Use the IT help desk SharePoint site template
Applies To
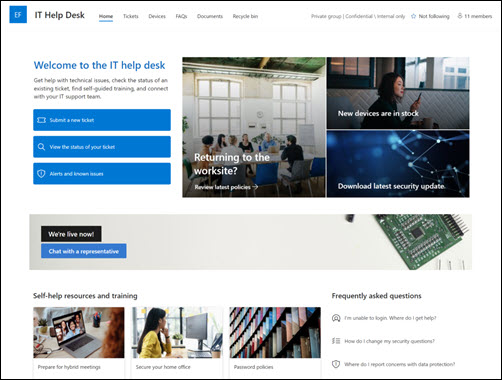
The IT help desk SharePoint site template is a team site designed to serve as an internal home page for your IT help desk. Manage technical requests, track devices, and share training materials with your organization.
In this article, you can learn how to use elements that are on the IT help desk SharePoint site template and how you can customize the site to make it your own.
Notes:
-
This template is a Microsoft 365 connected template. When a team is created using this template, the connected SharePoint template is applied to the site and the team.
-
SharePoint components such as pages, lists, and Power Platform integrations are automatically added and pinned as tabs to the General channel in the team. Users can edit these pages and lists right from within Teams.
Site features
-
Customizable site that comes with pre-populated images, web parts, and content to inspire site editors when making customizations to fit the needs of your organization.
-
Integrate your existing ticketing system or use a Microsoft List to track support requests and assets.
-
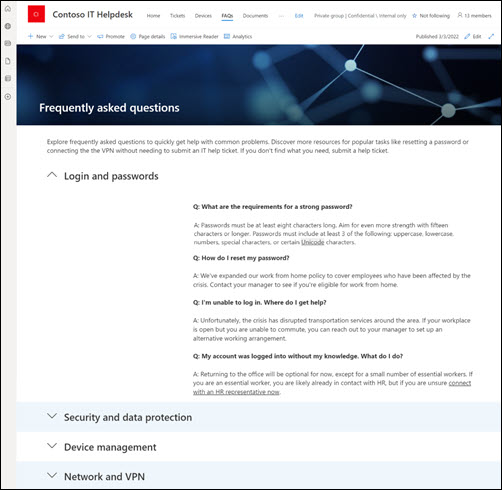
Use a ready-made FAQ page template to address commonly asked questions.
Notes:
-
Some functionality is introduced gradually to organizations that have opted into the Targeted release program. This means that you may not yet see this feature, or it may look different than what is described in the help articles.
-
When you apply a template to an existing site, your content will not automatically merge with the new template. Instead, existing content will be stored as a duplicate page in Site contents.
If creating your team site for the first time, you can select the IT help desk template during setup. Or, follow the instructions on how to add a site template to an existing SharePoint site.
Note: You must have site creation permissions to add this template to your site.
Explore pre-populated site content, web parts, and pages and decide what site customizations will be necessary to align with your organization's brand, voice, and overall business objective.
Pre-populated site, list, and news post template content:
-
Home page - A landing place for visitors to submit and view the status of support requests, review outage alerts, and access trainings and other resources.
-
Tickets - Keep track of progress on submitted support tickets. Customize this list template by editing list text fields.
-
Devices - Keep track of assigned devices and assets. Customize this list template by editing list text fields.
-
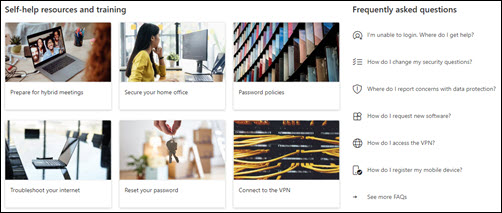
FAQs - Provide visitors a list of answers to frequently asked questions relating to topics like passwords, security, network and device management.
-
Documents - Easy access to shared documents.
-
Recycle Bin - Provides access to recently deleted content.
Once you've added the IT help desk site template, it's time to customize it and make it your own.
Note: To edit a SharePoint site you must be a site owner or site member.
|
 |
Customize your site's look, site navigation, web parts, and content to fit the needs of your viewers and of the organization. When making customizations, ensure the site is in edit mode by selecting Edit in the top right of the site. As you work, select Save and close to save your work as a draft, or Republish to make changes visible to viewers.
1. Use Text web parts to provide guidance to visitors
-
Begin by selecting the Text web part.
-
Edit your text directly in the web part. Find text and formatting options in the toolbar above the web part.
Learn more about the Text web part.
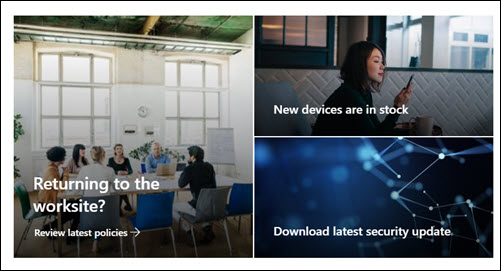
2. Use the Hero web part to highlight updates and important information
-
Begin by selecting the Hero web part and choose Edit properties (
-
Choose the Layoutoptions that best suit the organization's needs.
See different types of layouts and options for the Hero web part.
3. Use the Call to Action web part to highlight common resources
-
Select the Call to Action web part and select Edit properties (
-
Add a background image by selecting Change in the editing pane, selecting an image source, and then selecting Insert after choosing an image.
-
Update the Button label and Button link to the navigation destination.
-
Adjust the alignment of the button label and link.
-
Add alternative text under Accessibility.
Learn more about using the Call to Action web part.
4. Use the Quick links web part to provide easy access to tech support resources
-
Navigate to the Quick Links web part, select the link, then select Edit properties (
-
Edit the link, title, icon, and description if needed by selecting existing links and selecting Edit (
-
To add a link, select + Add links.
See different types of layouts and editing options for the Quick Links web part.
5. Use the Events web part to create a list of important events and dates
-
Select the Events web part and choose Edit properties (
-
Select the Source, Event list, Category, Date range, and the Layout for events to be displayed.
-
Select Enable audience targeting to highlight content to specific groups.
-
Enter the maximum number of items that should be listed in this web part.
Learn more about using the Events web part.
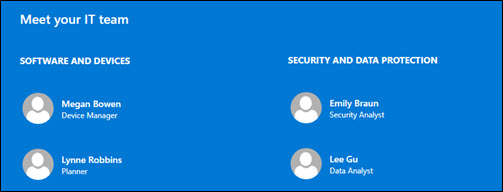
6. Use the People web part to showcase key contacts
-
Select the People web part choose Edit properties (
-
Choose a layout for the contact cards (larger cards provide more information).
-
Within the web part, enter a name or email address within the text field. Names will auto populate based on users within your organization.
-
To delete names from the web part, hover over the name and select X.
-
To reposition names within the web part, select and drag the reorder icon (
Learn more about the People web part.
Customize the following pages and lists within the site
-
Tickets - Keep track of progress on submitted support tickets. Customize this list by editing the list template.
-
Devices - Keep track of assigned devices and assets. Customize this list by editing the list template.
-
FAQs - Customize this page by editing the Textand Quick Links web parts.
Customize the look and site navigation
Before you share your site with others, put the finishing touches on your site by ensuring users can find the site, navigate through links and pages easily, and quickly access content on the site.
-
Edit document libraries by updating the folder names and uploading resources.
-
Edit and customize site navigation.
-
Change the look of your site by customizing the theme, logo, header layouts, and the look of your site.
-
Add or remove pages to this site or the site navigation to accommodate existing content.
-
Choose to associate this site with a hub site within your organization, or add this site to an existing hub site navigation if needed.
Share your site with others after you've customized your site, reviewed for accuracy, and published the final draft.
-
Share your site with others after you've customized your site, reviewed it, and published the final draft.
-
Select Settings and then Site Permissions.
-
Select Add members,select Add members to group and then Add members.
-
Type names in the Add members field to add members to the site. After entering a name, select the permission level under their name to grant access to team site content, shared resources like the team Outlook calendar and editing rights to the site.
Learn more about managing team site settings, site information and permissions.
After you create and launch your site, the next important phase is maintaining site content. Ensure you have a plan to keep content and web parts up to date.
Site maintenance best practices:
-
Plan for site maintenance - Establish a schedule to review the site content as often as needed to ensure content is still accurate and relevant.
-
Regularly post news - Distribute the latest announcements, information, and status across the organization. Learn how to add a News post on a team site or communication site, and show others who will be posting announcements how they can use SharePoint news.
-
Check links and web parts - Keep links and web parts updated to ensure you are leveraging the full value of your site.
-
Use analytics to improve engagement - View site usage by using the built-in usage data reportto get information on popular content, site visits, and more.
-
Periodically review your site settings - Once you've created a site in SharePoint, you can make changes to the settings, site information, and permissions for the site.
More customization resources
Learn more about planning, building, and maintaining SharePoint sites.
See more SharePoint site templates.

