
Import or export contacts in Outlook
Outlook has an Import/Export wizard that makes it easy to import contacts from a CSV file.
Select a tab option below for the version of Outlook you're using. What version of Outlook do I have?
Note: If the steps under this New Outlook tab don't work, you may not be using new Outlook for Windows yet. Select the Classic Outlook tab and follow those steps instead.
In this section:
Import contacts to new Outlook using a .csv file
Use a comma separated values file (CSV) to import your contacts into your Outlook account.
Tip: For best results, make sure that the CSV file has UTF-8 encoding. This encoding works for all languages and alphabets.
-
From the navigation bar, select

Tip: If People aren't already in the left navigation bar, select More apps, then People to add it. After adding People, right-click and select Pin to keep it in the left navigation bar.
-
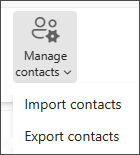
From the ribbon, select Manage contacts > Import contacts.
-
Select Browse, choose your CSV file, and select Open.
-
Select Import.
Note: If the file doesn't have UTF-8 encoding, the import tool may not recognize and display all text correctly. The import tool will then show you some example contacts from your file, and you can check that the text is readable and correct. If the text is not displayed correctly, select Cancel. You will need a file in UTF-8 encoding to continue. Convert your CSV file to use UTF-8 encoding and restart the import. To learn more about UTF-8 encoding, see Why should I care about UTF-8 encoding?
Export contacts to a .csv file in new Outlook
When you export your contacts from new Outlook, a copy of your contacts is saved to a CSV file. You can then use this file to import your contacts to another email account.
-
On the side panel select
-
From the ribbon, select Manage contacts > Export contacts.
-
In the dropdown under Contacts from this folder, choose an option then select Export.
-
The exported .CSV file is saved to your Downloads folder.
Typically, you can import contacts without worrying about the underlying details of how the text is stored in the CSV file. However, if the contact information includes characters not found in the English alphabet, such as Greek, Cyrillic, Arabic, or Japanese characters, this can cause problems when importing contacts. Therefore, you should save the contacts file with UTF-8 encoding if you have that option during export.
If you can't export your contacts using UTF-8 directly, you can convert the exported CSV file using Excel or third-party apps. How to do this will be different between apps and app versions.
How to convert your CSV file to UTF-8 using Microsoft Excel 2016:
-
In Excel, create a new blank document (workbook).
-
From the Data menu, select From Text/CSV. Browse to your exported CSV file (you may have to select to display Text Files (....csv) to see it). Select Import.
-
In the dialog box that appears, under File Origin, choose the encoding that makes the characters in the text appear correctly, for example, Cyrillic Windows 1251, and then select Load.
-
Check that characters are displayed correctly in Excel.
-
Select File >Save As. Enter a name for your file, and select CSV UTF-8 (Comma delimited) (*.csv) as your file type.
-
Select Save.
In this section:
Import contacts to classic Outlook using a .csv file
-
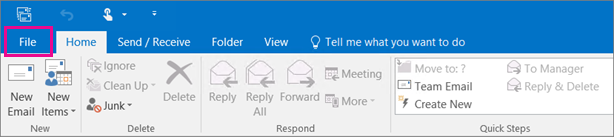
At the top of your Outlook ribbon, choose File.
If your ribbon doesn't have a File option in the top left corner, you're using an older Outlook version. See What version of Outlook do I have? to get to the import instructions for your version of Outlook.
-
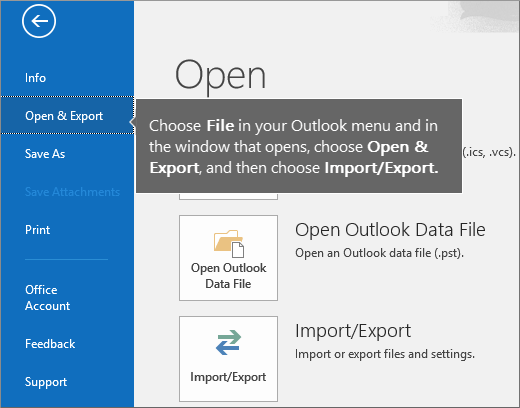
Choose Open & Export > Import/Export. This starts the wizard!
-
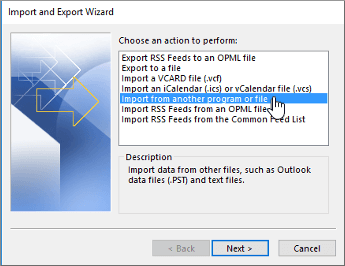
Choose Import from another program or file, and then choose Next.
-
Choose Comma Separated Values, and then choose Next.
-
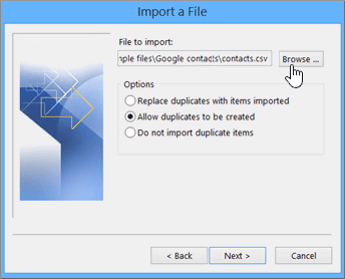
In the Import a File box, browse to your contacts file, and then double-click to select it.
-
Choose one of the following to specify how you want Outlook to handle duplicate contacts:
-
Replace duplicates with items imported If a contact is already in Outlook and your contacts file, Outlook discards the info it has for that contact and uses the info from your contacts file. You should choose this option if the contact info in your contacts file is more complete or more current than the contact info in Outlook.
-
Allow duplicates to be created If a contact is in Outlook and your contacts file, Outlook creates duplicate contacts, one with the original Outlook info and one with the info imported from your contacts file. You can combine info for those people later to eliminate duplicate contacts. This is the default option.
-
Do not import duplicate items If a contact is in Outlook and your contacts file, Outlook keeps the info it has for that contact and discards the info from your contacts file. You should choose this option if the contact info in Outlook is more complete or more current than the info in your contacts file.
-
-
Click Next.
-
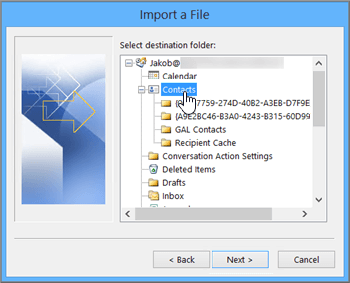
In the Select a destination folder box, scroll to the top if needed and select the Contacts folder > Next. If you have multiple email accounts, choose the Contacts folder that's under the email account you want to be associated with the contacts.
-
Choose Finish.
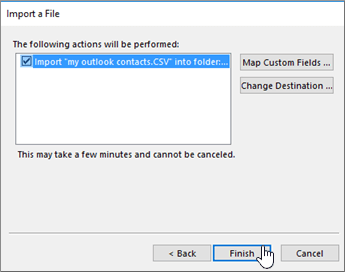
Outlook begins importing your contacts immediately. You'll know it's finished when the Import Progress box closes.
-
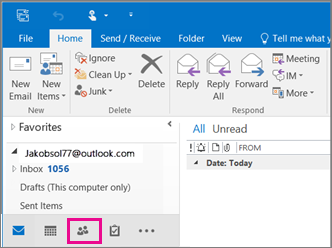
To see your contacts, at the bottom of Outlook, choose the People icon.
Didn't work?
Export contacts to a file in classic Outlook
-
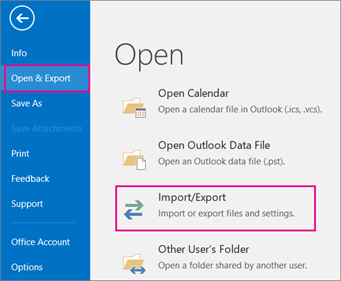
In Outlook on a PC, choose File.
If your ribbon doesn't have a File option in the top left corner, you're not using Outlook on a PC. See What version of Outlook do I have? to get to the export instructions for your version of Outlook.
-
Choose Open & Export > Import/Export.
-
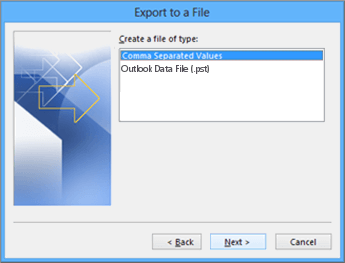
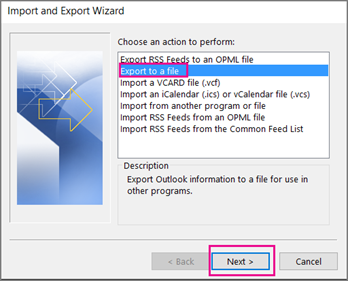
Choose Export to a file.
-
Choose Comma Separated Values.
-
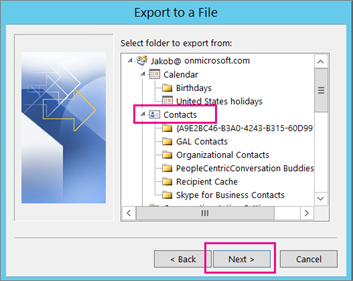
THIS STEP IS KEY especially if you're borrowing a friend's computer: In the Select folder to export from box, scroll to the top if needed and select the Contacts folder that's under your account. Choose Next.
-
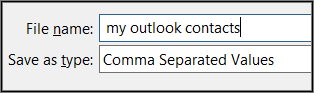
Choose Browse, name your file, and choose OK.
-
Confirm where your new contacts file will be saved on your computer, and choose Next.
-
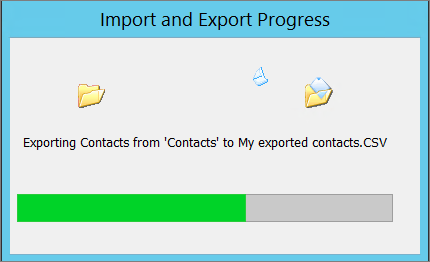
Choose Finish to start exporting your contacts immediately. Outlook doesn't display any message when the export process is complete but the Import and Export Progress box goes away.
-
Locate the new .csv file on your computer and open it with Excel to verify your contacts are there. You'll likely have a lot of empty cells. That's normal.

-
Generally we recommend closing the file without saving any changes; otherwise the file might get messed up and you won't be able to use it for importing. If that happens you can always run the export process again and create a new file.
You can use Excel to update the information in your .csv file. For tips about working with a list of contacts in Excel, see Create or edit .csv files.
-
If you borrowed a friend's computer with Outlook on it, you can now remove your account from that person's version of Outlook. Here's how:
-
In Outlook on the desktop, choose File > Account Settings > Account Settings.
-
Choose the account you want to delete, and then choose Remove.
-
Choose Close.
-
-
Now that your contacts are copied to a .csv file, you can import them to another computer with Outlook for Windows on it, or import them to another email service.
Import contacts to Outlook on the web or Outlook.com using a .csv file
Use a comma separated values file (CSV) to import your contacts into your Outlook account.
Tip: For best results, make sure that the CSV file has UTF-8 encoding. This encoding works for all languages and alphabets.
-
From the navigation bar, select
-
From the ribbon, select Manage contacts > Import contacts.
-
Select Browse, choose your CSV file, and select Open.
-
Select Import.
Note: If the file doesn't have UTF-8 encoding, the import tool may not recognize and display all text correctly. The import tool will then show you some example contacts from your file, and you can check that the text is readable and correct. If the text is not displayed correctly, select Cancel. You will need a file in UTF-8 encoding to continue. Convert your CSV file to use UTF-8 encoding and restart the import. To learn more about UTF-8 encoding, see Why should I care about UTF-8 encoding?
Export contacts to a .csv file in Outlook on the web or Outlook.com
-
On the side panel, select
-
From the ribbon, select Manage contacts > Export contacts.
-
From the dropdown, select All contacts or another option.
-
Select Export.
Typically, you can import contacts without worrying about the underlying details of how the text is stored in the CSV file. However, if the contact information includes characters not found in the English alphabet, such as Greek, Cyrillic, Arabic, or Japanese characters, this can cause problems when importing contacts. Therefore, you should save the contacts file with UTF-8 encoding if you have that option during export.
If you can't export your contacts using UTF-8 directly, you can convert the exported CSV file using Excel or third-party apps. How to do this will be different between apps and app versions.
How to convert your CSV file to UTF-8 using Microsoft Excel 2016:
-
In Excel, create a new blank document (workbook).
-
From the Data menu, select From Text/CSV. Browse to your exported CSV file (you may have to select to display Text Files (....csv) to see it). Select Import.
-
In the dialog box that appears, under File Origin, choose the encoding that makes the characters in the text appear correctly, for example, Cyrillic Windows 1251, and then select Load.
-
Check that characters are displayed correctly in Excel.
-
Select File >Save As. Enter a name for your file, and select CSV UTF-8 (Comma delimited) (*.csv) as your file type.
-
Select Save.
Related articles
Import email messages, contacts, and other items into Outlook for Mac


Need more help?
Want more options?
Explore subscription benefits, browse training courses, learn how to secure your device, and more.


Communities help you ask and answer questions, give feedback, and hear from experts with rich knowledge.


Find solutions to common problems or get help from a support agent.
