
Symptoms
In Microsoft Outlook, under Junk E-mail Options, the Junk E-mail protection level may change unexpectedly to Low from an earlier setting of either High or No Automatic Filtering, as shown in the following screen shot: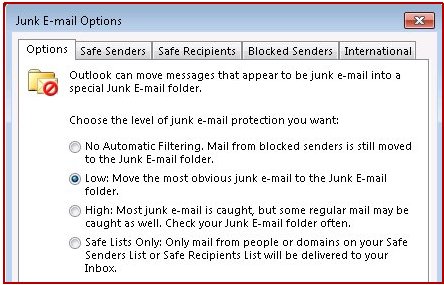
Cause
This behavior may occur if the following Exchange PowerShell command is run against the affected user mailbox:
Set-MailboxJunkEmailConfiguration -identity <user_alias>-Enabled <value>Note The <user_alias> placeholder represents the alias of the affected user, and <value> is either $true or $false.
The Outlook Junk E-mail protection setting changes to Low from either High or No Automatic Filtering, regardless of whether -Enabled is set to $true or $false.
Resolution
This issue is corrected in Cumulative Update 5 and later cumulative updates for Exchange Server 2013. To obtain the latest update, go to Updates for Exchange 2013.
After you apply the update, the issue no longer occurs when the Set-MailboxJunkEmailConfiguration -identity -Enabled $true/$false PowerShell command is run for mailboxes that had previously been accessed by Outlook.
For mailboxes that had not previously been accessed by Outlook, or for mailboxes whose Junk E-mail protection levels were unexpectedly changed by the Set-MailboxJunkEmailConfiguration cmdlet, follow the steps in the 'Workaround' section to reset the Outlook Junk E-mail protection setting.
Workaround
To work around this issue, use one of the following methods.
Method 1: Manually set the Outlook Junk E-mail Protection option to the level that you prefer
-
On the Home tab in Outlook, click Junk, and then click Junk E-mail Options.
-
On the Options tab in the Junk E-mail Options dialog box, select the setting that you want under Choose the level of junk e-mail protection you want.
-
Click OK.
Method 2: Use Group Policy to set the Outlook Junk E-mail Protection setting to the level that you prefer
Outlook 2013 and later versions
The default, Group Policy template files for Outlook contain the policy setting that controls this functionality. These are Outlk16.admx and Outlk16.adml for Outlook 2016 and Outlk15.admx and Outlk15.adml for Outlook 2013.
To deploy this setting by using the Outlook Group Policy template, follow these steps:
-
Download the appropriate file for your version of Office from the Microsoft Download Center:
Office 2016: http://www.microsoft.com/en-us/download/details.aspx?id=49030
Office 2013: http://www.microsoft.com/download/details.aspx?id=35554 -
Extract the admintemplates_32bit.exe or admintemplates_64bit.exe file to a folder on your disk.
-
Copy the appropriate file to your version of Outlook to the C:\Windows\PolicyDefinitions folder:
Office 2016: Outlk16.admx
Office 2013: Outlk15.admx -
Copy the appropriate file to your version of Outlook to the C:\Windows\PolicyDefinitions\xx-xx directory, where xx-xx is a Language Culture name. For example, for English (US), the Language Culture name is en-us. For more information about Language Culture names, see Table of Language Culture Names, Codes, and ISO Values [C++].
Office 2016: Outlk16.adml
Office 2013: Outlk15.adml
Note The .adml file must be copied from the correct language folder. -
Start the Group Policy Object Editor or the Group Policy Management Console.
Note Because you may be applying the policy setting to an organizational unit and not to the whole domain, the steps may vary in this aspect of applying a policy setting. Therefore, check your Windows documentation for more information. -
In the Group Policy Object Editor or the Group Policy Management Console, under User Configuration, expand Administrative Templates, expand your version of Microsoft Outlook, expand Outlook Options, expand Preferences, and then click the Junk E-mail node.
-
Under Junk E-mail, double-click Junk E-mail protection level.
-
Click Enabled, and then select the level that you prefer under Options. Click OK.
At this point, the policy setting is applied on your Outlook client computers when the Group Policy setting update is replicated. To test this change, type the following command at a command prompt, and then press Enter:
gpupdate /force
Outlook 2010
-
Download the following file from the Microsoft Download Center:
https://www.microsoft.com/en-us/download/details.aspx?id=18968 -
Add the Outlk14.adm file to the Group Policy Object Editor or to the Group Policy Management Console.
Note The steps to add the .adm file to the Group Policy Object Editor or the Group Policy Management Console vary, depending on the version of Windows that you're running. Also, because you may be applying the policy setting to an organizational unit and not to the whole domain, the steps may also vary in this aspect of applying a policy setting. Therefore, check your Windows documentation for more information.
Go to step 3 after you add the .adm template to the Group Policy Object Editor or to the Group Policy Management Console. -
In the Group Policy Object Editor or the Group Policy Management Console, under User Configuration, expand Classic Administrative Templates (ADM), expand Microsoft Outlook 2010, expand Preferences, and then click the Junk E-mail node.
-
Under Junk E-mail, double-click Junk E-mail protection level.
-
Click Enabled, and then select the level that you prefer under Options. Click OK.
At this point, the policy setting is applied on your Outlook 2010 client workstations when the Group Policy setting update is replicated. To test this change, at the command prompt, type the following command, and then press Enter:
gpupdate /force
More Information
For more information about the Set-MailboxJunkEmailConfiguration cmdlet, see Set-MailboxJunkEmailConfiguration.


