In Microsoft Outlook, you can specify that for all messages that you send, an automatic carbon copy (Cc) is sent to other people or distribution lists.
One scenario in which this rule is useful is when all members of a team are responsible for responding to incoming email messages, such as a support center. When one team member replies to a message, the rest of the team automatically receives a copy of the reply, keeping everyone informed of outgoing communications.
You will first need to create a rule to automatically send a carbon copy (Cc) of all email messages that you send.
This particular rule is called a client-side rule. A client-side rule runs only on the computer on which it is created, and only runs if Outlook is running. If you were to send an email message by using your email account on a different computer, the rule would not run from that computer until it was created on that computer. You must create this same rule on each computer from which you intend to use it.
Create the rule
-
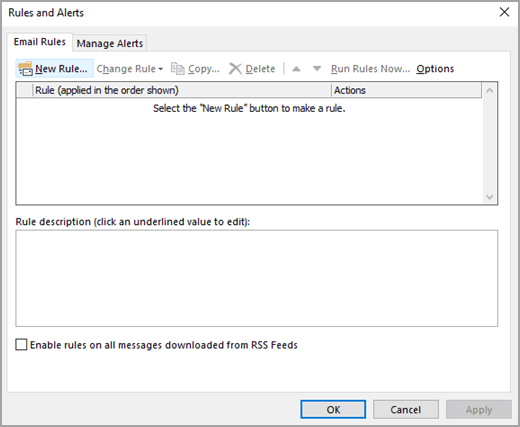
In Mail, on the Home tab, in the Move group, click Rules > Manage Rules & Alerts.
The Rules and Alerts dialog box appears.
-
On the E-mail Rules tab, click New Rule.
-
In the Rules Wizard, under Start from a blank rule, click Apply rule on messages I send.
-
Click Next, and then click Next again.
-
A confirmation message will appear, notifying you that this rule will apply to every message that you send. Click Yes.
-
Under Step 1: Select action(s), select the Cc the message to people or public group check box.
-
Under Step 2: Edit the rule description (click an underlined value), click people or public group.
-
In the Rule Address dialog box, click a name or group, and then click To. Repeat this step until all names or groups that you want to add are included in the To box.
-
Click OK.
-
In the Rules Wizard, click Next and then click Next again.
-
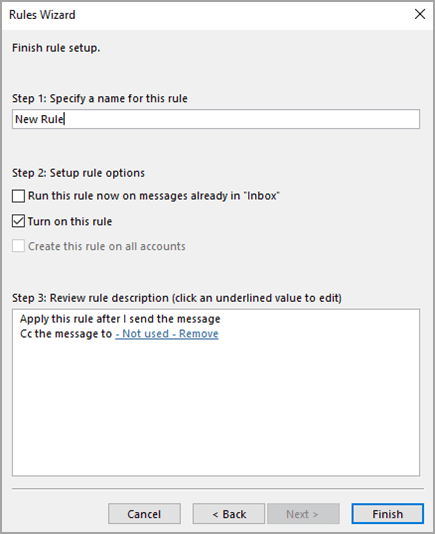
Under Step 1: Specify a name for this rule, enter a name that you will recognize for this rule.
-
In Step 2: Set up rule options, select the Turn on this rule check box.
-
Click Finish.
-
You will see a message stating that the rule will run only when you check your email in Outlook. Click OK.
Now every time that you send a message, whether it is a new message, a reply, or a message that you are forwarding, the people or groups that you specified in the rule will automatically be added as Cc recipients. You will not see the names of the people or groups on the Cc line as you compose the message, but any recipient of the message will see these names.
Turn off the rule
To avoid automatically sending a carbon copy, you must first turn off the rule.
-
In Mail, on the Home tab, click Rules > Manage Rules & Alerts.
-
On the E-mail Rules tab, under Rule, clear the check box for the rule that you created earlier.
-
Click OK.
You can now send a message without the automatic Cc rule sending a copy to other people or distribution lists. The rule will remain off until you return to the Rules and Alerts dialog box and enable the rule again.
Tip: For a fast way to turn off this rule on a per-message basis, see the next section, "Use a category to turn off the automatic Cc on a per-message basis."
Use a category to turn off the automatic Cc on a per-message basis
If you want the flexibility to turn your new automatic Cc rule off on a single-message basis without going to the Rules and Alerts dialog box, you can use the category feature in Outlook, together with the rule.
Edit the rule you created earlier so that if you add a specified category to the message, the Cc rule does not send a copy to anyone automatically.
-
In Mail, on the Home tab, click Rules > Manage Rules & Alerts.
-
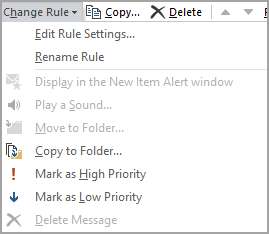
On the E-mail Rules tab, click the rule that you created earlier, and then click Change Rule.
-
Click Edit Rule Settings.
-
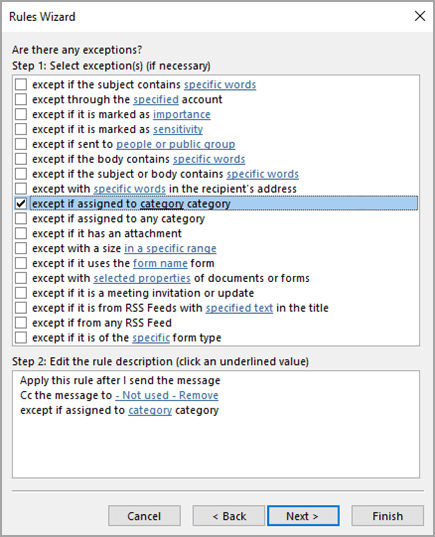
Click Next on the first two steps of the Rules Wizard until you see Are there any exceptions?
-
Under Step 1: Select exception(s) (if necessary), select the except if assigned to category category check box.
-
Under Step 2: Edit the rule description (click an underlined value), click category.
-
In the Color Categories dialog box, click New.
-
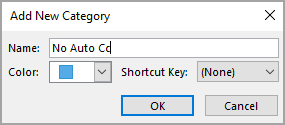
In the Add New Category dialog box, in the Name box, type No Auto Cc.
You can also assign a keyboard shortcut that can be used to quickly apply this category to a message. To do this, click an option in the Shortcut Key list.
-
Click OK to close the Add New Category and Color Categories dialog boxes.
-
Click Finish.
-
You will see a message stating that the rule is a client-only rule. Click OK.
When you want to send a message and turn off the automatic Cc rule for that one message, apply the category to the message.
-
When composing a new message, or replying to or forwarding a message, on the Options tab, click More Options.
-
In the Properties dialog box, click Categories, and then click No Auto Cc.
Tip: Use the category keyboard shortcut if you specified one when you created the special category.
When you send the message, the Auto Cc rule will not automatically send a copy to anyone.


