Blur an entire picture
Word and PowerPoint allow you to blur an entire image by using the blur artistic effect.
-
Use Insert > Pictures to place the photo in your document.
-
Select the photo on the canvas.
-
On the Picture Format (or Format) tab of the toolbar ribbon, select Artistic Effects.
-
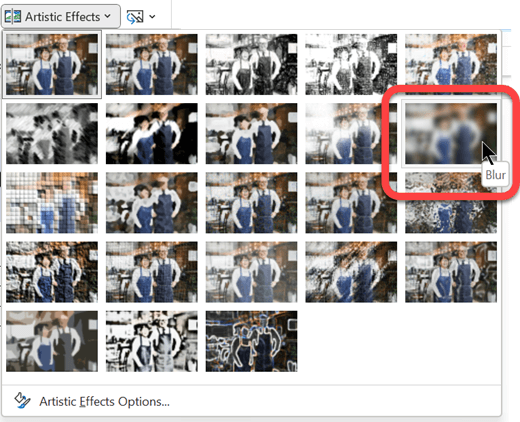
In the gallery of picture options that opens, select the Blur option:
Note: We're sorry, but artistic effects like "Blur" aren't available in Word for the web or PowerPoint for the web. This feature is only available in the desktop apps.
Change the degree of blurriness
After performing the steps above. you can adjust the degree of blurriness, if necessary.
-
Select the picture on the canvas again.
-
On the Picture Format (or Format) tab of the toolbar ribbon, select Artistic Effects.
-
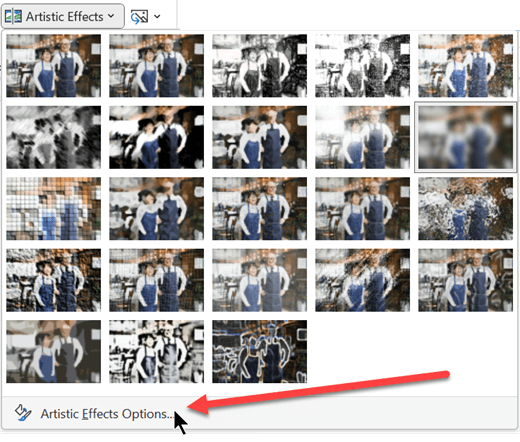
At the bottom of the gallery of options, select Artistic Effects Options.
-
In the Format Picture pane on the side, under Artistic Effects, adjust the Radius value to a number between 0 and 100. The higher the number, the more blurry the image becomes.


