Download this template Or in Word, go to File > New, and search for booklet page numbering.
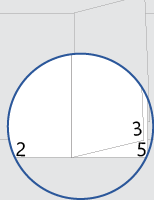
This template gives you a document that's laid out so that the page number is on the outside margin of each page when the document is printed double-sided. The cover page has no page number on front or back.
When you print, remember to print on both sides, flipped on the short edge.
Replace the text in the document with your own, and follow these tips for customizing the page numbers or footer:
-
Go to Layout > Page Setup > Margins > Custom Margins.
-
On the Margins tab, under Pages, in the Multiple pages dropdown box, select Book fold, and then select OK.
Word shows you that each half of a landscape-oriented page will be one page of the booklet.
-
Go to File > Print and set Print on Both Sides to Flip pages on short edge.
-
Fold all the printed pages in half and use a long-reach stapler to staple along the fold.
-
On an odd-numbered page, double-click the page number to edit the footer, and then press Ctrl+E.
-
Repeat the process on an even-numbered page: Double-click the page number to edit the footer, and then press Ctrl+E.
-
On an odd-numbered page, double-click the page number to edit the footer, and then enter the text you want, such as p. or Page.
-
Repeat the process on an even-numbered page: Double-click the page number to edit the footer, and then enter the text you want.
Do these steps on an odd-numbered page, and then repeat them on an even-numbered page.
-
On the Insert tab, in the Header & Footer group, select Footer > Blank (Three Columns).
-
Replace the placeholders with your content. To insert content that comes from the document (like author and file name), select Header & Footer > Insert > Document Info.
To add the current date, pick Date & Time in that same group (Header & Footer > Insert).
Tip: If you want the printed document to always show the date it's printed, select Update automatically.
-
Use one of the placeholders for the page number. Select Header & Footer tab > Header & Footer group > Page Number > Current Position, and then select Plain Number.
-
If you don't use all the placeholders, delete the ones you don't use.
-
Go to Layout > Margins > Custom Margins.
-
Under Pages, in the Multiple Pages box, choose Book fold, and click OK.
Word shows you that each half of a landscape-oriented page will be one page of the booklet.
-
Go to File > Print, and set Two-Sided to Short-Edge binding.
-
Fold all the printed pages in half, and use a long-reach stapler to staple along the fold.
-
On an odd-numbered page, double-click the page number to edit the footer, and then go to Page Number on the Header & Footer tab, and in the Page Numbers dialog box, choose Center as the alignment.
-
Repeat the process on an even-numbered page: Double-click the page number to edit the footer, and then choose Center for the alignment in the Page Numbers dialog box.
-
On an odd-numbered page, double-click the page number to edit the footer, and then enter the text you want, such as p. or Page.
-
Repeat the process on an even-numbered page: Double-click the page number to edit the footer, and then enter the text you want.
Do these steps on an odd-numbered page, and then repeat them on an even-numbered page.
-
On the Insert tab, go to Footer > Blank (Three Columns).
-
Replace the placeholders with your content. To insert content that comes from the document (like author and file name), go to Field on the Header & Footer Tools tab.
In the Field dialog box, filter the list of fields to choose from by choosing Document Information in the list of categories; then double-click the field you want.
-
To add the current date, pick Date & Time on that same tab.
Tip: If you want the printed document to always show the date it's printed, select Update Automatically.
-
Position the page number by deleting one of placeholders and then going to Page Number on the Header & Footer tab. In the Page Numbers dialog box, choose the alignment that corresponds to the position of the placeholder you deleted (Right, Left, or Center).
-
If you don't use all the placeholders, delete the ones you don't use.


