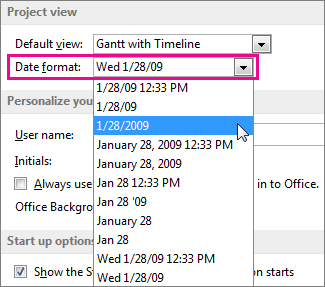
Project has 21 different date formats for wherever they show up in your project (columns, calendars, timelines, Gantt bars, reports). You can change the date format on the Project Options dialog box:
-
Choose File > Options.
-
Select General.
-
Under Project view, pick an option from the Date format list.
Change the date format for a specific table
-
On the View tab, choose Tables > More Tables.
-
In the Tables list, select Task or Resource, select the table for which you want to format the date, and then click Edit.
-
In the Date format list, select the date format you want to use, choose OK, and then choose Apply.
Use a date format from a different country
All the default date format options follow the same pattern — the way people usually write dates in your country. If you want to switch to a different regional or national date format (European or a specific European country, for example), you need to change your region in Control Panel.
-
In Control Panel, choose Clock, Language, and Region > Change the date, time, or number format.
-
In the Region and Language dialog box, select the Format tab.
-
Change the format:
-
Pick new formats from the Short date and Long date lists.
OR
-
Pick a region from the Format list. Don’t forget that this also changes the way Windows displays time.
-
-
Open Project and pick a date format in the Project Options dialog box (see above).


