|
Note This feature is in General Availability (GA) in the Microsoft 365 Monthly Release Channel as of May 2022. If you are on the Microsoft Semi-annual Enterprise Channel, it is available in December 2022. For more information on how to participate, see aka.ms/AccessAndPowerPlatform. |
If you want to migrate an Access Multivalued field to a Dataverse Choices field, here's how to create it in Access so the operation is successful.
-
In the navigation pane, right-click the Table name, and then select Design View.
-
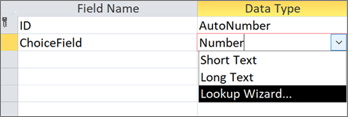
Under Field Name, in the first available blank box, enter a name, such as "ChoiceField".
-
Under Data Type, on the right of the field name you just entered, select Number from the drop-down list.
-
Select the same drop-down list, and then select Lookup Wizard.
-
On the first page of the Lookup Wizard, select I will type in the values that I want, and then select Next.
-
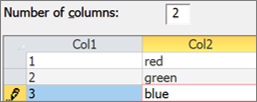
On the second page of the Lookup Wizard, in the Number of columns box, enter 2.
-
In the boxes under Col1 and Col2, enter the following values:
-
Between the Col1 and Col2 headers, select the separator
-
To finish the Lookup Wizard, select Next > Next > Finish.
-
Right-click the table name header, and then select Save.
-
Right-click the table name header, and then select Datasheet View.
-
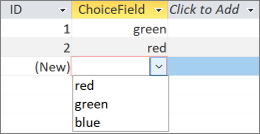
Create a few records to confirm the ChoiceField works as expected:
-
Right-click the table name header, select Close, and then confirm the operation.
-
In the navigation pane, right-click the table name, and then select Export > Dataverse.
-
Follow the steps to migrate the table to Dataverse. Make sure you select the option Open the Dataverse table URL when finished. For more information, see Migrate Access data to Dataverse.
-
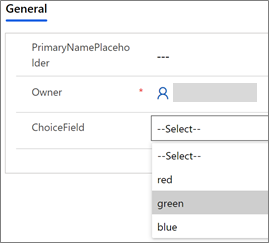
After successful completion of the migration, Dataverse opens the table. On the top right, select Active <Table Name> > All Columns.
-
Locate the ChoiceField in the list of columns.
-
In Access, make some changes to the data and then select Home > Refresh All.
-
Switch back to the Dataverse view in step 17, and then select Refresh Data to see the updated data on the page.


