Tip: Learn more about Microsoft Forms or get started right away and create a survey, quiz, or poll. Want more advanced branding, question types, and data analysis? Try Dynamics 365 Customer Voice.
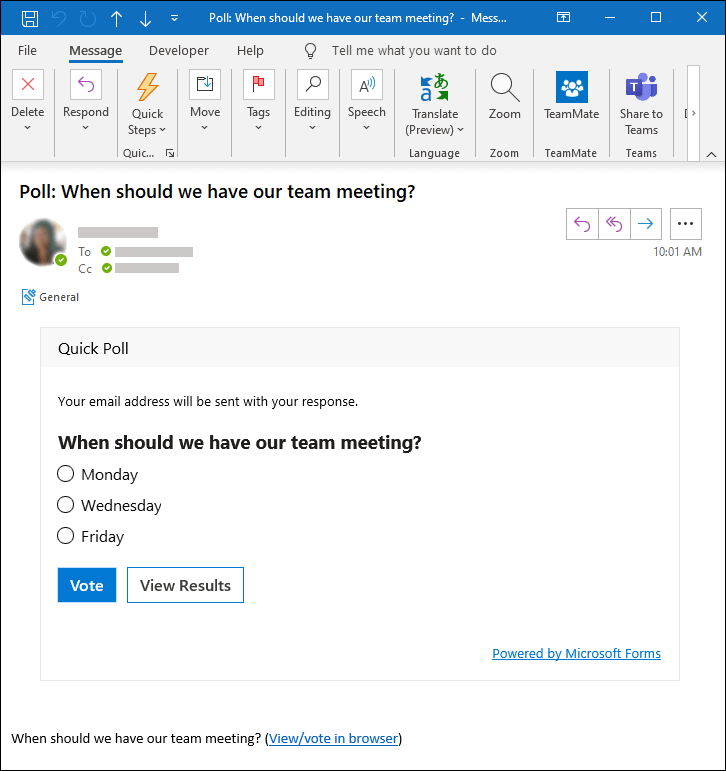
You can create an instant, real time poll in seconds within an email message. In the body of your Outlook email, add questions and options for single or multiple answers. Once you send the message, recipients vote directly in email or click on a handy included link and vote in a browser window. You can then quickly check poll results in the voting card.
Note: In order to create a poll in Outlook, your administrator must go to the Microsoft 365 admin center and check the Send a link to the form and collect responses option under External sharing. Administrators can learn more here.
With what versions of Outlook can I create a poll?
You can use Poll with the following versions of Outlook.
Create a poll
-
In a new email message, go to the Insert tab, and then click Poll.
Note: You can also find the poll on the Options tab > Use Voting Buttons > Poll.
-
The Poll pane opens and is ready for you to type your first question and two options.
Note: If you're already signed in with your work or school account and prompted to sign in again, there may be a setting your admin needs to address to eliminate this extra sign in step for you. Contact your admin for more information.
-
To add additional options, click + Add option.
-
When you're done adding options, you can decide if you want responders to only select a single answer or multiple answers. If you want to allow multiple answers, toggle the Multiple answers button to the right so that it turns green.
You'll see a link to your poll in the body of the email and your name pre-populated in the CC line. You're now ready to send your poll in email.
Note: If you encrypt an Outlook message that contains voting buttons, message recipients won't be able to see them. That feature isn't supported at this time.
Create a poll
-
In a new email message, select More apps > Poll from the Message or Insert tabs.
-
The Poll pane opens and is ready for you to type your first question and two options.
-
To add additional options, click + Add option.
-
When you're done adding options, you can decide if you want responders to only select a single answer or multiple answers. If you want to allow multiple answers, toggle the Multiple answers button to the right so that it turns green.
You'll see a link to your poll in the body of the email and your name pre-populated in the CC line. You're now ready to send your poll in email.
How voting works
Recipients will see the poll in the body of their email (also called an "actionable message") or get a link in email that will direct them to vote in a browser.
Learn more about what versions of Outlook support actionable messages.
Why can't my recipients see the poll in their email message?
There are a few reasons why recipients may not see the poll in their email message and, instead, receive a link to the poll, which will direct them to vote in a browser.
-
Your poll may be too lengthy (e.g. title is too long or there are too many options).
-
You're signed in with your Microsoft work or school account and sent your poll to people outside of your organization.
Check your poll results
You can see aggregated results in the voting card that is in the body of the email. Click Refresh to see the most updated results or click View in Forms to see detailed responses on forms.office.com. Similarly, you can click on the poll link in the body of the email to track more detailed results on forms.office.com.
Feedback for Microsoft Forms
We want to hear from you! To send feedback about Microsoft Forms, go to the upper right corner of your form and select More form settings
See Also
Create a poll in Outlook for Mac


