Use a SmartArt graphic to create a timeline showing target dates for an assignment or project.

Create a timeline
On the Insert tab, click SmartArt.

In the Choose a SmartArt Graphic gallery, click Process, and then double-click a timeline layout.
Tip
There are two timeline SmartArt graphics: Basic timeline and Circle Accent Timeline, but you can also use almost any process-related SmartArt graphic.

Click [Text], and then type or paste your text in the SmartArt graphic.
Note
You can also open the Text Pane and type your text there. If you do not see the Text Pane, on the SmartArt Tools Design tab, click Text Pane.
Add more dates to your timeline
Click a shape in the timeline.
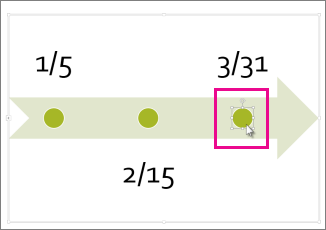
On the SmartArt Design tab, do one of the following:
- To add an earlier date, click Add Shape, and then click Add Shape Before.
- To add a later date, click Add Shape, and then click Add Shape After.

In the new date box, type the date that you want.
Move a date in your timeline
On the timeline, click the date you want to move.
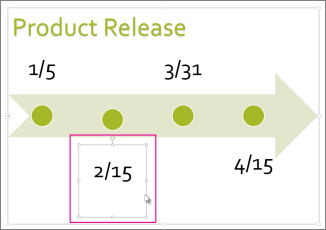
On the SmartArt Design tab, do one of the following:
- To move a date sooner than the selected date, click Move Up.
- To move a date later than the selected date, click Move Down.

Change to a different timeline layout
Click the SmartArt graphic timeline.
On the SmartArt Design tab, in the Layouts group, click More
 .
.

Note
To view only the timeline and process-related layouts, at the bottom of the layouts list, click More Layouts, and then click Process.
Pick a timeline or process-related SmartArt graphic, like the following:
- To show progression in a timeline, select Accent Process.

- To create a timeline with pictures or photos, click Continuous Picture List. The circular shapes are designed to contain pictures.

Change the colors of your timeline
Click the SmartArt graphic timeline.
On the SmartArt Design tab, select Change Colors.

Note
If you don't see the SmartArt Tools Design tab, make sure you've selected the timeline.
Click the color combination that you want.
Tip
Place your pointer over any combination to see a preview of how the colors look in your timeline.
Apply a SmartArt style
A SmartArt style applies a combination of effects, such as line style, bevel, or 3-D perspective, in one click, to give your timeline a professionally polished look.
Click the timeline.
On the SmartArt Design tab, click the style you want.

Tip
For more styles, click More
, in the lower right corner of the Styles box.
See Also
Create a timeline
On the Insert tab, click SmartArt.

In the Choose a SmartArt Graphic gallery, click Process, and then double-click a timeline layout.
Tip
There are two timeline SmartArt graphics: Basic timeline and Circle Accent Timeline, but you can also use almost any process-related SmartArt graphic.

Click [Text], and then type or paste your text in the SmartArt graphic.
Note
You can also open the Text Pane and type your text there. If you do not see the Text Pane, on the SmartArt Tools Design tab, click Text Pane.
Add more dates to your timeline
Click a shape in the timeline.
On the SmartArt Tools Design tab, do one of the following:
- To add an earlier date, click Add Shape, and then click Add Shape Before.
- To add a later date, click Add Shape, and then click Add Shape After.

In the new date box, type the date that you want.
Move a date in your timeline
On the timeline, click the date you want to move.
On the SmartArt Tools Design tab, do one of the following:
- To move a date sooner than the selected date, click Move Up.
- To move a date later than the selected date, click Move Down.

Change to a different timeline layout
Click the SmartArt graphic timeline.
On the SmartArt Tools Design tab, in the Layouts group, click More
.

Note
To view only the timeline and process-related layouts, at the bottom of the layouts list, click More Layouts, and then click Process.
Pick a timeline or process-related SmartArt graphic, like the following:
- To show progression in a timeline, click Accent Process.
- To create a timeline with pictures or photos, click Continuous Picture List. The circular shapes are designed to contain pictures.
Change the colors of your timeline
Click the SmartArt graphic timeline.
On the SmartArt Tools Design tab, click Change Colors.

Note
If you don't see the SmartArt Tools Design tab, make sure you've selected the timeline.
Click the color combination that you want.
Tip
Place your pointer over any combination to see a preview of how the colors look in your timeline.
Apply a SmartArt style
A SmartArt style applies a combination of effects, such as line style, bevel, or 3-D perspective, in one click, to give your timeline a professionally polished look.
Click the timeline.
On the SmartArt Tools Design tab, click the style you want.

Tip
For more styles, click More
, in the lower right corner of the Styles box.
See Also
Create a timeline
- Open PowerPoint on the web and start a new presentation or resume a presentation.
- On the Insert tab, click Smart Art.

- Pick a timeline layout from the gallery that appears, such as this Basic Timeline in the List section.

On the slide, a text editor opens next to the graphic so you can easily add words to the graphic.
- In the text editor, enter the dates and descriptions, and then press Enter.

- Optionally, you can make a sub-item in the bulleted list by clicking the bullet with the text you want to use for a sub-item, and on the Smart Art tab, clicking Demote.

Change the color or style of a timeline
You can change the color or style of the timeline graphic. You can also choose a different graphic layout entirely.
- Select the timeline.
- Select the SmartArt tab of the Ribbon, and then select either Change Colors or Styles to see a menu of available options for the timeline graphic. Click the style or color you want to select it.

- You can also try changing the layout by opening the layout gallery to the left of Change Colors. Some of the options in the List and Process sections of the gallery are suitable for timelines.
Resize the timeline
You can change the size of the graphic so it fits better on your slide.
- Select the timeline.
- Point at one of the corner sizing handles until you see the two-headed arrow, and then click and drag to resize the timeline.

See Also
Create a SmartArt graphic
Get Microsoft timeline templates
Get started with PowerPoint for free on the web
