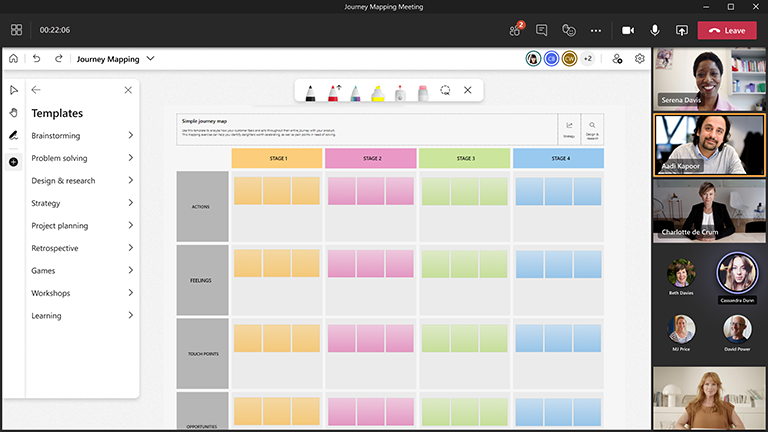
Getting to the bottom of what customers want out of a product is easier when you have fewer restrictions on creativity and collaboration.
Whiteboard provides the perfect way to sit down with the team, understand customer needs, and create a plan to implement solutions.
Key features:
-
Templates for a variety of design and research scenarios — such as empathy maps, journey maps, and affinity diagrams
-
A blank canvas with freeform ink to express ideas
-
Colorful sticky notes to better organize subjects
-
Smart inking and shapes to help visualize solutions
-
Reactions to encourage participation and team alignment
Integrate design and research in every project
Empathize and make informed decisions for the user
Think of yourself as a detective. The first step is to start off with a deep understanding of the context, the problem, and who you’re solving for. Starting with an empathy map template can help to deeply empathize with the people you are trying to help.
Collect and analyze data
Research is all about gathering, synthesizing, and providing a list of recommendation. Grouping all the data from research on a whiteboard can help make sense of the qualitative data in a visual way and identify patterns. Using an affinity diagram can help organize this data and keep track of all the relevant information needed.
Collaborating with key stakeholders
To make informed decisions, engage stakeholders and leverage knowledge from different disciplines such as engineering, product, and design. Take them along on your design thinking journey by running educational sessions to help solve the problem.
Enable successful design and research sessions with Whiteboard
Prepare the board
-
Schedule Teams meeting
-
Navigate to the Teams meeting and select Whiteboard from the list at the top of the meeting. You can also do this by creating a whiteboard and sharing the link in the Whiteboard Windows App or in the browser at whiteboard.office.com.
-
In the creation panel, select Templates > Design and Research and choose a template.
-
Customize the template to fit your goals for the session
-
You can also share a link to the board if others are helping you prepare
During the session
-
Ensure that all attendees have the Teams meeting link.
-
Once the meeting has started, share the whiteboard from the Share tray, or send a link to the prepared board from the Windows app or from whiteboard.office.com.
-
Introduce the goal of the session and ensure everyone is familiar with using Whiteboard.
-
Set ground rules with the team about what different colors and reactions mean for that particular session.
-
Begin your design or research session, encouraging participation through Teams as well as directly on the board itself.
-
Use the "Raise Hand" feature in Teams to organize the order in which participants will speak.
-
Keep an eye on the time to make sure you will be able to cover all intended topics.
After the session
-
Send a message to attendees with the link to the whiteboard so everyone has access.
-
If you want to send a snapshot of the finished whiteboard with your group or with anyone who missed the meeting, export and then share a PNG image from the Settings menu.
-
Summarize the outcomes of the session and share with all relevant participants.
-
Take your hard work and put it into action!
See also
Check out our other Whiteboard guides to learn more!


