Updated: October 27, 2016
|
Skype for Business on Mac is now available! Install Skype for Business on Mac from the Microsoft Download Center. |
How to get to the Lync for Mac 2011 download and install it
To get the instructions for how to download and install Lync for Mac 2011 from the Microsoft 365 portal, choose the arrow (>) next to the plan you have.
Important: You need to use Internet Explorer or Safari to perform these steps. The download doesn't work with Chrome.
-
Sign in to Microsoft 365.
-
At the top of your Microsoft 365 page, choose
-
Choose Install and manage software.
-
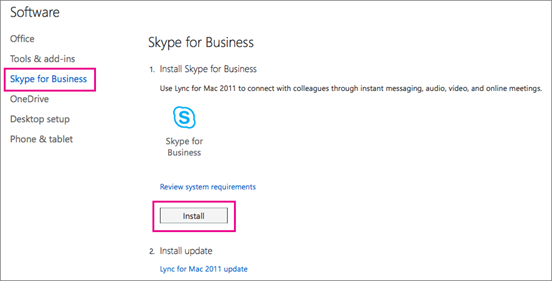
Choose Skype for Business > Install to download the Lync for Mac 11 installation program onto your Mac.
If you don't see Skype for Business listed, then it's not included with the Microsoft 365 business plan you have.
The lync_14.<x.x>_<xxxxxx>.dmg file is downloaded onto your computer. This is the Lync for Mac 11 installation program.
-
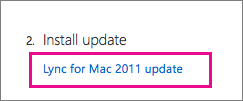
After the Lync for Mac 11 installation program downloads to your Mac, go back to the Skype for Business page, and choose Lync for Mac 2011 update.
-
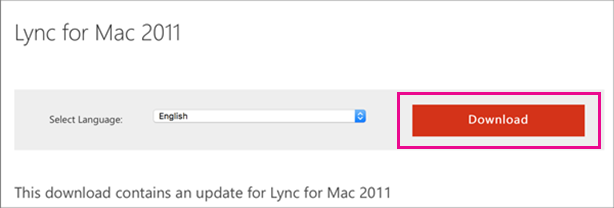
At the Microsoft download center, choose Download to download the Lync for Mac 2011 update program onto your Mac.
The lync_14.<x.x>_<xxxxxx-2>.dmg file is downloaded onto your computer. This is the Lync for Mac 11 update.
-
After the programs are finished downloading, go to Downloads on your Mac. You'll see two Lync programs there.
-
Choose the first one, lync_<xx>_<xxxxxx>.dmg, to open the installer.
Important: Depending on your Mac settings, the Lync Installer might be blocked from running because it's not from the Mac App Store and identified developers. Open the General pane of Security & Privacy preferences, choose the unlock icon, and then choose Anywhere to allow the Lync Installer to run.
-
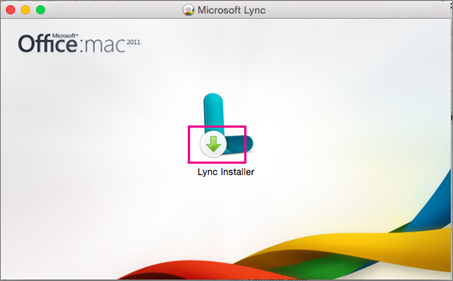
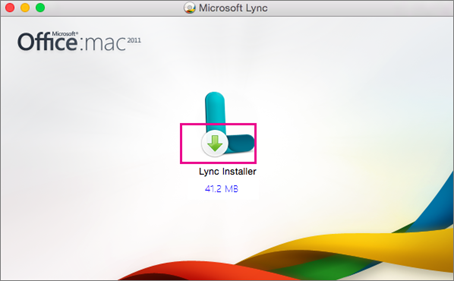
Choose the Lync Installer button to start the installer.
-
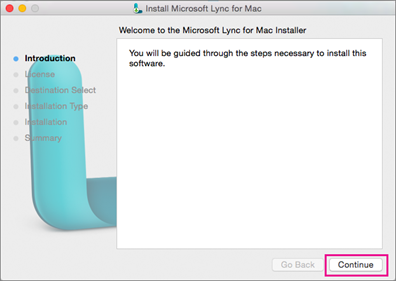
Follow the prompts in the Lync for Mac Installer until it's finished, and then choose Close at the end.
-
Next, go back to Downloads on your Mac, and choose the update program, lync_<xx>_<xxxxxx>-2.dmg.
-
Choose the Lync Installer button to start the installer for the update.
-
Follow the prompts in the Lync for Mac Installer until it's finished, and then choose Close at the end.
Congratulations! You're done installing Lync for Mac 2011. Now you're ready to sign in for the first time.
Were these steps helpful? Please leave us a comment.
When you purchased a Skype for Business Online Plan, you created a Microsoft 365 user ID at the same time, even though you didn't purchase Microsoft 365.
To install Lync for Mac 2011, you need to sign in to Microsoft 365 first. Here's how you do that:
-
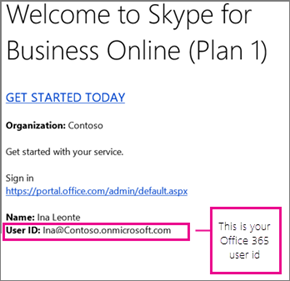
Locate your Microsoft 365 user ID. You received an email from the Microsoft Online Services Team that contains your Microsoft 365 user ID. It looks something like this:
-
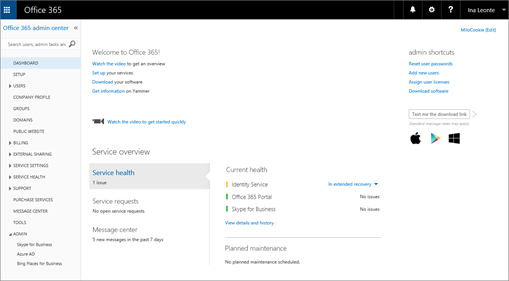
Go to https://admin.microsoft.com/ and enter your Microsoft 365 user ID and password. After you sign in, you'll see the Office 365 admin center.
-
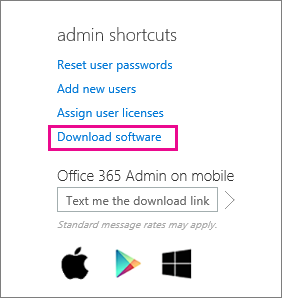
Choose Download software.
-
Choose Software.
-
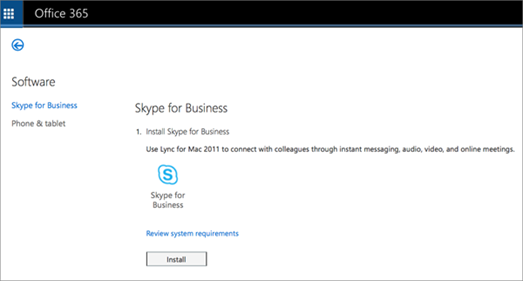
Choose Skype for Business.
-
Choose Install to download the Lync for Mac 11 installation program onto your Mac.
-
After the Lync for Mac 11 installation program downloads to your Mac, go back to the Skype for Business page, and choose Lync for Mac 2011 update.
-
At the Microsoft download center, choose Download to download the Lync for Mac 2011 update program onto your Mac.
-
After the programs are finished downloading, go to Downloads on your Mac. You'll see two Lync programs there.
-
Choose the first one, lync_14.<x.x>_<xxxxxx>.dmg, to open the installer.
Important: Depending on your Mac settings, the Lync Installer might be blocked from running because it's not from the Mac App Store and identified developers. Open the General pane of Security & Privacy preferences, choose the unlock icon, and then choose Anywhere to allow the Lync Installer to run.
-
Choose the Lync Installer button to start the installer.
-
Follow the prompts in the Lync for Mac Installer until it's finished, and then choose Close at the end.
-
Next, go back to Downloads on your Mac, and choose the update program, lync_14.<x.x>_<xxxxxx>-2.dmg.
-
Choose the Lync Installer button to start the installer for the update.
-
Follow the prompts in the Lync for Mac Installer until it's finished, and then choose Close at the end.
Congratulations! You're done installing Lync for Mac 2011. Now you're ready to sign in for the first time. Go to Sign in to Lync for Mac 2011 for the first time.
-
Locate your Microsoft 365 user ID. You received an email from the Microsoft Online Services Team that contains your Microsoft 365 user ID. It looks something like this:
If you can't find your user ID, ask the person who purchased your plan.
-
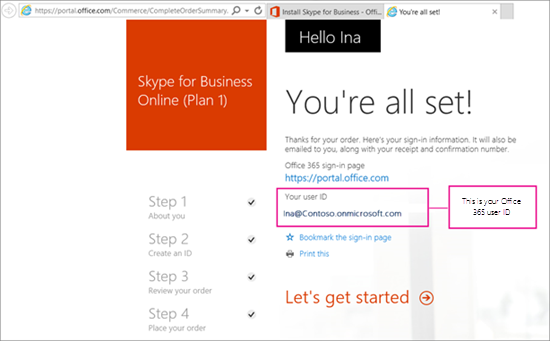
Go to https://admin.microsoft.com/ and enter your Microsoft 365 user ID and password. After you sign in, you'll see a page like this:
-
Choose Install to download the Lync for Mac 11 installation program onto your Mac.
-
After the Lync for Mac 11 installation program downloads to your Mac, go back to the Skype for Business page, and choose Lync for Mac 2011 update.
-
At the Microsoft download center, choose Download to download the Lync for Mac 2011 update program onto your Mac.
-
After the programs are finished downloading, go to Downloads on your Mac. You'll see two Lync programs there.
-
Choose the first one, lync_14.<x.x>_<xxxxxx>.dmg, to open the installer.
Important: Depending on your Mac settings, the Lync Installer might be blocked from running because it's not from the Mac App Store and identified developers. Open the General pane of Security & Privacy preferences, choose the unlock icon, and then choose Anywhere to allow the Lync Installer to run.
-
Choose the Lync Installer button to start the installer.
-
Follow the prompts in the Lync for Mac Installer until it's finished, and then choose Close at the end.
-
Next, go back to Downloads on your Mac, and choose the update program, lync_14.<x.x>_<xxxxxx>-2.dmg.
-
Choose the Lync Installer button to start the installer for the update.
-
Follow the prompts in the Lync for Mac Installer until it's finished, and then choose Close at the end.
Note: Thanks to reader feedback, these steps were updated on 12/14/2015 to clarify that your Microsoft 365 user ID is also your email address.
-
Double-check that you're connected to the Internet.
-
On your Dock, choose the Lync icon
-
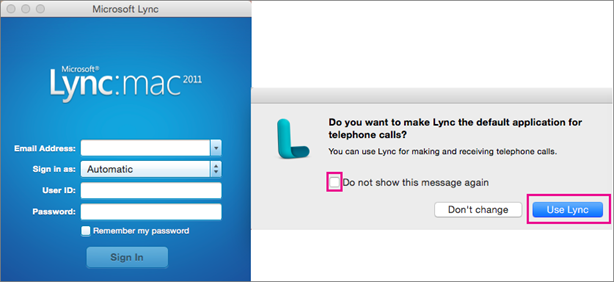
When prompted, choose Use Lync if you want to make and receive telephone calls through it. Otherwise, choose Don't change.
-
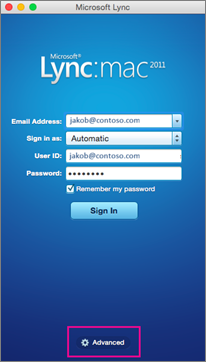
At the Lync for Mac 2011 sign in page, choose Advanced at the bottom of the page after entering your Microsoft 365 user ID (which is also your email address) in both the Email Address box and the User ID box, and your password.
-
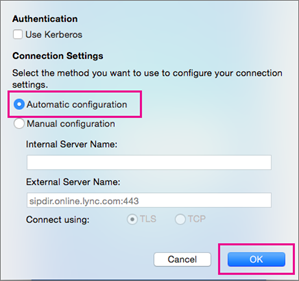
Under Authentication, clear the Use Kerberos box so it's blank.
-
Under Connection Settings, choose Automatic and OK.
-
Back at the Sign in page, choose Sign In.
Important:
-
If you get a message that sign in failed, doublecheck your password and your Internet connection. If you continue to get the message, it could be that the connection is slow because of a lot of traffic on the Internet. Try again; it can take a few times to get through.
-
If you continue to have problems, see Fix problems with setup or signing in.
-
-
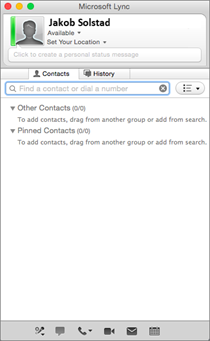
When you're signed in, Lync for Mac 2011 looks like this:
Were these steps helpful? Please leave us a comment.
-
If you get the error message "No Kerberos ticket is detected":
-
At the Lync for Mac 2011 sign in page, choose Advanced at the bottom of the page, after typing your Microsoft 365 user ID in both the Email Address box and the User ID box, and entering your password.
-
Under Authentication, clear the Use Kerberos box so it's blank.
-
Choose OK.
-
Trying signing in again.
-
-
If you get the message "Lync was unable to sign in. Please verify your logon credentials and try again" or "The service might not be available," the issue might be a connection can't be established with Lync.
Author's note: when I tested these instructions from home, where my Internet service isn't very good, I wasn't able to connect and kept getting errors, even after trying for 30 minutes. But the next day I could connect. When I tested the instructions at work, the connection worked the first time.
-
If you still can't connect, or for other issues, see Troubleshoot sign in issues with Lync for Mac 2011 in Skype for Business Online.
Leave us a comment
Were these steps helpful? If so, please let us know at the bottom of this topic. If they weren't, and you're still having trouble setting up Lync for Mac 2011, tell us what was confusing or wrong. We'll use your feedback to double-check our steps.


