
Share and access a calendar as view-only in Outlook
If you're using a work or school account or personal account in Outlook, you can send a sharing invitation to other users so they can view your calendar from within their own Outlook Calendar list.
Calendar sharing isn't limited to the default Calendar folder that's created in all Outlook profiles. You can create additional calendar folders and choose which of those folders to share. For example, you can create a calendar folder for a specific project and share it with your co-workers, or a family calendar that includes all the events and appointments for family members.

This article describes how to share and access a calendar that's can only be viewed. This means the people you're sharing it with, can't make changes to it. To give someone permissions to edit a shared calendar, see Share and access a calendar with edit or delegate permissions in Outlook.
Select a tab option below for the version of Outlook you're using. What version of Outlook do I have?
Note: If the steps under this New Outlook tab aren't working for you, you may not be using new Outlook for Windows yet. Select the Classic Outlook tab and follow those steps instead.
In this article:
Share a calendar with others in new Outlook
-
From the navigation pane, select Calendar.
-
On the Home tab, select Share calendar, and if you have more than one calendar, select which calendar you want to share.
-
Type whom to share with in the Enter an email address or contact name box. If the person's name appears in a list, select it, otherwise press Enter.
-
After you’ve added the person you want to manage your calendar, select the drop-down list next to their name, and choose the level of access you want them to have.
-
Select Can view when I'm busy to give them permission to see only when you are busy, but not the details of items on your calendar.
-
Select Can view titles and locations to give them permission to see when you're busy, plus the titles and locations of items on your calendar.
-
Select Can view all details to give them permission to see all details of items on your calendar. others to view your calendar but not make changes to it.
Note: If you want to grant permissions that allow a user to edit your calendar, or can respond to meeting requests on your behalf, see Calendar delegation in Outlook.
-
-
After you’ve finished adding the person you want to share your calendar with and have chosen which permission you want to give them, select Share. If you decide not to share your calendar right now, select

-
The person you're sharing a calendar with will receive an email invitation to share their calendar. Once they accept, they can add your calendar to their own view.
Add another person's calendar to your calendar
Adding another person's calendar to your own is only possible with work or school accounts.
Note: To do this using a personal account, ask the person who you want to share calendars with to share their calendar following the steps in the section above, Share an Outlook calendar with others.
The following video demonstrates how to add a shared Outlook calendar.
Publish a calendar
You can publish a calendar and then share the link with others to let them view the calendar online. Use an HTML link if you want recipients to view the calendar in a browser, or an ICS link if you want them to subscribe to your calendar.
-
From the navigation pane, select Calendar.
-
From the ribbon, select the View tab Calendar settings > Calendar > Shared calendars.
-
Under the section Publish a calendar, select the calendar you want to publish from the dropdown and select the permissions you want to grant.
-
Click Publish. HTML and ICS links will appear below.
-
Copy the HTML or ICS links for how you want to share the calendar. Copy the HTML link if you want recipients to view the calendar in a browser, or copy the ICS link if you want them to subscribe.
Select Unpublish to unpublish the calendar.
|
Guided support in your browser can provide digital solutions for Office problems |
Steps and information for classic Outlook:
Share your calendar | Stop sharing your calendar | Share a calendar by publishing | Share your calendar in email | Additional information | Fix issues
Stop sharing your calendar
At any time you can revoke access to your calendar.
Note: It may take a while for Microsoft 365 and the user's Outlook to sync and remove the view to your calendar
-
Select Calendar.
-
On the ribbon, select the Folder tab, then select Calendar Properties.
-
Select the Permissions tab, and under Currently sharing with, select the user's name and then choose Remove.
-
Select OK.
Share a calendar by publishing it to a web page
If you have access to a web server that supports the World Wide Web Distributed Authoring and Versioning (WebDAV) protocol, you can publish your calendar there.
Note: Not sure if your server supports WebDAV? Your server administrator or internet service provider (ISP) should be able to tell you.
-
Select Calendar.
-
Select Home > Publish Online > Publish to WebDAV Server.
Notes:
-
If your email account uses Exchange, you will see Publish This Calendar, instead of the option to publish to a WebDAV server. This lets you publish your calendar directly to an Exchange Server. In the window that opens, select the publishing options you want, and click Start Publishing.
-
If you're using Microsoft 365, you can still publish your calendar to a WebDAV server, but you must first remove {Anonymous:CalendarSharingFreeBusySimple} from the sharing policy. This will prevent you from publishing your calendar to Exchange in the future, however.
-
-
In the Location box, enter the location of the WebDAV server, select any other publishing options you want, and then select OK.
Share your calendar in an email
If you don't want to give someone permissions to share your calendar and see updates, you can email a static copy of your calendar for a specific date range. The recipient will be able to see the events on your calendar at the time you sent the email, but not any updates you make after you send the email.
Note: This feature is no longer available with Outlook for Microsoft 365.
-
Select Calendar.
-
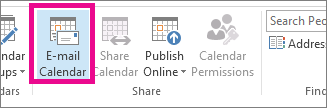
Select Home > E-mail Calendar.
-
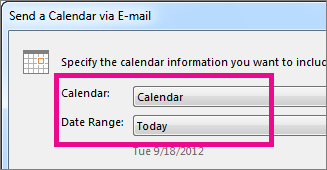
In the Calendar and Date Range boxes, pick the calendar and time period you want to share. For example, choose Today only or for the Next 7 days.
-
Set any other options you want, and then select OK.
-
In the new email that opens, add who you want the message to go to in the To field, add a message if you want, and select Send.
The person you sent your calendar to will see a snapshot of your calendar in the message.
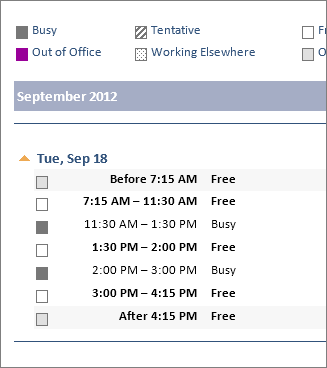
The message also includes an attached iCalendar (.ics) file that they can open in Outlook or another calendar program. When the recipient clicks the iCalendar file, Outlook displays the file as a new calendar that they can view side-by-side with their calendar. They can drag appointments or meetings between the two calendars and find a time that works for both of you.
Fix issues sharing your calendar
If you don't have the option to share your calendar (it's greyed out), it's because the admin/IT support for your business has set a policy to prevent people from sharing calendars.
In this article:
Share a calendar with others in new Outlook
-
From the navigation pane, select Calendar.
-
On the Home tab, select Share calendar, and if you have more than one calendar, select which calendar you want to share.
-
Type whom to share with in the Enter an email address or contact name box. If the person's name appears in a list, select it, otherwise press Enter.
-
After you’ve added the person you want to manage your calendar, select the drop-down list next to their name, and choose the level of access you want them to have.
-
Select Can view when I'm busy to give them permission to see only when you are busy, but not the details of items on your calendar.
-
Select Can view titles and locations to give them permission to see when you're busy, plus the titles and locations of items on your calendar.
-
Select Can view all details to give them permission to see all details of items on your calendar. others to view your calendar but not make changes to it.
Note: If you want to grant permissions that allow a user to edit your calendar, or can respond to meeting requests on your behalf, see Calendar delegation in Outlook.
-
-
After you’ve finished adding the person you want to share your calendar with and have chosen which permission you want to give them, select Share. If you decide not to share your calendar right now, select
-
The person you're sharing a calendar with will receive an email invitation to share their calendar. Once they accept, they can add your calendar to their own view.
Add another person's calendar to your calendar
Adding another person's calendar to your own is only possible with work or school accounts.
The following video demonstrates how to add a shared Outlook calendar.
Publish a calendar
You can publish a calendar and then share the link with others to let them view the calendar online. Use an HTML link if you want recipients to view the calendar in a browser, or an ICS link if you want them to subscribe to your calendar.
-
From the navigation pane, select Calendar.
-
From the ribbon, select the View tab Calendar settings > Calendar > Shared calendars.
-
Under the section Publish a calendar, select the calendar you want to publish from the dropdown and select the permissions you want to grant.
-
Click Publish. HTML and ICS links will appear below.
-
Copy the HTML or ICS links for how you want to share the calendar. Copy the HTML link if you want recipients to view the calendar in a browser, or copy the ICS link if you want them to subscribe.
Select Unpublish to unpublish the calendar.
Share a calendar with others in new Outlook
-
From the navigation pane, select Calendar.
-
On the Home tab, select Share calendar, and if you have more than one calendar, select which calendar you want to share.
-
Type whom to share with in the Enter an email address or contact name box. If the person's name appears in a list, select it, otherwise press Enter.
-
After you’ve added the person you want to manage your calendar, select the drop-down list next to their name, and choose the level of access you want them to have.
-
Select Can view when I'm busy to give them permission to see only when you are busy, but not the details of items on your calendar.
-
Select Can view titles and locations to give them permission to see when you're busy, plus the titles and locations of items on your calendar.
-
Select Can view all details to give them permission to see all details of items on your calendar. others to view your calendar but not make changes to it.
Note: If you want to grant permissions that allow a user to edit your calendar, or can respond to meeting requests on your behalf, see Calendar delegation in Outlook.
-
-
After you’ve finished adding the person you want to share your calendar with and have chosen which permission you want to give them, select Share. If you decide not to share your calendar right now, select
-
The person you're sharing a calendar with will receive an email invitation to share their calendar. Once they accept, they can add your calendar to their own view.
Add another person's calendar to your calendar
To add another person's calendar to your own, ask the person who you want to share calendars with to share their calendar with you following the steps in the section above, Share an Outlook calendar with others.
Publish a calendar
You can publish a calendar and then share the link with others to let them view the calendar online. Use an HTML link if you want recipients to view the calendar in a browser, or an ICS link if you want them to subscribe to your calendar.
-
From the navigation pane, select Calendar.
-
From the ribbon, select the View tab Calendar settings > Calendar > Shared calendars.
-
Under the section Publish a calendar, select the calendar you want to publish from the dropdown and select the permissions you want to grant.
-
Click Publish. HTML and ICS links will appear below.
-
Copy the HTML or ICS links for how you want to share the calendar. Copy the HTML link if you want recipients to view the calendar in a browser, or copy the ICS link if you want them to subscribe.
Select Unpublish to unpublish the calendar.


Need more help?
Want more options?
Explore subscription benefits, browse training courses, learn how to secure your device, and more.


Communities help you ask and answer questions, give feedback, and hear from experts with rich knowledge.


Find solutions to common problems or get help from a support agent.
