News for Email allows authors to convert their SharePoint News posts into distributions that can be read fully in email inboxes. You can now engage your audience directly in their inbox and track their mail reads.
How to Create News for email
-
To create distributions that are made for email, start from the + menu drop down and select News post.
Note: Currently, you can't create made for email distributions for other page types or promoted news.
-
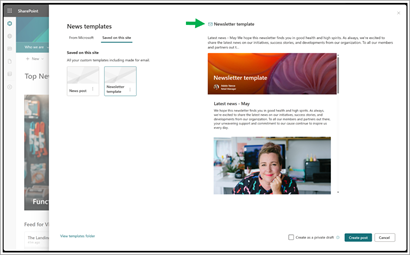
Select one of our Made for email template options.
-
In the newly created post, you can start authoring your page.
Notes:
-
You’ll notice a few key changes from the previous experience, namely:
-
Post and send replaces post to now include email distribution into your publishing flow.
-
Made-for-email webparts are only in your webpart picker.
-
-
After writing your post, select Post and send to publish your news to your site.
Note: Made for email webparts include, but aren't limited to, text, image, and people.
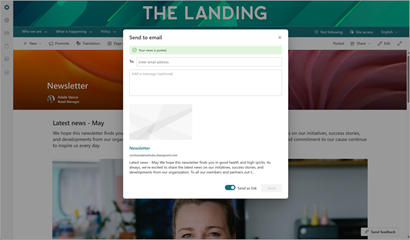
Your post will be confirmed in the following dialog box:
You can preview your full distribution before you distribute it. Send your news straight to any email address by inputting recipients in the to line. This includes sending to, (and CCing,) distribution lists.
Your post title is automatically auto-filled as your email subject line. If needed, you can manually change it by editing the dialogue box under CC. You can also add an optional message to appear as the body of your finished email.
If instead, sending the full version, you can optionally send in a way that doesn’t show the full post content or grant new permissions. Toggle the send as link button next to send to revert to the legacy experience available for pages that are not made for email. With this option you can send a link to distribution lists without showing any of the mail content, and no analytics will be recorded.
Permissioning, Site Access, and Sharing
When you send a News post as an email, all recipients can read the content of the post in its entirety but are not granted any further site permissions. This restriction includes access to the original page on SharePoint Online. You can think of sending mail by email as making someone a photocopy of a page in a book which they can read without being able to see anything else in the book.
Existing site permissions are not impacted for users who already have site access, they will be able to view the Web version on SharePoint.
Analytics
When you create a Made for Email News Post, your email views, viewers, and page traffic will be added to your page analytics. However, your average time spent per user will only reflect your SharePoint Online views. User activity reflected in the report will not include usage data collected in the last 60 minutes.
Additional user activities such as reactions are not counted in page analytics, and any likes and comments are result of interaction with the SPO page.
An email view is counted after a user opens the email distribution, but not counted on forward, reply, or attachment. An email view is recorded regardless of where the mail is opened, whether the email client is Outlook, Outlook online, or a third-party provider such as Gmail.
To be able to collect analytics, be sure to send your distribution to each recipient directly from the SharePoint page, either on first Post or later from the share dropdown.
What your recipients will see
News posts sent as emails can be viewed in any email client, and will display as any other email, sent from the News post author.
There may be a slight variation in the look of the end newsletter depending on the recipient's mail client. These variations are purely cosmetic, resulting from differences in how different mail clients process data. The best results will come from opening these distributions on Outlook.com.
When viewing on a mobile device, recipients will see a distribution width of 600 pixels. However, when they view on a device with more available horizontal space (desktop mail app), these distributions will stretch to fill 740 pixels for better legibility and image quality.
Updating your Post and sending again
Updates to News posts sent as emails work the same way as updates to any other News post. Previous recipients and readers are not notified of changes to the document. Also note the version that you previously published is a static snapshot of the page at the moment of sending, and will not update in inboxes when your make updates to the online version, regardless of whether the mail has been opened or not. If you want your readers to see your most recent changes, you can resend your page after the changes are made.
To send your post as an email after initial publishing, use the send as email dialogue box again under the share dropdown.
Saving a Made for email news post as a custom template
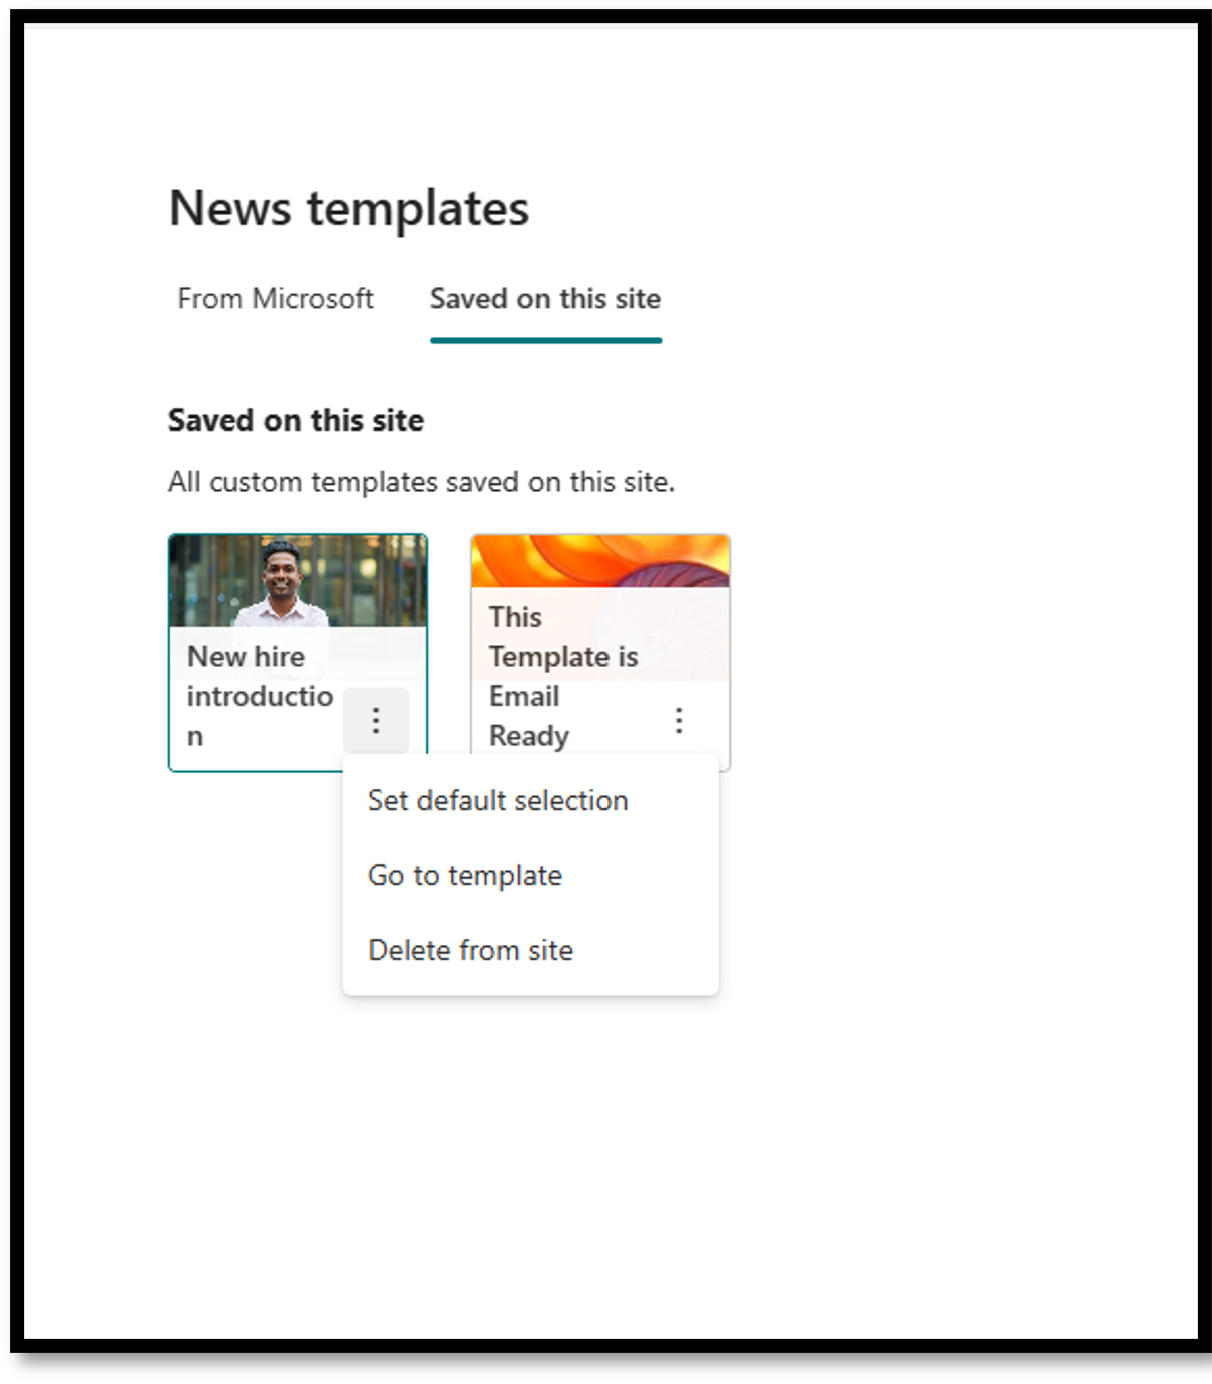
If you save a made for email template as a custom template, it will show up on your site next to your standard templates. News that was created with this template will retain send-as-email capabilities and webpart scoping.
You can tell which of your saved templates can be sent as emails by noting the mail icon next to your template title (appearing the preview loads).
Making the "Saved on this site" tab open by default in the Template Picker
If you set a custom "saved on this site" template as your default template on a given site, the "saved on this site" tab will now open by default whenever anyone creates a new News Post. The "From Microsoft" made for email templates can still be accessed by clicking the "from Microsoft" tab.
Individual Web part functionality
Individual web parts, by and large, work the same as they do in distributions that aren't made for email, with a few exceptions:
-
Individual audience targeting is disabled entirely.
-
Web part appearance may vary in your distribution view.
Text
Use the Text web part to add paragraphs to your page. Formatting options like styles, bullets, indentations, highlighting, and links are available. You can also paste images inline with text.
To use the Text web part:
-
Select + and then choose Text from the list of web parts.
-
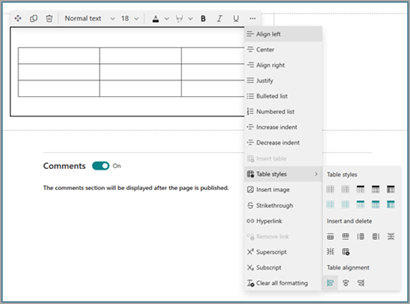
Click inside the box and the formatting toolbar will display.
-
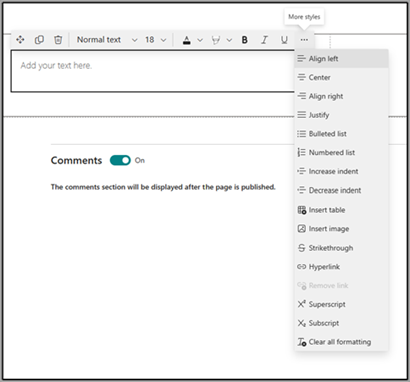
Enter your text and format it using the formatting toolbar. View more formatting options by selecting the ellipses (...) More styles on the right side of the toolbar.
-
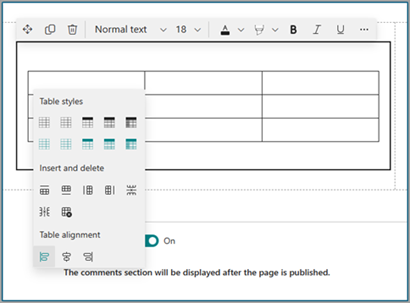
To add a table, select (...) More style > Insert.
Note: Once you are clicked into the table, the table styles tool will become available to you.
Note: You can also access this menu by right clicking on the table itself.
Note: Though any table size can be added to a ‘made for email’ distribution, the conversion of larger tables into the 600px distribution width might lead to undesirable reflow. We recommend paying specific attention to your table appearance in preview mode to ensure it meets expectations. We're able to provide a horizontal scroll bar to prevent reflow issues in some mail clients, but not all, especially third-party ones, but will work to expand our support in future updates.
Images web part
Use the image web part to add images to your page. Formatting options like styles, bullets, indentations, highlighting, and links are available. You can also paste images inline with text.
To use the image web part:
-
On your page, hover your mouse above or below an existing web part and you'll see a line with a circled +, like this:
-
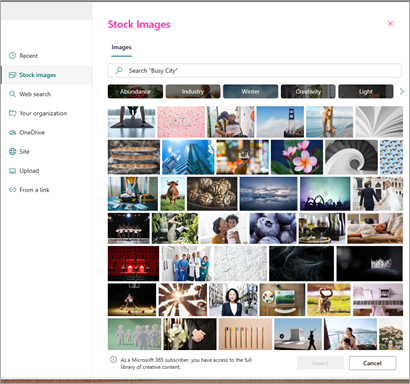
Toggle through the image picker options to select your image.
-
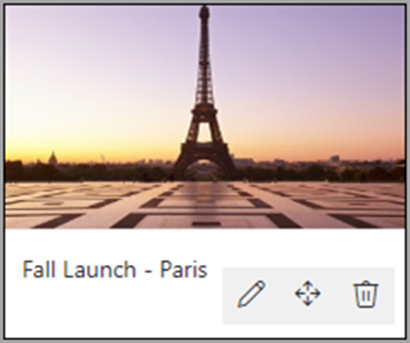
Once you have an image selected, the following edit options will show up in the image toolbar.
From left to right, they are sequentially:
-
Move
-
Edit
-
Duplicate
-
Delete Web part
-
Browse images
-
Text overlay (shows on top of the image when transpiled)
-
Resize
-
Crop
-
Center align
-
Advanced editing, and
-
reset
For more information on how to use these image editing capabilities, please reference the full support documentation on image webpart linked here.
Note: When you use the text overlay capability in the image webpart, the text will show above the image in the mail distribution.
Inline images
-
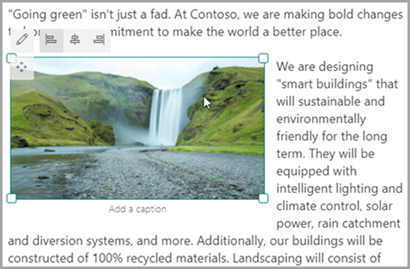
You can add an image inline with text by copying an image and pasting it into the Text web part.
-
Select the image within the web part and use the toolbar at the upper left of the image to edit the image, move it, or align it left, right, or center. You can resize the image by selecting the handles at each corner of the image.
Note: In the generated email distribution, images will not show as inline with text. Instead, the text will render above or below the image depending on their location with respect to the inline image. The size of the inline image will be preserved. For best conversion results, rely on the full image webpart.
People
Who's on the team? What are they responsible for? How can I contact them? It's easy to answer these questions for your readers with the People web part. It can show the photos, contact information, and more of the people in your organization.
-
Hover your mouse above or below an existing web part and you'll see a line with a circled +, like this:
-
Select + > People from the list of web parts.
-
You can change the title of the web part by selecting the text that says People profiles and typing over it.
-
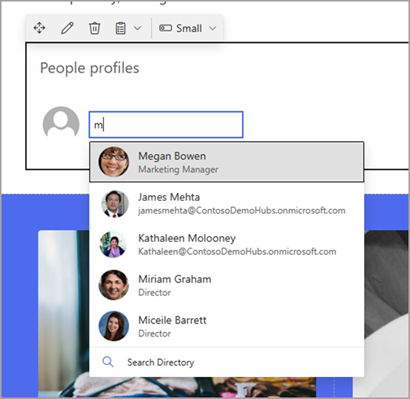
Enter a name or partial name in the box. A list of matching results will display, and you can pick the person you want. Then select add profile.
-
Continue entering names and selecting profiles until you are done.
Type of card
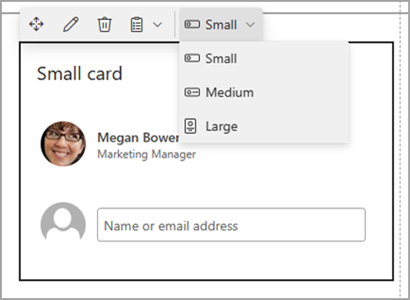
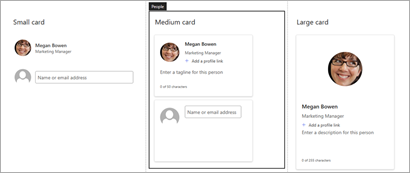
Three different types of cards are supported: small, medium and large. You can choose to show more or less information by selecting the type of card to show. Small cards show a picture (if one is available) and the person's name or email address, as in the image above. The Medium layout shows one row of a text description. The Large layout shows a picture, name or email, title (if available), and an optional link and description, as shown in the image below.
To reorder people profiles, just drag and drop each one using the Move button.
Note: You can also reorder people using Ctrl + Left or Ctrl + Right arrow keys.
File and Media
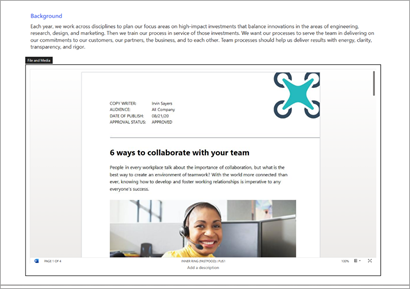
Use the File and media web part to insert a file on your page. File types you can insert include Excel, Word, PowerPoint, Visio, PDFs, 3D models, videos, and more.
-
Hover your mouse above or below an existing web part or under the title region, click , and then select File and media web part.
-
Choose a recent file or get a file from your site, your computer, or a link. If your organization has specified a set of approved images, you'll be able to choose from that set under Your organization. That file will then be displayed in line on your page.
Notes:
-
Web search uses Bing images that utilize the Creative Common license. You are responsible for reviewing licensing for an image before you insert it on your page.
-
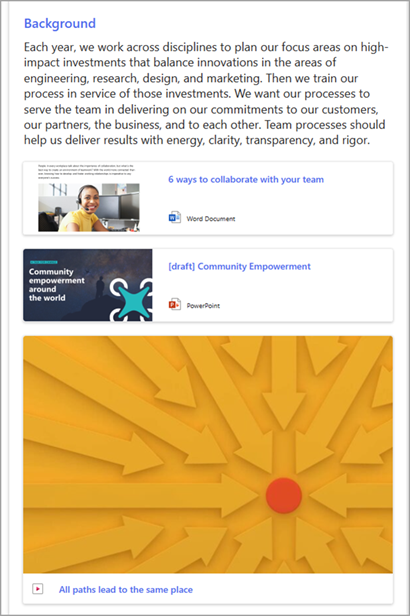
For any imbedded file, the webpart is translated as a card that links back to the full file form. For videos, a larger card is generated that previews the first frame.
-
Tips:
-
Image files aren't supported in the File and Media web part. However, if you want to insert an image on your page, you can use the Use the Image web part.
-
To print from .PDF files, you must select Open in new window button from the toolbar that displays when you hover over the file on a published page in view mode. Then you can print from the browser window.
Divider
-
Hover your mouse above or below an existing web part or under the title region, select +.
-
Select Divider web part.
Customizing the divider webpart
-
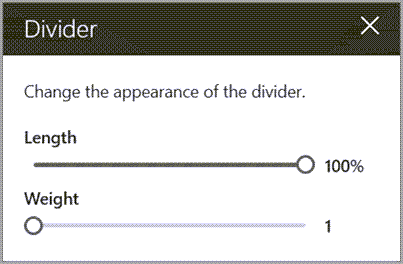
Select Edit web part (on the left) to customize the divider's length and weight.
-
Set the Length of the divider from 20% - 100%. (The divider's length will change as you drag the slider, so you can preview the change.)
-
Set the Weight of the divider from 1 (thinnest) to 6 (thickest). (The divider's weight will change as you drag the slider, so you can preview the change.)
Quicklinks
-
If your page isn't already in edit mode, select Edit at the top right of the page.
-
Hover your mouse above or below an existing web part and you'll see a line with a circled +, like this:
-
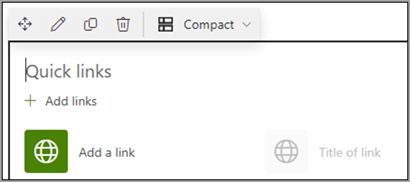
Select + and then select Quick links web part.
-
Type over the Quick links title to add your own title.
-
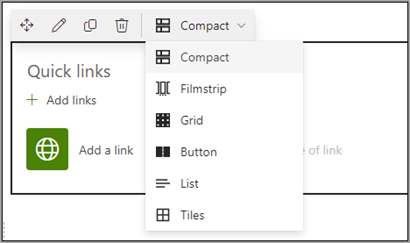
Select the layout options above the Quicklinks to select your layout.
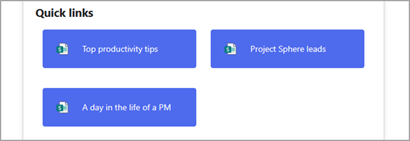
Note: Regardless of which layout you choose, it will be converted to the button format in your distribution:
Add links
-
Select + Add.
-
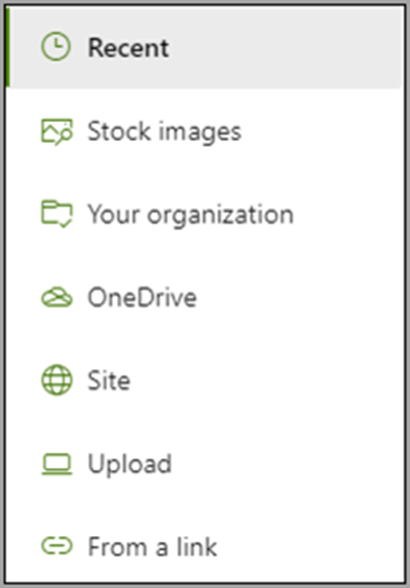
Choose a recent file or get a file or image from one of the following locations: Stock images provided by Microsoft A site Your OneDrive account Your computer A link
-
If your organization has specified a set of approved images, you'll be able to choose from that set under Your organization.
-
Select your image, page, or document and select Insert.
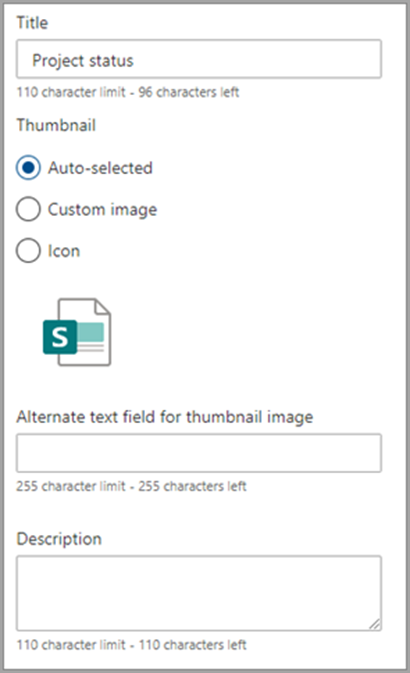
Note: In the toolbox on the right, you'll have options for each link. The options depend on the settings you've chosen for the layout. For example, if you chose to Show descriptions for a list layout, you can add a description for the individual link. Other types of options for individual links, depending on the layout options, include changing the image, formatting icons, adding descriptions, and adding alternative text.
Edit links
-
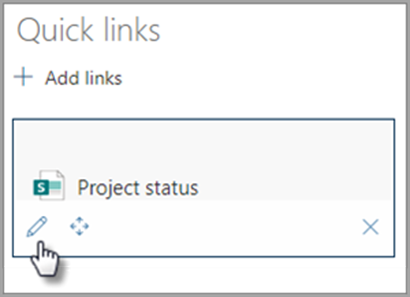
Hover over the item you want to edit then select Edit item pencil at the bottom of the item you want to edit.
Note: This will open the toolbox for that item where you'll have options for that link. The options depend on the settings you've chosen for the layout. For example, if you chose to Show descriptions for a list layout, you can add a description for the individual link. Other types of options for individual links, depending on the layout options, include changing the image, formatting icons, adding descriptions, and adding alternative text.
-
To remove links, select the trashcan icon for the item.
-
To reorder links, drag and drop items to new positions using the Move icon .
Notes:
-
You can also reorder links using Ctrl + Left or Ctrl + Right arrow keys.
-
You can't reorder links in the Filmstrip layout.
-
Links
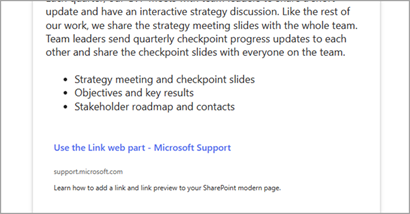
Use the Link web part to add a link, along with its preview, to an internal or external page, video, image, or document.
-
Hover your mouse above or below an existing web part or under the title region, click +, and then select the Link web part.
-
Paste the link to the page, video, image, or document. In addition to the link text, a preview of the item will display on the page if available. To remove either the link text or the preview, click the X next to it.
The link web part will look similar in your final distribution.


