
There are many ways to customize access to an item to share it safely, securely, and only to the people you want to share it with. The two main ways to share the item are to email an invite or copy a link to the item.
In this article:
Get started with sharing
There are two ways to share an item from a SharePoint library or your OneDrive:
-
In List view, hover over an item row or select the checkbox next to an item, then select

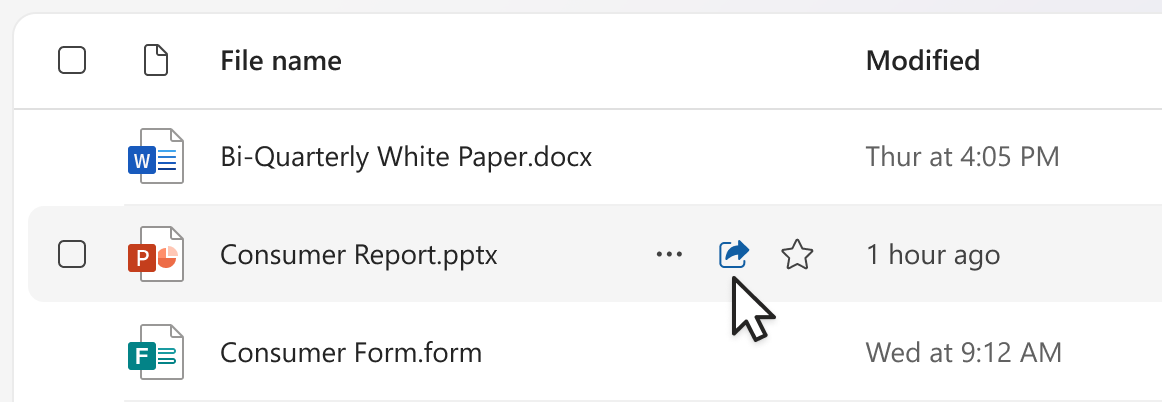
-
In List or Tiles view, select an item row or tile. Then, select
Note: This option is not available in the OneDrive Home view.
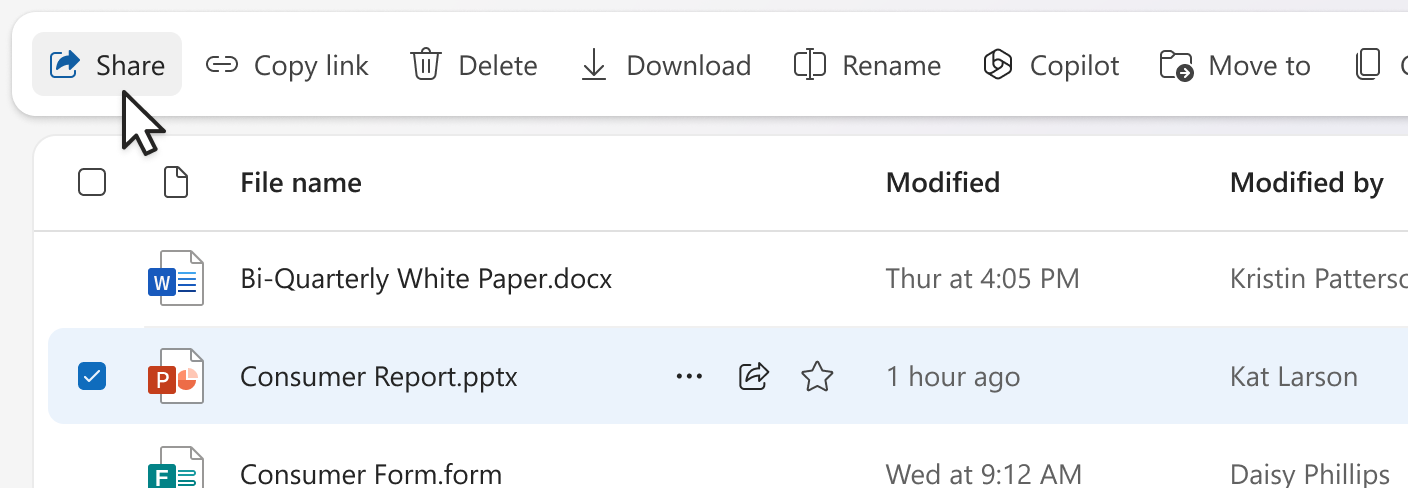
To share a Microsoft 365 file from the app, like a PowerPoint, Word, or Excel file:
-
In the top right corner, select
-
Select

Note: Selecting and sharing multiple items at the same time is not available in SharePoint or OneDrive for work or school. Instead, add the items to a folder and share the folder.
Once you’ve selected
Notes:
-
If you haven’t shared the item yet, there will be a

-
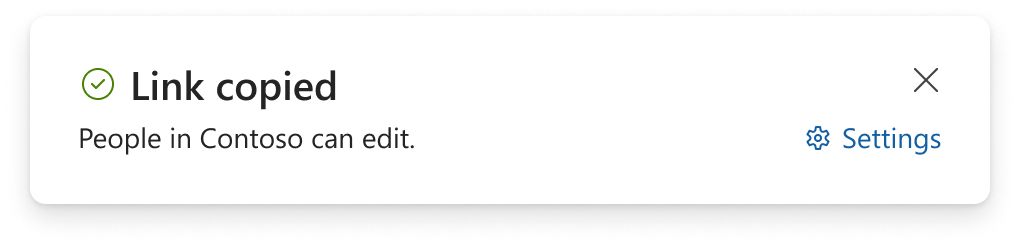
If the item has already been shared, the profile images or initials of the people and groups it's shared with will appear in the bottom left corner. You can select one of the icons to open Manage access, where you can review and manage the people with existing access.
-
If you copy a link to an item that hadn’t been shared yet, the lock icon will be replaced with your profile image, even if the link has not been opened by anyone yet.
Choosing permissions
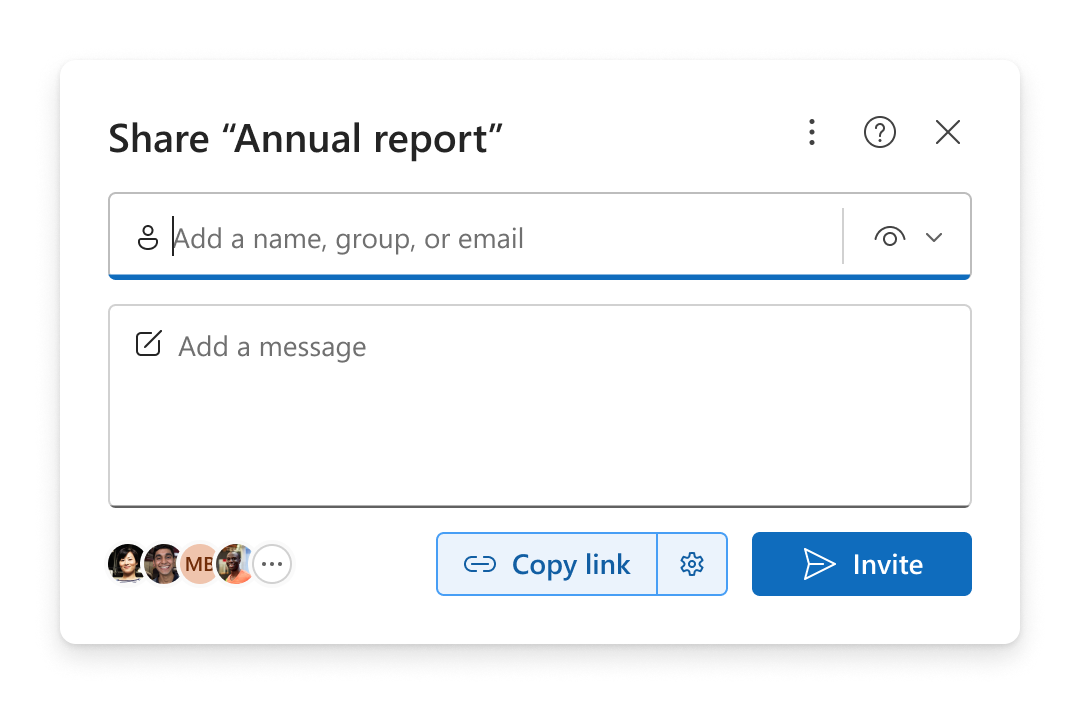
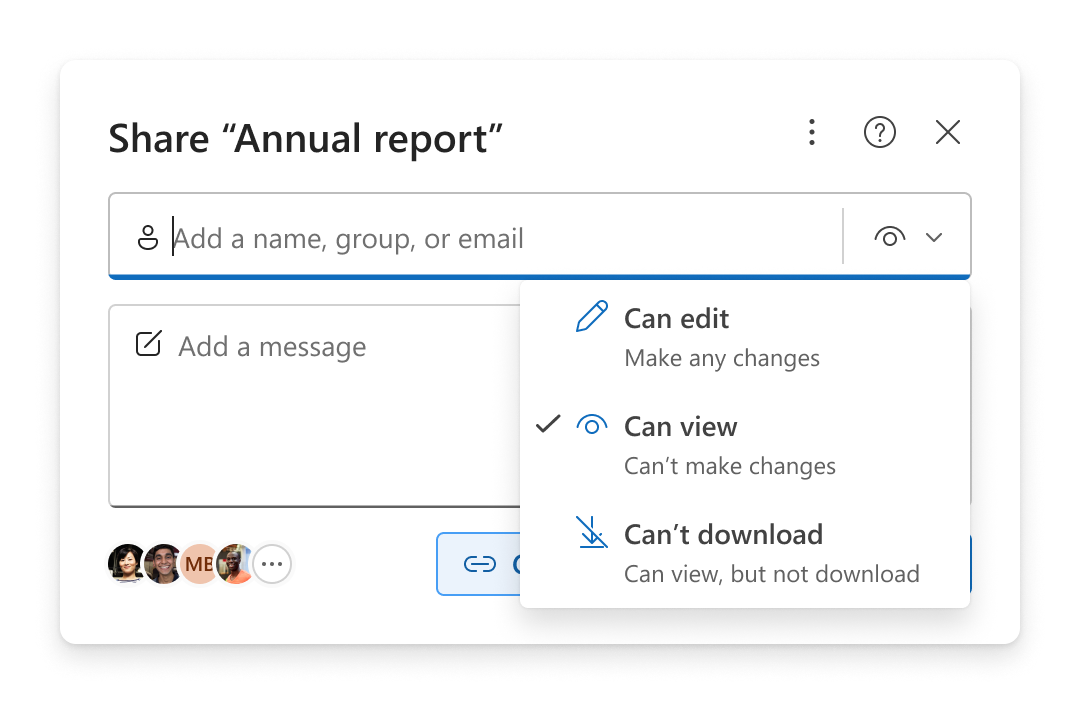
Select the permission icon next to the Add a name, group, or email area to open a dropdown list of options for permission levels. The permission you select will apply to both the invite you can send by selecting Invite and the link you can copy by selecting Copy link.
-
Can edit lets people make changes to the item. They will also be allowed to share the item with others.
Note: If you're sharing a folder, people with editing permission can copy, move, edit, rename, share, and delete any item in the folder they can access.
-
Can view lets people only view the item. People won't be able to edit it.
-
Can review lets people view the item, leave comments, and make suggestions, but they can't edit the item.
Notes:
-
This option is only available for Word documents.
-
If someone already has editing permissions for the document, selecting Can review won’t prevent them from making edits, and the file will still open in edit mode. You can change permissions in Manage Access.
-
-
Can't download lets people view the item, but they can’t download it to their device.
Notes:
-
This option is only available for OneDrive for work or school.
-
People can still download the item if they have an existing editing permission to the item. You can view and manage permissions and links in Manage access.
-
Administrators can control what types of files can have the "block download" setting.
-
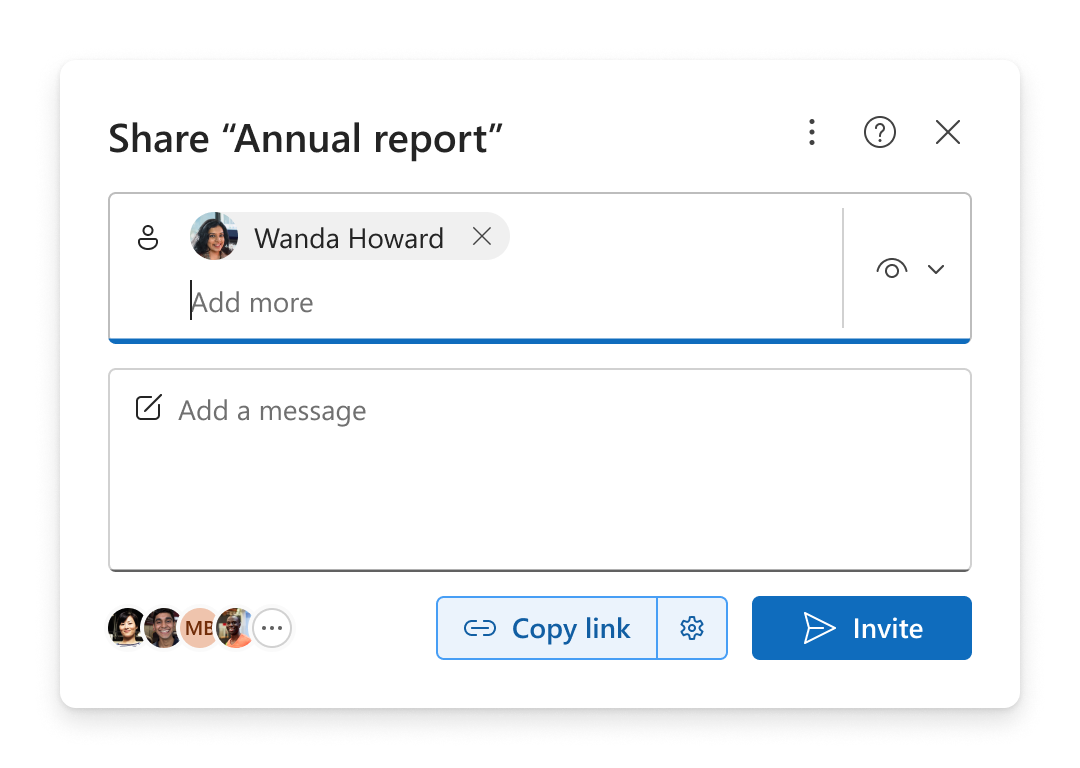
Email an invite to an item
Inviting people is a simple way of giving access to an item to only the people you select.
-
Add people in the Add a name, group, or email area.
-
Review or update the permission you want to give by selecting the permission icon.
-
Optionally, add a note in the message box.
-
Select Invite.
-
The people you added will receive an automated email from you inviting them to access the file.
Notes:
-
Only the people you added or those with existing access will be able to access this invitation.
-
Once they’ve been invited, you can easily update or remove individual access in Manage access.
-
Inviting people is the same as the experience previously known as Grant access.
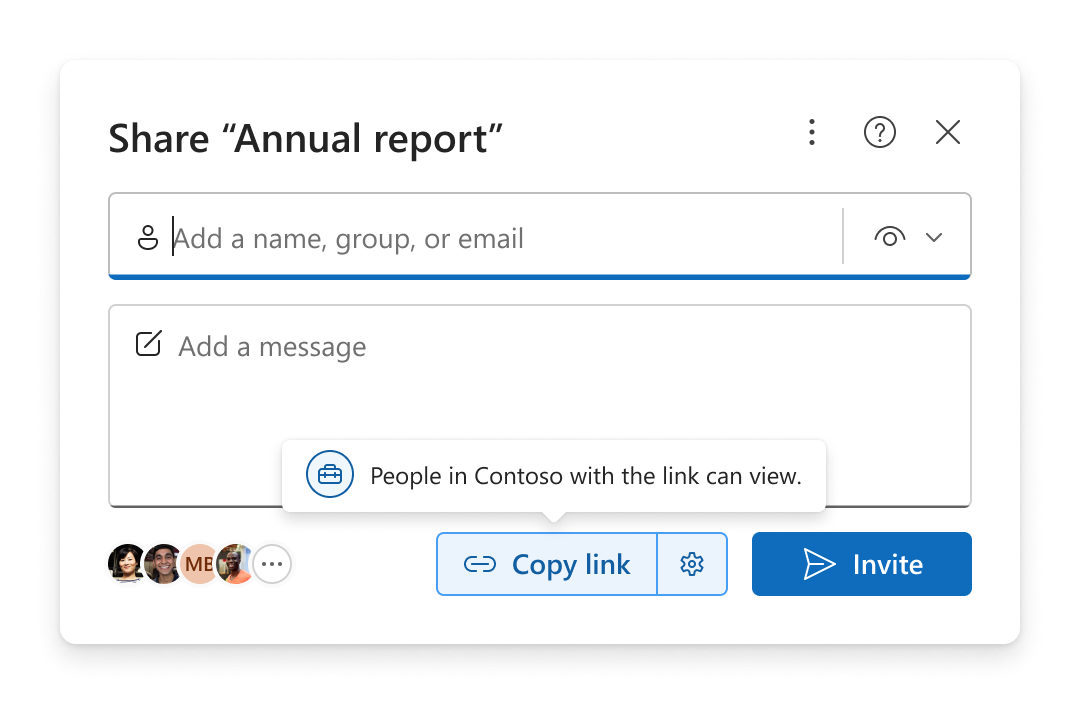
Copy a link to an item
Links are another way to share an item with the audience that you choose.
-
Review or update the permission you want to give by selecting the permission icon.
-
Review or update the link settings by selecting the

Tip: To quickly see the link type before copying the link, hover over Copy link.
-
Select Copy link.
-
Paste the link anywhere you want to send it (for example in a Teams message or an email).
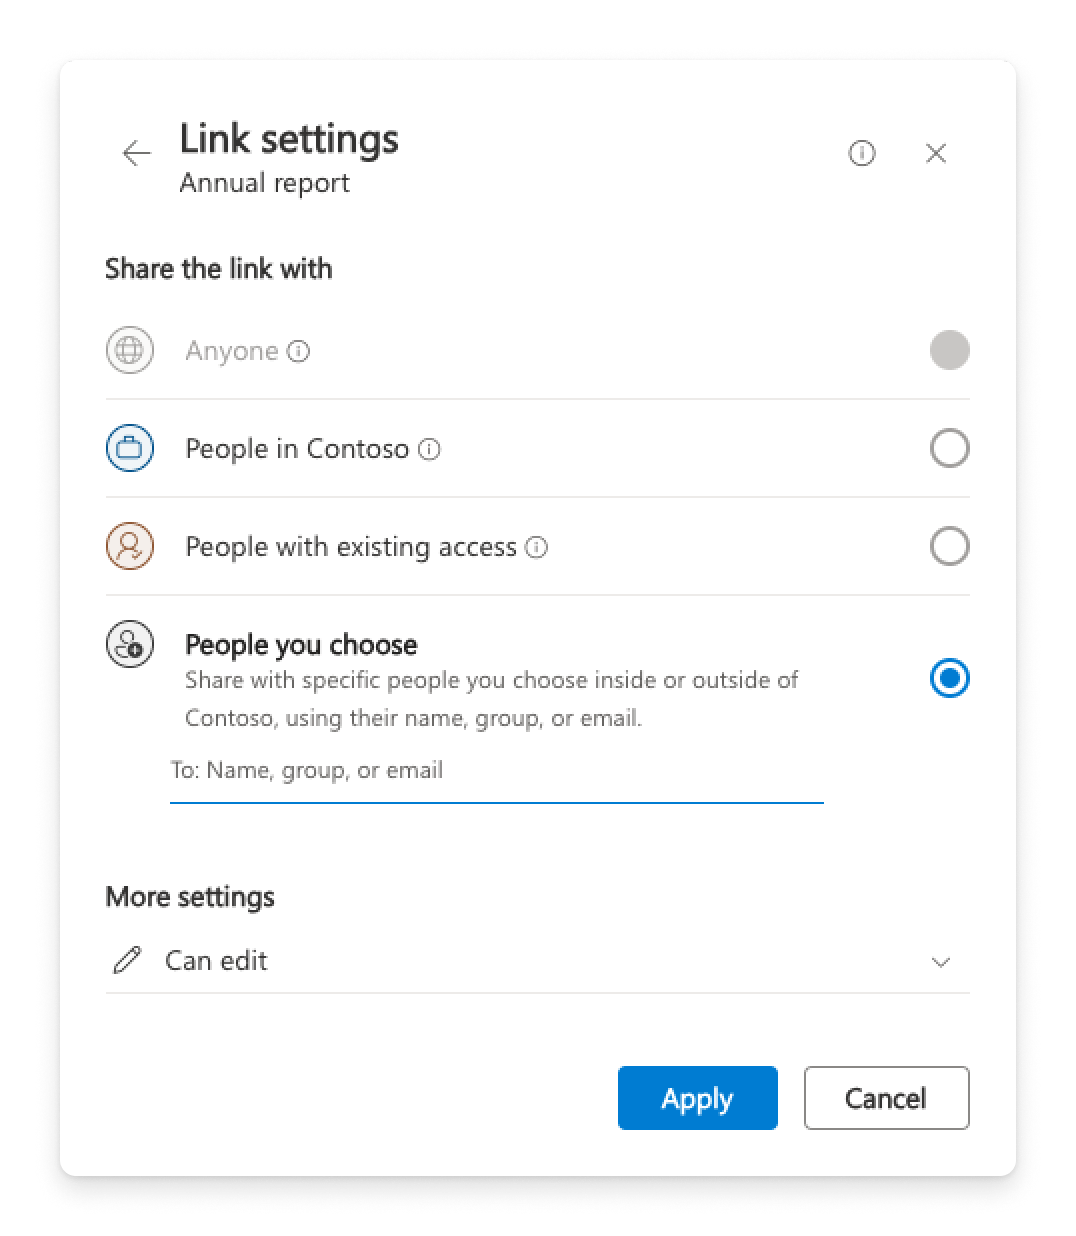
Link settings
There are different link options to choose from.
Note: If some options aren’t available, the admin for your organization or SharePoint site may have restricted it. For example, they may choose to remove the Anyone option to prevent forwarding links outside of your organization.
-
Anyone gives access to anyone who receives the link, whether they receive it directly from you or forwarded from someone else. This may include people outside of your organization.
-
People in your organization with the link gives access to anyone who has an account from your organization and the link, whether they receive it directly from you or forwarded from someone else. They must be signed into their work or school account, like “someone@contoso.com”.
-
People with existing access gives access to people who already have access to the document or folder. The link works only for them. It does not change any permissions. This is helpful when sending a link again to someone who already has access.
Note: If the item has already been shared, the profile images or initials of the people and groups it's shared with will appear here. You can select one of the icons to open Manage Access, where you can review and manage the people with existing access.
-
People you choose gives access to only the people you specify by name, group, or email. If someone forwards the link, only people who already have access to the item will be able to use the link.
Note: If you select this option, select Apply then add names to the Add a name, group, or email area. Then select Copy link.
Depending on which link type is selected, there may be optional settings available.
-
Set expiration date lets you set a date for the link to expire. After the date you set, the link won't work and you'll need to make a new link or reshare with people so they can continue to access the file.
-
Set password lets you set a password to access the file. When a user clicks the link, they will be prompted to enter a password before they can access the file. You'll need to provide this password separately to anyone you want to share the file with.
After you select your settings, select Apply to update the link.
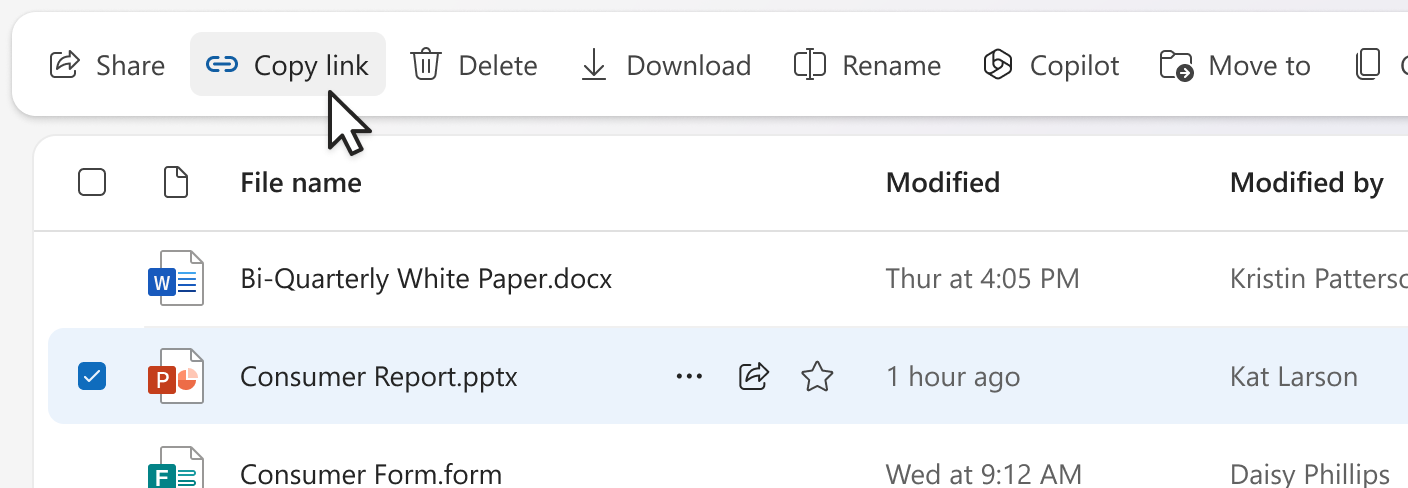
Quickly copy a link
There are two shortcuts for copying a link to an item from a SharePoint library or your OneDrive:
In the list or tiles view:
-
Select an item row or tile.
-
Select Copy link from the command bar above the files view.
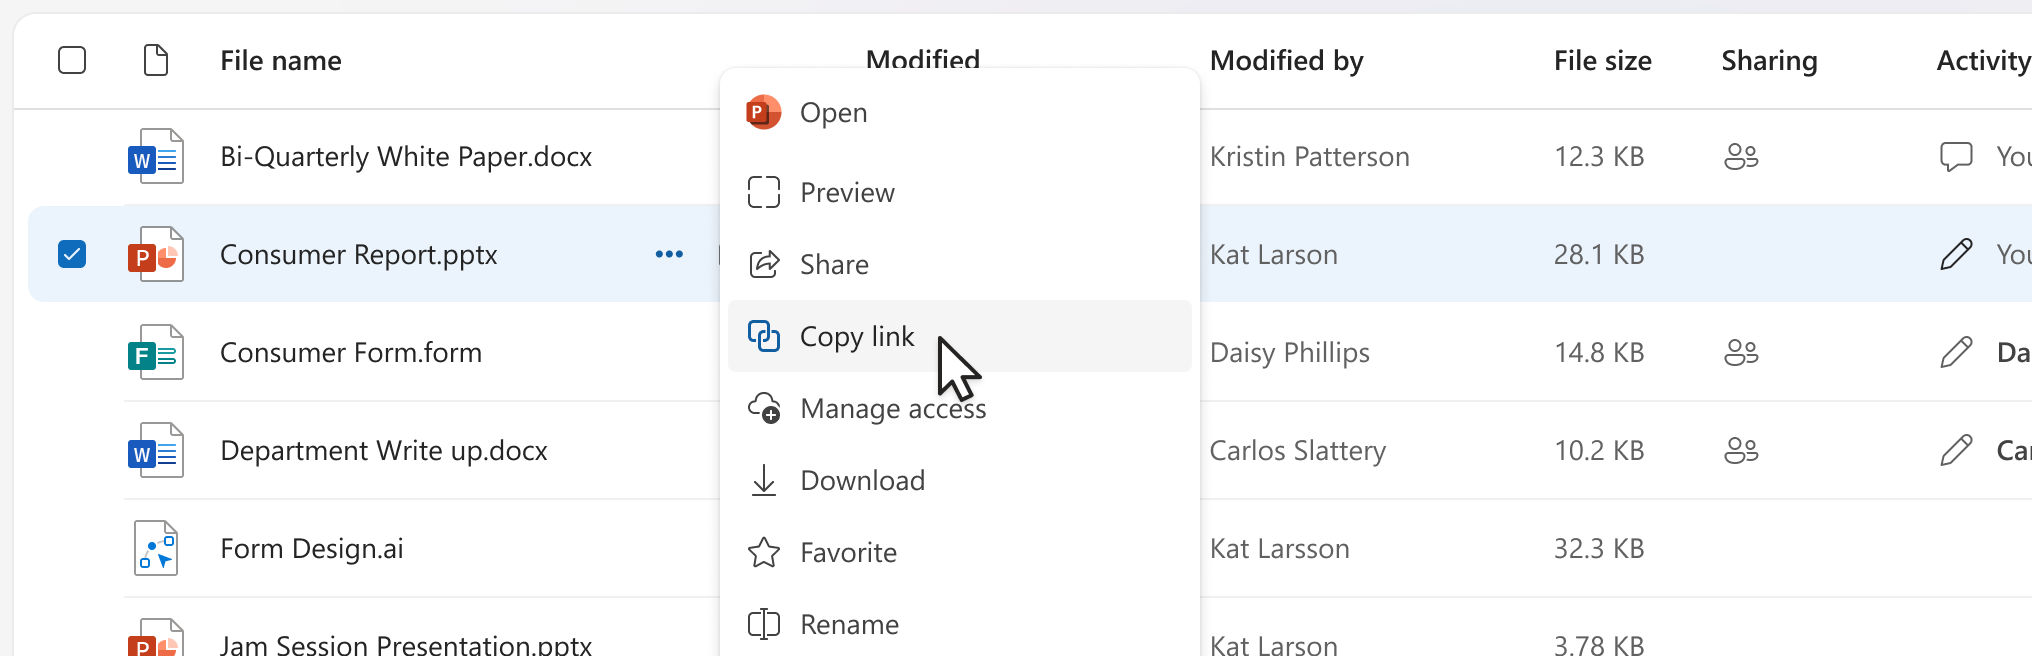
In list view:
-
Hover or select an item row.
-
Select the more actions icon.
-
Select Copy link from the action menu.
If inside an open Microsoft 365 file (such as a PowerPoint, Word, or Excel document):
-
Select
-
Then select Copy link.

Selecting Copy link will automatically copy the link to your clipboard with the default sharing settings selected. If you want to make changes to the link, go to
Note: If you select People you choose, you must then select people you want the link to work for directly in the
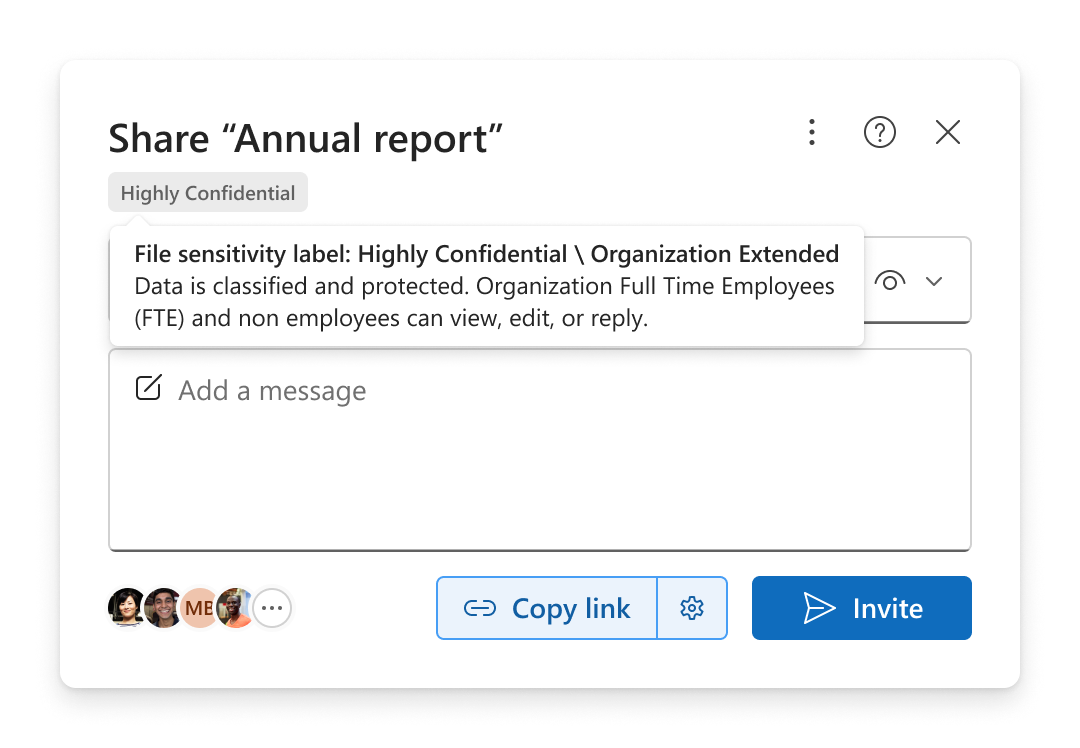
Sensitivity labels
After you select
Sharing outside of your organization
If your organization lets you to share an item with people outside of your organization, there are two ways to do it after selecting
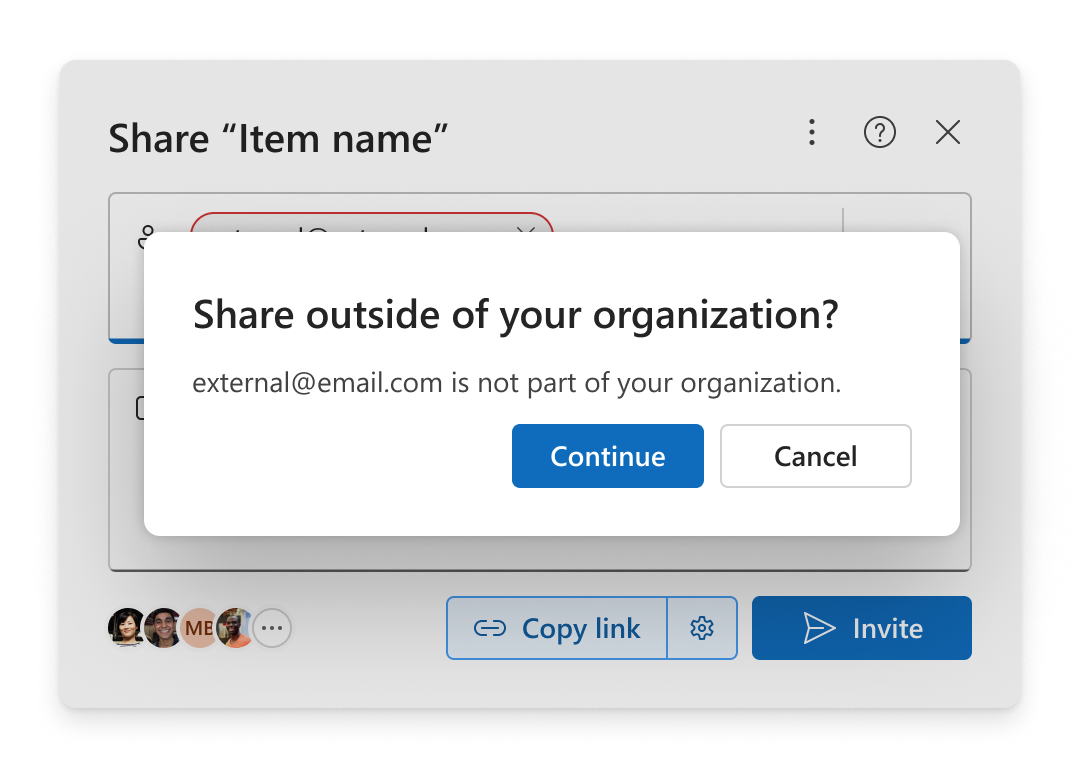
Invite
Add the emails to the Add a name, group, or email area and select Continue.
Copy link
-
Open
-
Select People you choose or Anyone.
-
Select Copy link.
-
Paste the link somewhere for the person outside of your organization to use it, like in a Teams message or email.
If you select People you choose, add the emails to the Add a name, group, or email area before you copy the link.
Note: You can’t share to outside of your organization if People in your organization is selected in the sharing settings.
–––––––––––––––––––––––
Related Topics
Share OneDrive files and folders
Share SharePoint files or folders


