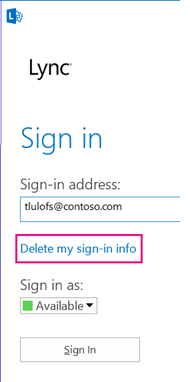
Sign in to Lync for the first time
Your Lync sign-in information is usually configured automatically when Lync is installed. But you might have to manually start Lync the first time. Here’s how:
-
Log on to your organization’s network.
-
Click Start > All Programs > Microsoft Lync > Lync 2013.
-
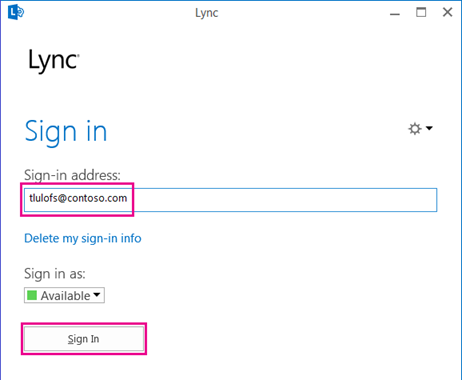
You should now see the Lync sign-in screen.
-
If the sign-in address box is already filled in, confirm that the address shown is correct.
-
If it’s not correct, or if the box is empty, enter your sign-in address.
-
If an empty password box is displayed, add your password.
-
Then click Sign In.
Close or exit Lync
When you’re finished using Lync, you can close the display, sign out of your session, or exit from the program, all from the File menu. The following table explains the differences in the options.
|
Option |
How to perform it |
What it does |
|
Exit |
In the Lync main window, click the arrow next to the Options |
Ends your Lync session and shuts down Lync on your computer. After exiting, if you want to restart Lync, click Start > All Programs > Microsoft Lync > Lync 2013. |
|
Close |
On the Lync main window:
or
|
Closes your Lync display but lets the Lync session identified with your user ID continue to run. This is so you can continue to get notifications and interact with others. You can get the display back at any time by clicking the Lync icon on the taskbar, or notification area at the bottom of your screen. |
|
Sign out |
In the Lync main window, click the arrow next to the Options button, and then click File > Sign Out. |
Ends the Lync session associated with your user ID, but Lync continues to run in the background. When you sign out, the sign-in window will appear. Tip: Click Delete my sign-in information when you sign out to remove the record of your logon ID and password from the computer’s memory. Doing this might make it easier for support people to troubleshoot sign-in issues. It can also help ensure your sign-in information is more secure by making it difficult for unauthorized users to log on with your credentials. |
Change the “Automatically start Lync” option
To change Lync startup behavior:
-
In the Lync main window, go to Options
-
Check or un-check the options Automatically start Lync when I log on to Windows and Show Lync in the foreground when it starts.
Reset or change your password
If you forgot your password, or just want to change it, contact your workplace technical support—typically the person who set up your Lync account for you. Provide them with this link: Reset a user's password in Active Directory.
Sign in to Lync with a smart card
Some organizations now use a multi-step sign-in process, called two-factor authentication, to increase security for their Lync 2013 users. If you’re expected to use this option, you’ll need a “smart card” to sign in to Lync. Smart cards come in two varieties, physical and virtual:
|
Smart card |
Details |
|
Physical |
About the size of a credit card. You insert it into a smart card reader (usually built into your computer) when you log in. |
|
Virtual |
Not a material object, but an electronic identifier that gets written to a special chip on your computer, which in essence builds the smart card into your computer. Available only for use with Windows 8 computers that contain the TPM (Trusted Platform Module) chip. Since each virtual smart card is associated only with the device it’s installed on, a separate card will need to be enrolled for each Windows 8 computer you use. |
If you need a smart card, your domain system administrator or IT support team should be able to tell you which kind you’ll need and where to get it.
Confirm that your smart card has been enrolled
Before you can sign in with a smart card, the card must be “enrolled”—that is, your user credentials have to be identified with the card. This is the case whether the card is physical or virtual. This process may already have been carried out by your domain system administrator or IT support team. Check with them if you’re not sure.
Sign in with your smart card
-
Type your Lync ID in the address box and click Sign In.
-
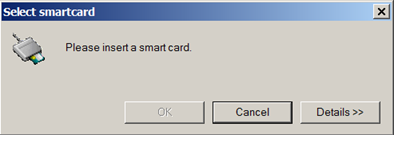
You’ll now see a pop-up window introducing the smart card part of the sign-in process, and, if you are using a physical smart card, you should get a request to insert your smart card into the card reader. Depending on how your security was set up, the request will probably look something like this:
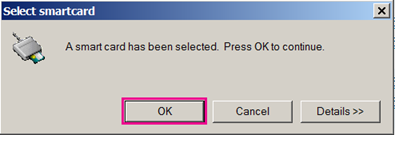
Insert your card and click OK when you get confirmation that your computer has detected the smart card.
-
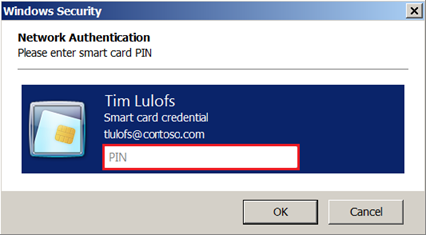
(This step applies to both virtual and physical cards): Type in your smart card personal identification number (PIN) and click OK. (Ask your domain system administrator what PIN to use if you haven’t received it.)
Note: If you get an error message saying that your user ID or password is not recognized, select Delete my sign-in info on the sign-in page, then sign in again. This will erase any sign-in credentials from your computer’s memory, which may clear up the problem.


