
Create an assignment in Microsoft Teams for Education and assign it to individual or small groups of students in a class. Groups turn in one copy of the assignment that can be graded separately or together.
Create a new assignment
-
Navigate to your desired class team and select Assignments.
-
Select Create > Assignment.
Create a group assignment
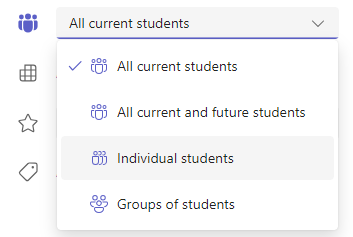
Select the student dropdown under Assign to. By default, All Students will be selected. Select Groups of students.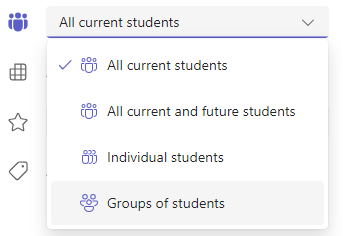
Choose whether you would like to create groups Manually or Randomly.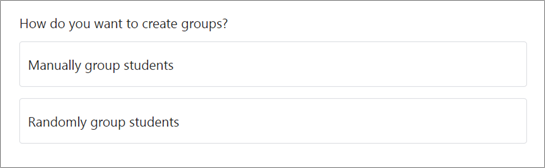
If you chose Randomly group students:
-
Enter number of groups, then select Create groups.
-
Review the groups you've created.
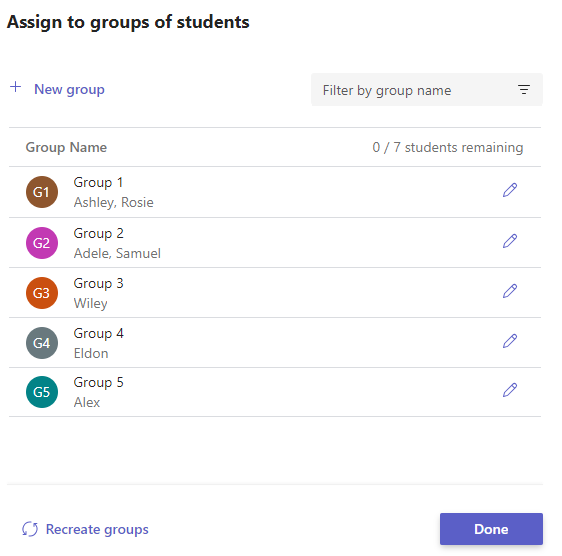
Select Edit
Select Recreate groups to start over.
Select + New group to add another group. You will need to remove students from existing groups first in order to create a new group and add members. -
When everything looks good, select Done.
If you decide you need more edits, select Groups of students again. -
Finish adding details to your assignment, then select Assign. Note that once an assignment has been distributed to students, you can no longer edit groups.
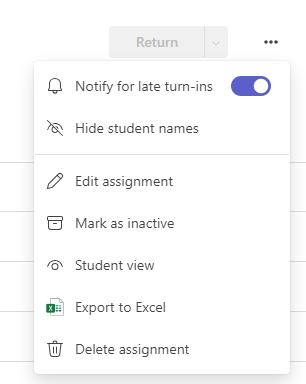
Tip: You can preview how your assignment will look to students by opening the assignment and selecting More options

If you chose Manually group students:
-
Select Create groups.
-
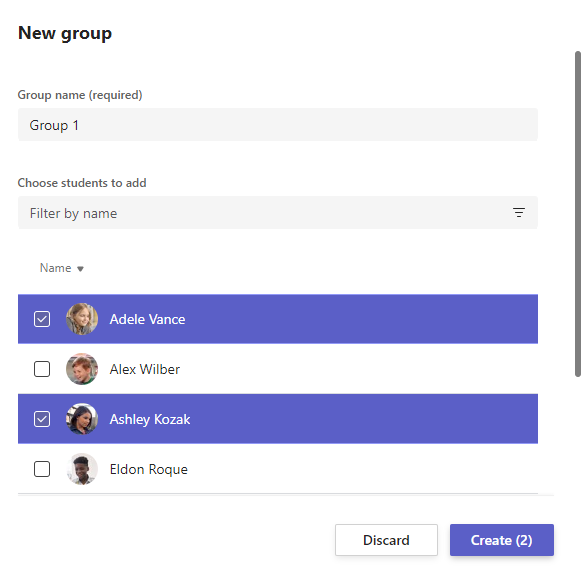
Edit the default group name, if desired.
-
Type in the search box to pull up student names, or scroll. Select the checkboxes next to the students you want to add to this group.
-
Select Create.
-
When you're done, select + New group and repeat Steps 2 and 3 until all students have been assigned to a group.
-
Review the groups you've created.
Select Edit
Select Recreate groups to start over. -
When everything looks good, select Done.
If you decide you need more edits, select Groups of students again. -
Finish adding details to your assignment, then select Assign. Note that once an assignment has been distributed to students, you can no longer edit groups.
Tip: You can preview how your assignment will look to students by opening the assignment and selecting More options
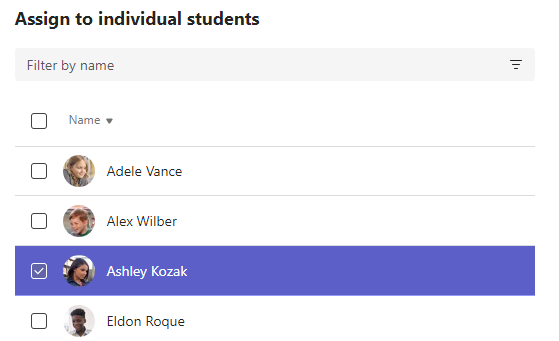
Assign to individual students
Select the student dropdown under Assign to. By default, All Students will be selected. Select student names or type to search for a student.
Note: You can only assign work to individual students in one class at a time.
-
Once you've selected the students, finish adding details to your assignment.
-
Select Assign. The students you chose will be notified of their new assignment.


