Symptoms
When you configure junk email list settings in the Group Policy Management Console, these policy settings are correctly deployed to client workstations (which are determined by examining the Windows registry). However, when you start Microsoft Office Outlook, these policy values are not used by Outlook.
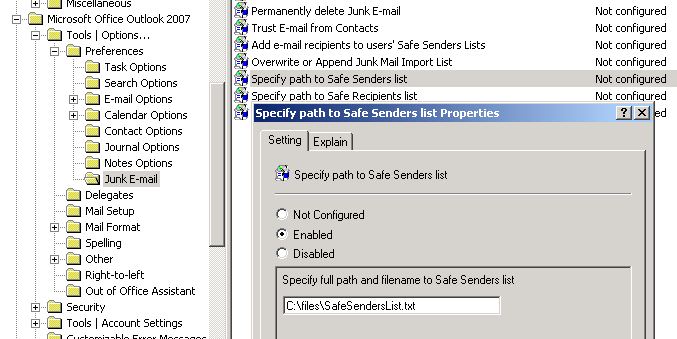
For example, assume that you configure a Safe Senders list by using Group Policy. (The screen shot for this step is listed below).
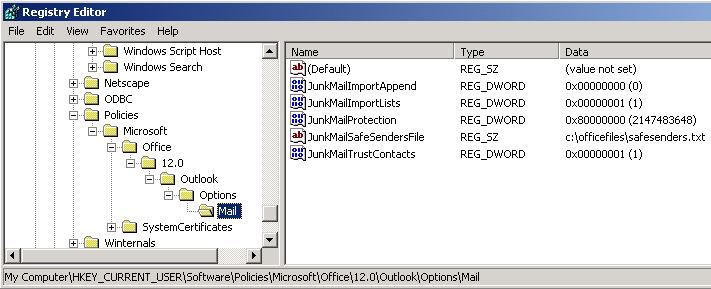
When you check the Outlook client, you find that this policy has been correctly configured in the registry (The screen shot for this step is listed below):
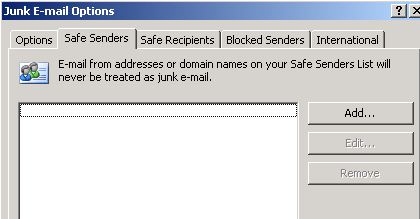
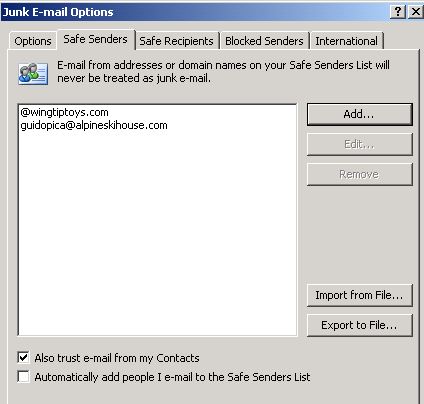
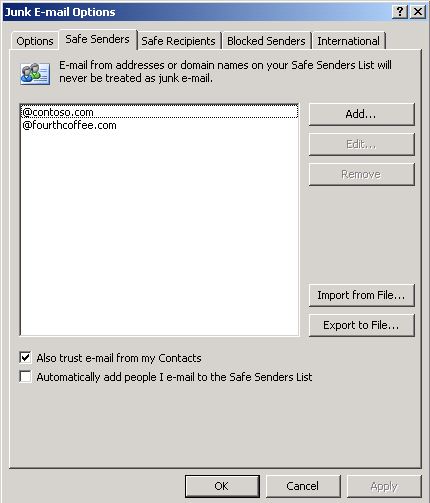
However, when you start Outlook and examine the Safe Senders list in the Junk E-mail Options dialog box, you see that the Safe Senders list has not been updated. (The screen shot for this step is listed below).
Cause
This problem occurs if you do not have either of the following subkeys in your system's registry when Outlook is started (together with the DWORD data that follows):
Key: HKEY_CURRENT_USER\Software\Policies\Microsoft\Office\1x.0\Outlook\Options\Mail or
Key: HKEY_CURRENT_USER\Software\Microsoft\Office\1x.0\Outlook\Options\Mail
DWORD: JunkMailImportLists Value: 1
Note The 1x.0 placeholder represents your version of Outlook (11.0 = Outlook 2003, 12.0 = Outlook 2007, 14.0 = Outlook 2010, and 15.0 = Outlook 2013).
The JunkMailImportLists registry value is the trigger that is used by Outlook to determine whether junk email list settings are applied when you start Outlook. If this value is missing or is set to zero (0), Outlook does not apply any of the junk email list policy settings that may exist in the registry.
Resolution
To resolve this problem, deploy the following registry data to the Outlook client:
DWORD: JunkMailImportLists Value: 1
Do this in one of the following subkeys:
HKEY_CURRENT_USER\Software\Policies\Microsoft\Office\1x.0\Outlook\Options\Mail or
HKEY_CURRENT_USER\Software\Microsoft\Office\1x.0\Outlook\Options\Mail
Note The 1x.0 placeholder represents your version of Outlook (11.0 = Outlook 2003, 12.0 = Outlook 2007, 14.0 = Outlook 2010, and 15.0 = Outlook 2013).
You can deploy this registry data by using one of the following methods:
-
Group Policy
-
A logon script
-
An update file (.msp) that is created by the Office Customization Tool (Outlook 2007 and later versions)
-
A transform file (.mst) that is created by the Custom Installation Wizard (Outlook 2003)
-
A maintenance file (.cmw) that is created by the Custom Maintenance Wizard
For more information about how to deploy this junk email settings trigger by using a custom Group Policy template, see the "More information" section.
More Information
To deploy the Outlook junk email settings trigger by using a custom Group Policy template, follow these steps:
-
Download and extract the custom Group Policy template for your version of Outlook from the Microsoft Download Center: Outlook 2010: outlk14-junkemailtrigger.adm Outlook 2007: outlk12-junkemailtrigger.adm Outlook 2003: outlk11-junkemailtrigger.adm
Note The Office 2013 Administrative Templates include the junk email settings trigger and do not require the custom Group Policy template.
-
If you do not already have the main Group Policy template for your version of Outlook, download and extract the latest template from the Microsoft Download Center: Office 2013: http://www.microsoft.com/download/details.aspx?id=35554 Office 2010: http://www.microsoft.com/download/details.aspx?id=18968
-
Add the .adm file that you downloaded in step 2 to your domain controller: Outlook 2013 = Outlk15.admx Outlook 2010 = Outlk14.adm Outlook 2007 = Outlk12.adm Outlook 2003 = Outlk11.admNote The steps to add the .adm or .admx files to a domain controller vary, depending on the version of Windows that you are running. Also, because you may be applying the policy to an organizational unit (OU) and not to the whole domain, the steps may vary in this aspect of applying a policy. Therefore, check your Windows documentation for more information.
-
Add the custom Group Policy template that you downloaded in step 1 to your domain controller: Outlook 2010 = Outlk14-junkemailtrigger.adm Outlook 2007 = Outlk12-junkemailtrigger.adm Outlook 2003 = Outlk11-junkemailtrigger.adm
Note The Office 2013 Administrative Templates include the junk email settings trigger and do not require the custom Group Policy template.
Note The steps to add the .adm or .admx files to a domain controller vary, depending on the version of Windows that you are running. Also, because you may be applying the policy to an organizational unit (OU) and not to the whole domain, the steps may vary in this aspect of applying a policy. Therefore, check your Windows documentation for more information.
-
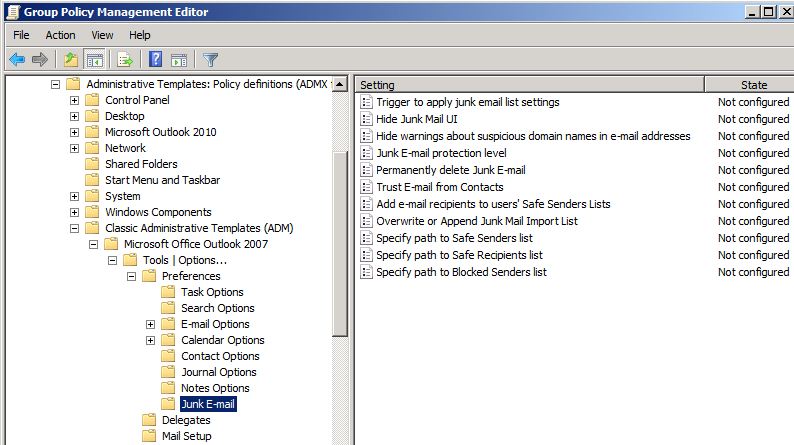
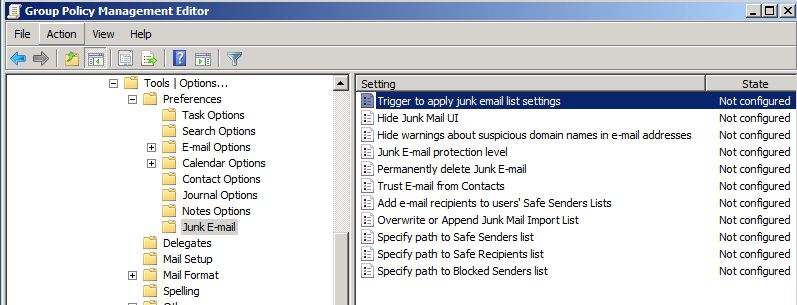
Under User Configuration, expand Classic Administrative Templates (ADM) to locate the policy node for your template. The following screen shot shows the Junk E-mail policy settings for Outlook 2007 in the Group Policy Management Console when both .adm files that are referenced in the previous steps are installed.
-
To configure the Junk E-mail options, double-click any policy setting in the details pane. For example, double-click Specify path to Save Senders list to configure the path of a text file that includes the list of domains and addresses that you want to appear on the Safe Senders tab in Outlook.
-
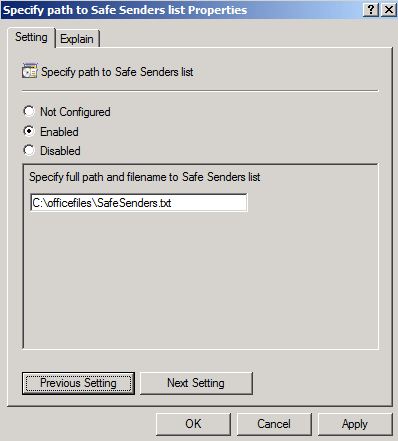
In the dialog box for the policy setting, click Enabled to enable the policy. For example, the following screen shot shows the path for the text file that is used to configure the list of safe senders in Outlook.
-
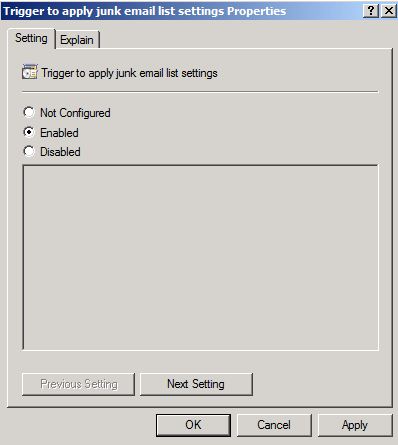
After you have configured the different junk email policy settings, double-click the Trigger to apply junk email list settings policy in the details pane. (The screen shot for this step is listed below).
-
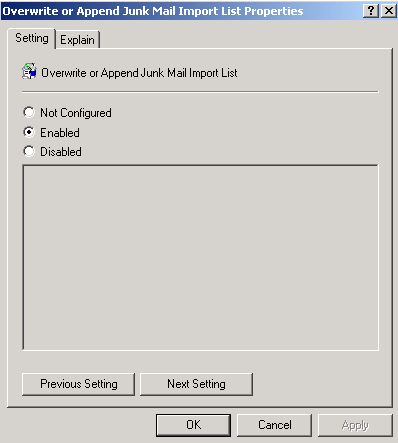
To enable this policy, click Enabled, and then click OK. (The screen shot for this step is listed below).
-
After you finish configuring your junk email policies, and they have been propagated to your Outlook clients, you can verify that the policies are available to Outlook by examining the following subkey in the registry:
HKEY_CURRENT_USER\Software\Policies\Microsoft\Office\1x.0\Outlook\Options\Mail
Note The 1x.0 placeholder represents your version of Outlook (11.0 = Outlook 2003, 12.0 = Outlook 2007, 14.0 = Outlook 2010, and 15.0 = Outlook 2013). The following screen shot shows the registry of an Outlook client on which several junk email policies have been configured. These include the trigger policy (JunkMailImportLists = 1) that forces Outlook to apply the junk email list policies.
-
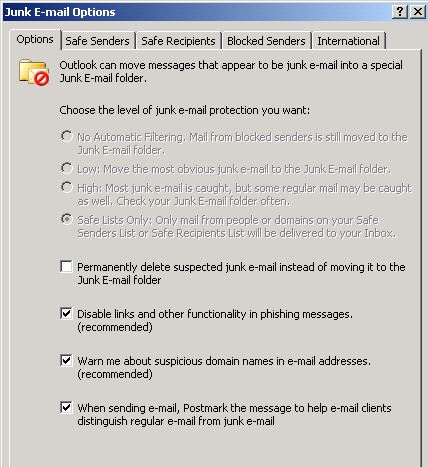
To finish your testing of this policy deployment, start Outlook, and then open the Junk E-mail Options dialog box (Tools - Options - Junk E-mail). The settings that you configured by using Group Policy are configured, but they are disabled so that users cannot modify them through the Outlook user interface. The following screen shot shows the junk email protection level configured to Safe Lists Only. However, this setting cannot be changed by a user because it is configured through Group Policy.
Note If a user adds a new entry to the Safe Senders, Safe Recipients, or Blocked Senders tabs in Outlook, the item will be removed if you are deploying the items for that tab by using Group Policy and if you also enable the Overwrite or Append Junk Mail Import policy. By enabling this policy, you force Outlook to overwrite items on the tab with the items that are specified in the list from the corresponding policy.
How to deploy the junk email list trigger to the non-policy location in the registry
You can also configure the junk email list trigger in the following non-policy location in the registry:
Key: HKEY_CURRENT_USER\Software\Microsoft\Office\1x.0\Outlook\Options\Mail
DWORD: JunkMailImportLists Value: 1
Note The 1x.0 placeholder represents your version of Outlook (11.0 = Outlook 2003, 12.0 = Outlook 2007, 14.0 = Outlook 2010, and 15.0 = Outlook 2013).
If you use this non-policy location, Outlook will change the value of JunkMailImportLists from 1 to 0 during the first restart after you configure this registry value. This behavior prevents Outlook from reimporting your deployed lists every time that you start Outlook.
However, when the JunkMailImportLists setting is deployed by using Group Policy, Outlook cannot change the value from 1 to 0 because the setting is being enforced by policy. Therefore, Outlook imports any lists that are deployed by policy every time that you start Outlook if the JunkMailImportLists setting is also deployed by policy.

