How to record a video
1. Select the recording icon in the bottom of the screen to begin recording.
A short three second count down will display, giving you time to prepare.
The recording icon will display as it does in the image below while you are recording.
Important: Video recordings for assignments are limited to a maximum of five minutes. A clock at the top of the recording window will begin counting down once a recording is started letting you know how much time you have left.
2. When you are finished with your recoding, choose the recording icon again to stop the recording.
3. Choose the Review button to watch to your recording.
4. From the review screen, you can edit your recording by doing the following:
-
Trim: Cut out sections of the recording you don't wish to include.
-
Delete Clip: Erases the clip entirely, giving you room to start over.
-
Add music: Choose from a variety of chill, energetic, fun, high tech, and inspiring tracks to enhance your video presentation.
5. Choose the Next button.
6. Name your recording. It will be uploaded to your assignment in a .webm file extension.
Once the video is uploaded, it will appear at the bottom of your instruction text box. You will now be able to proceed with creating an assignment by following the steps to on how to create an assignment in Microsoft Teams.
When the assignment is shared with them, your students will be able to review the video presentation.
How to start over
If you make a mistake recording the video and wish to start over you can do one the following options:
-
Choose the Record again button. Your previous attempt will be deleted and you can restart your video from the beginning.
-
On the review screen, select Delete clip. This will permanently erase the clip and you can start over.
Trimming a video recording
If there are some parts that you want removed from your recording, you don't have to delete the entire recording and start again. You can edit and cut-out portions of the video you don't wish to show by performing the following actions.
1. Follow the steps above to record a video of yourself for an assignment.
2. Choose the Review button.
3. Select the option to Trim.
4. Under your video recording, you will see a set of frames. Handles will display on either end of the recording showing where your video starts (in) and ends (out).
Drag these handles to a frame to set where you wish to start trimming and end the trim.
Choose the play button to review the section to ensure you are cutting out the correct frames.
5. Once you have a selection you are happy with, choose the Confirm trim button.
Warning: You will not be able to reverse this change once you've confirmed your selection.
The section will be cut from your video.
Adding music
Music can be added to your presentation during the video review process.
1. Follow the steps above to record a video of yourself.
2. Choose the Review button.
3. Select the option for Add music.
4. Song options will display in a window over your recording.
5. Choose the play button to preview the song. If you're happy with the selection, add a song track to your recording by selecting the add icon.
The song track will be added to your video presentation.
How to change the volume of music
The default volume setting for a track is 15. You can raise and lower the volume for the music by following the instructions below:
1. Once you've added a track to your video presentation, the Add music button will shift to read the name of your song selection.
2. Choosing this button will display the music window with the option to control the volume of the song track.
How to delete music from a recording.
1. Once you've added a track to your video presentation, the Add music button will shift to read the name of your song selection.
2. Select the button to display the music window.
3. Choose the Remove X option.
The music track selection will be removed from your recording.
Recording tools
Multiple tools and features are available to enhance your recording.
Stickers (emojis)
Choose the stickers icon
Stickers can be deleted by selecting the sticker and pressing the delete key on your keyboard.
Filter
Choose the filter icon
Switch to a different filter or choose the no filter icon to remove any filter effect.
Text
Choose the text icon
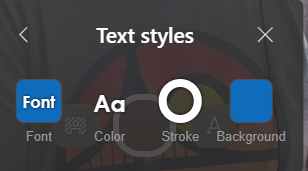
Once you've selected a text preference, you can edit the font, color, stroke, and background color to meet your unique creative specifications.
Text can be moved around and resized to fit anywhere on the recording screen.
To delete it, select the text and press the delete key on your keyboard.


