Overview
A StorSimple appliance is a highly available (HA) device that has redundant controllers, network ports, power supplies, and disks. This article describes how to use the Web UI to back up StorSimple configuration data to the cloud and how to restore it in a disaster-recovery scenario.
How to save an existing configuration file from the system
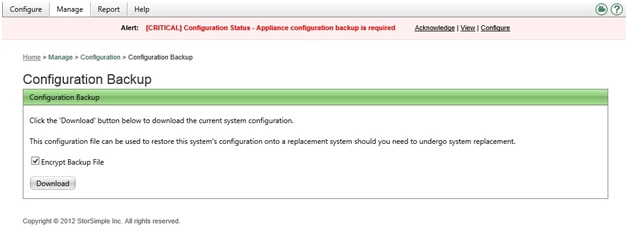
You should have a configuration backup available in a disaster-recovery scenario. To save the configuration of a StorSimple device, follow these steps:
-
Log on to the Web UI. To do this, click Manage, click Configuration, and then click Configuration Backup.
-
Click Download.
How to restore a volume by using the Web UI
Disaster recovery
Note If the configuration was taken from a different StorSimple device, and that system is up and running, the volumes on that system will be offline when a disaster recovery is performed.
-
To restore the configuration of the system, follow these steps:
-
Learn about Accessing the Web UI.
-
On the Setup Wizard page, click Next.
-
In the Appliance Name field, enter the name of the system, and then click Next.
-
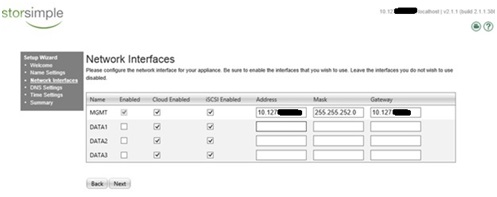
On the Network Interfaces page, enter the network interface configurations for the appliance, and then click Next.
-
On the DNS Settings page, enter the primary DNS server and secondary DNS server IP addresses in their respective boxes, and then click Next.
-
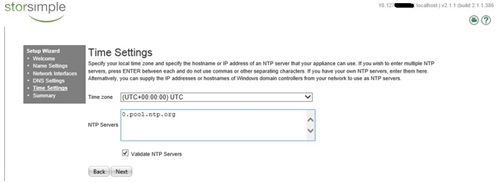
On the Time Settings page, select your local time zone in the Time zone list, and then enter the host name or IP address for the NTP server.
-
On the Summary and Next Steps page, confirm that the data that is entered is correct. After you are ready to continue, click Finish. You will be required to log back on to the system.
-
Log on to the system, and then go to step 2 to import the configuration backup file.
-
-
Import the configuration backup file.
-
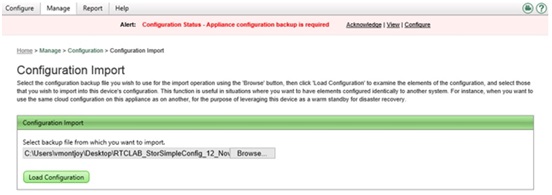
In the Web UI, click Manage, click Configuration, and then click Configuration Import.
-
Click Browse, and then select the configuration backup file that you saved in the "How to save an existing configuration file from the system" section.
-
After the file is populated, click Load Configuration.
-
Confirm that the Configuration Import page is correct, and then click Import Configuration. A message is displayed that indicates that the Configuration Import process was completed successfully.
-
-
Restore the Backup Registry.
-
In the Web UI, click Configure, click Cloud, and then click Configurations.
-
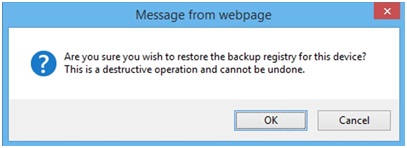
Click Restore Backup Registry. Note Do not click the Restore Backup Registry button more than one time.
-
When you receive the following message, click OK:
-
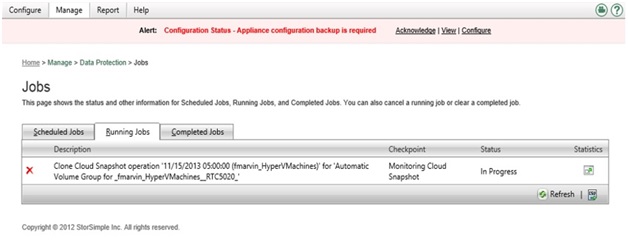
To check the status of the restore operation, click Manage, click Data Protection, and then click Backups.Note There are two checkpoints in the status of the restore:
-
Cloning Cloud Snapshot
-
Monitoring Cloud Snapshot
Click Manage, click Data Protection, and then click Jobs. On the Jobs page, click the Running Jobs tab to confirm the checkpoint.
-
-

