
Notes:
-
These instructions are for the older SharePoint Store app called the OneNote Class Notebook Creator. Microsoft has a newer version of the application that is now part of Microsoft 365 and shows up in the Microsoft 365 app launcher under the icon of Class Notebook. We encourage you to use the Class Notebook app that is part of Microsoft 365. When we add new features, they'll be added to only the new Class Notebook app. Microsoft will not be adding new features to the old SharePoint Store app.
-
Microsoft will continue to support the SharePoint Store app, in addition to making bug fixes when necessary. If your school uses Team Sites with the SharePoint Store app, you can continue using it as you have been in the past.
-
If your school needs to install the older OneNote Class Notebook Creator SharePoint Store app for use in Team Sites, please contact Microsoft Support for OneNote and they will be able to provide you with the specific instructions to install the SharePoint Store app.
Note: This article has done its job, and will be retiring soon. To prevent "Page not found" woes, we're removing links we know about. If you've created links to this page, please remove them, and together we'll keep the web connected.
The OneNote Class Notebook app is an app for OneDrive for Business that helps teachers set up OneNote for their classes. This app creates a class notebook, which includes three types of sub-notebooks:
-
Student Notebooks – private notebooks that are shared between each teacher and their individual students. Teachers can access these notebooks at any time, but students cannot see other students' notebooks.
-
Content Library – a notebook for teachers to share course materials with students. Teachers can add and edit its materials, but for students, the notebook is read-only.
-
Collaboration Space – a notebook for all students and the teacher in the class to share, organize, and collaborate.
Learn how OneNote notebooks can transform learning in your class.
What you'll need
-
IMPORTANT: Please be sure to install this important public update for all OneNote 2013 desktop clients in your school: https://support.microsoft.com/kb/2880458.
What you can expect
This guide helps you to install the OneNote Class Notebook app for teachers so they can easily create class notebooks on OneDrive for Business.
-
Teachers will be able to create class notebooks on a OneDrive for Business account where they have Full Control permissions.
-
All notebooks created by the OneNote Class Notebook app will be located within a root-level folder on the site called EduOneNoteAppDocuments.
Tip: With the current release, a Class notebooks entry will automatically be added to the Quick Launch navigation on the left. When clicking on this shortcut, users will be navigated to the EduOneNoteAppDocuments folder. All class notebooks that a particular teacher has created will live inside of this folder.
-
All notebooks within this folder will be grouped into sub-folders named by the teacher's account address followed by _courses (for example, "Steven.Foret@school.edu_courses").
Follow the steps below to install the OneNote Class Notebook app from the Office Store.
Add the App for all SharePoint sites in your school
Required Organizational account permission: Tenant Administrator; Site Collection Administrator of App Catalog.
-
Open Internet Explorer 10 or 11, and then go to your school's Microsoft 365 SharePoint site.
-
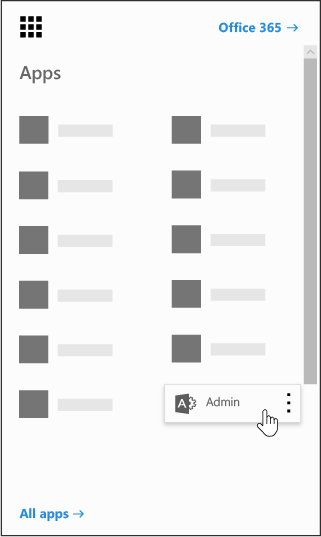
Click the app launcher

-
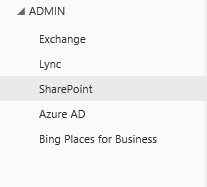
Click SharePoint on the lower left of the Admin page.
-
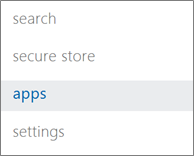
Choose apps on the left.
-
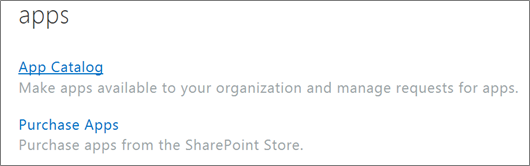
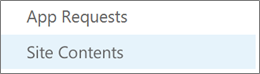
Click App Catalog, and then click Site Contents on the left side of the page.
-
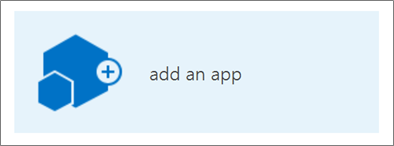
Click add an app, and then on the left, click SharePoint Store.
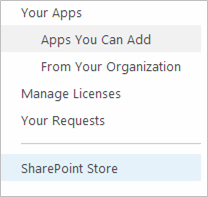
Note: The option to Add an app will appear only if you are the Site Collection Administrator for the Team Site. If the option is not visible, go to the SharePoint admin center to grant the active account Site Collection Administrator permissions.
-
In the upper right, search for OneNote Class Notebook.
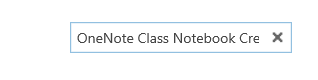
Note: An earlier version of this app called the OneNote Setup Tool for Teachers BETA may also appear in the results. Going forward, the only supported version is the OneNote Class Notebook.
-
When you find OneNote Class Notebook app, click Add It.

-
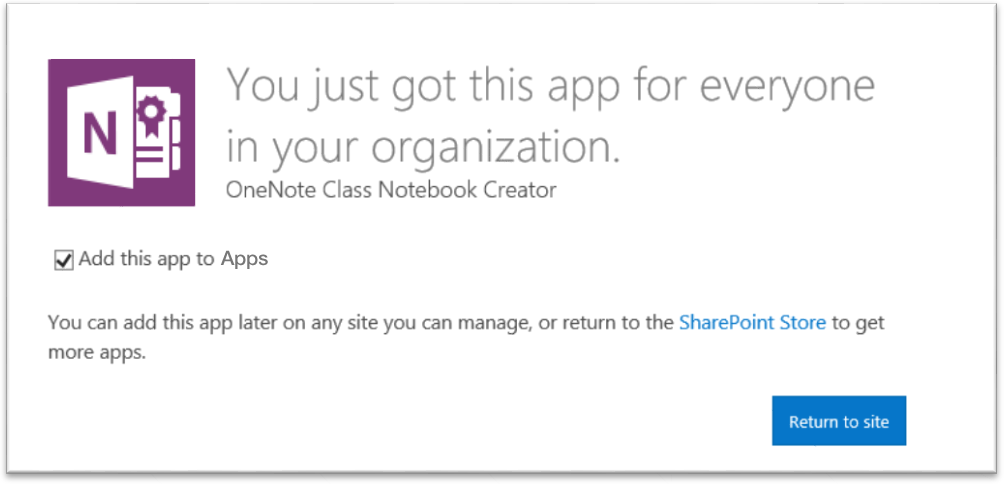
Keep Add this App to Apps checked, and then click Return to site.
-
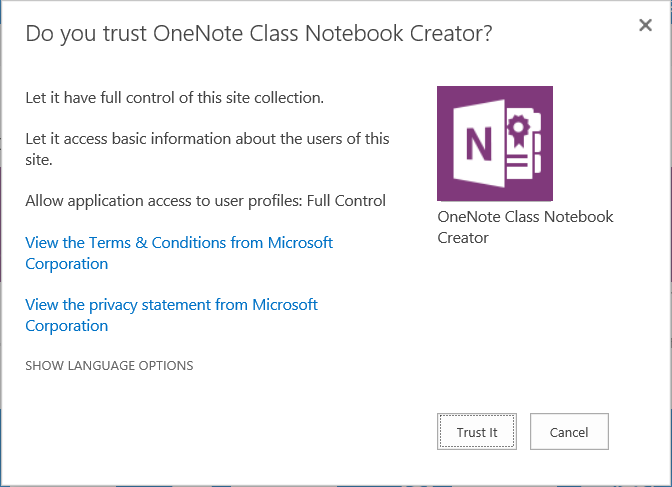
When prompted to trust the OneNote Class Notebook app, click Trust It.
-
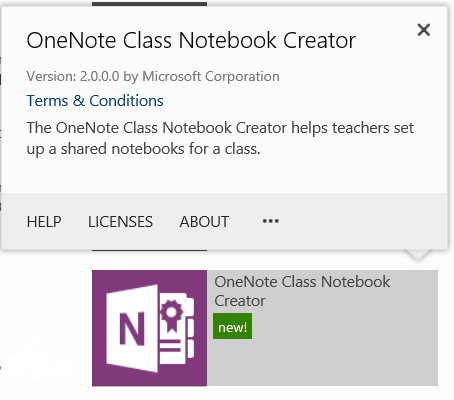
Next, locate the OneNote Class Notebook app, mouse over that item, click

-
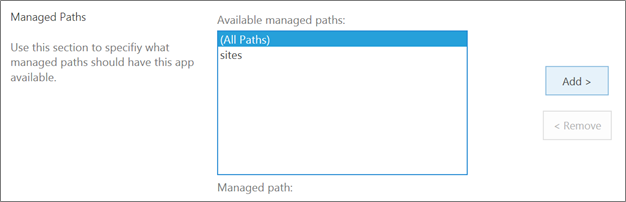
Under Available managed paths, select (All Paths) > Add > OK.
Note: This is a simple way to make the app available to all SharePoint paths at once. You may customize this differently, if you prefer.
-
On the next screen, click Trust It to give OneNote Class Notebook app the appropriate permissions to setup notebooks on your school SharePoint Online sites.
The OneNote Class Notebook app is now ready for your teachers to set up their class notebooks. To help them get started, your teachers can find instructions here:
Learn how your teachers can get started with the OneNote Class Notebook after it's installed.
Feedback and questions?
Please send any questions or feedback about OneNote Setup Tool for Teachers to OneNoteEDU@microsoft.com – we'd love to hear from you.
To learn more, see the FAQ about the OneNote Class Notebook app.


