You can label and protect files in File Explorer in Windows by using the Microsoft Purview Information Protection File Labeler. This method supports protecting Office documents, PDF files, images, text files, and a wide range of other files and is a convenient way to label and protect multiple files at once. For information about labeling files and emails directly within Microsoft 365 Apps, see Apply sensitivity labels to your files and email.
When you use information protection file labeler, you can quickly label and protect a single file, multiple files, or a folder.
Label and protect one or more files
The label and protection that you apply to a file will stay with a file, even if you email the file outside your organization or save it to another location. You can use the following steps to apply a label for the first time or to change the label for already protected files.
-
To open File Explorer, select the file icon on the taskbar or Start menu, or press the Windows logo key
-
In File Explorer, right-click the single file, group of files, or folder that you want to protect, and then select Apply sensitivity label with Microsoft Purview.
Note: When you select a folder, all the files in that folder and any subfolders are automatically selected for the labeling and protection options that you set. However, new files that are created in that folder or its subfolders in the future will not be automatically configured with those options.
-
In the Microsoft Purview Information Protection File Labeler dialog box, use the labels the same way you would in a Microsoft 365 App, which sets the label and protection as defined by your administrator.
-
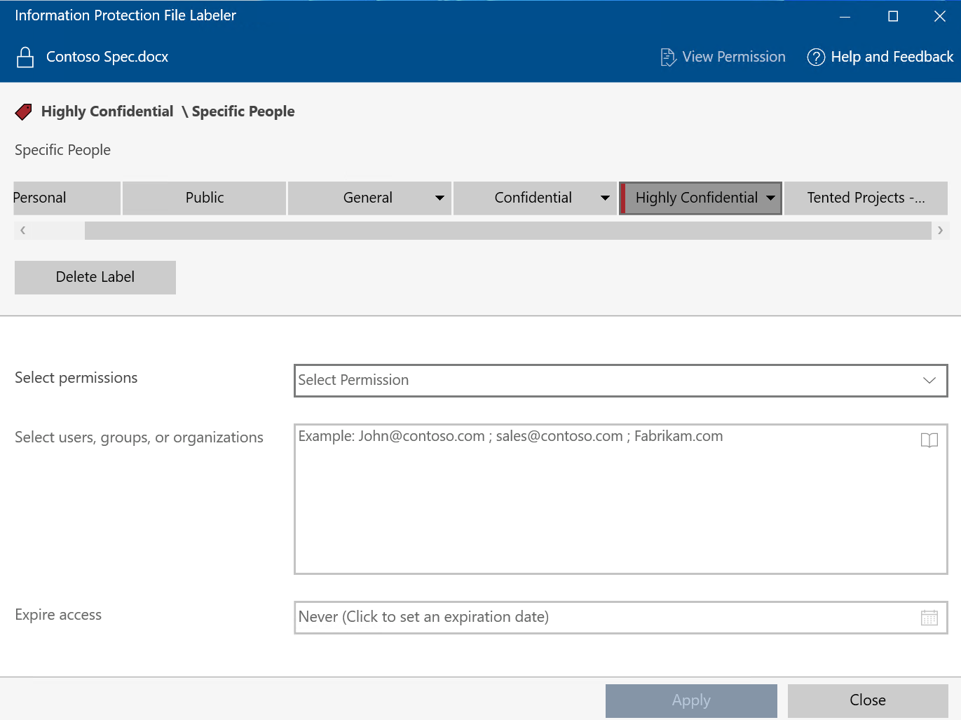
You can specify your own protection settings on labels that your administrator has defined can be set by users. To specify your own protection settings, select Protect with custom permissions . Then specify the options.
|
Option |
Description |
|---|---|
|
Select permissions |
For file types that can support labeling even without protection (see supported/unsupported file types): Select the level of access that you want recipients to have when you protect the selected file or files. The levels of access are Viewer, Reviewer , Co-Author , Co-Owner , or Only me . For other file types: The only option for permissions is generic protection , which authenticates that the user has permissions to view the file and then opens the file in a supported application. When the file opens, the recipient is granted access and asked to honor the View , Edit, Save As, Print , and Copy permissions. |
|
Select users, groups, or organizations |
Specify the people who should have the permissions you selected for your file or files. Type their full email address (John@contoso.com), a group email address (sales@contoso.com), or a domain name (contoso.com) from the organization for all users in that organization. Alternatively, you can use the address book icon to select users or groups from the Outlook address book. |
|
Expire access |
Select this option only for time-sensitive files so that the recipients can't open your selected file or files after midnight (your current time zone) on the date that you set. Because you applied encryption to the file, you will be considered the owner of the file and still be able to open the original file after the expiration date. |
5. Click Apply and wait for the Work finished message to see the results. Click Close .
The selected file or files are now labeled and protected, according to your selections. In cases when adding the protection changes the file extension, the original file in File Explorer will be replaced with a new file that has a lock icon. For example: the extension to a file named “ capture.png ” would change to “ capture.ppng .”
If you change your mind about the label and protection settings you applied, or you later need to change your settings, simply repeat this process with your new settings.
View label and protection on a file or folder
-
In File Explorer, right-click the file or folder for which you want to view label and protection settings, and then select Apply sensitivity label with Microsoft Purview .
-
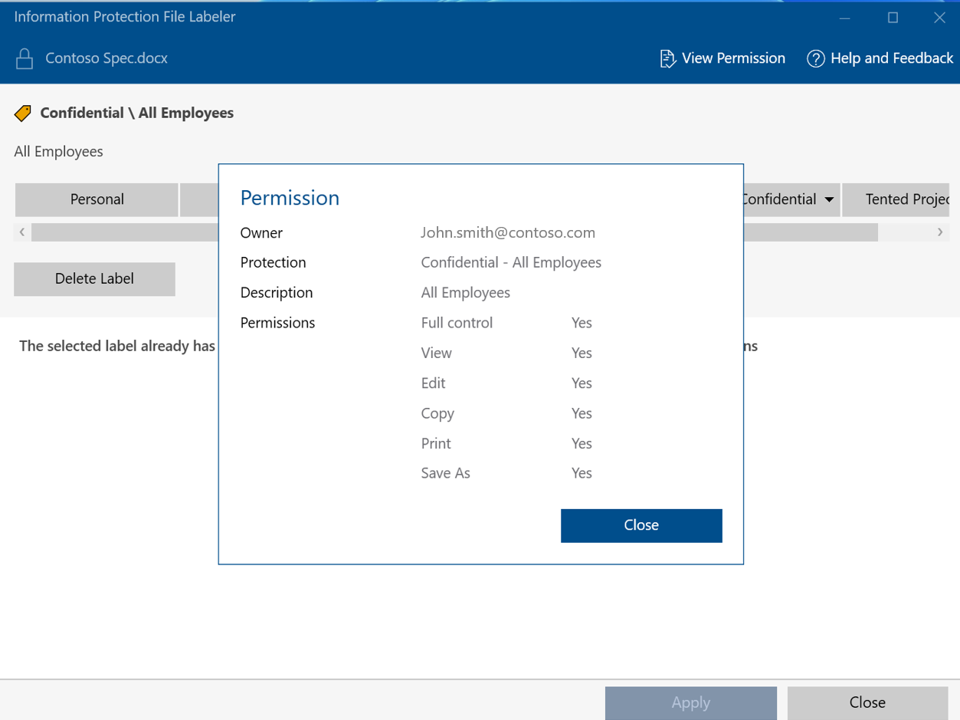
In the Microsoft Purview Information Protection File Labeler dialog box, select View Permissions to see the owner of the file or folder, the label applied, and the file permissions.
Remove label and protection from a file or folder
When you use information protection file labeler, you can quickly remove labels and protection from a single file, multiple files, or a folder. When you select a folder, all the files in that folder and any subfolders it has are automatically selected.
When the label that you remove is configured to apply protection, this action also removes protection from the file. You might be prompted to document the reason why you are removing the label.
If you want to choose a different label or a different set of protection settings, you do not need to remove the label or protection first. Instead, choose a new label or define custom permissions by using the information protection file labeler. If you are downgrading a label (for example, moving a label from Highly Confidential to Confidential) then you might need to provide justification.
Important: You must be the owner of the file to remove protection, or you must have been granted permission to remove protection (the Rights Management permission of Export or Full Control ).
-
In File Explorer, select the file, files, or folder you want. Right-click and then select Apply sensitivity label with Microsoft Purview .
-
In the Microsoft Purview Information Protection File Labeler dialog box, do one of the following:
-
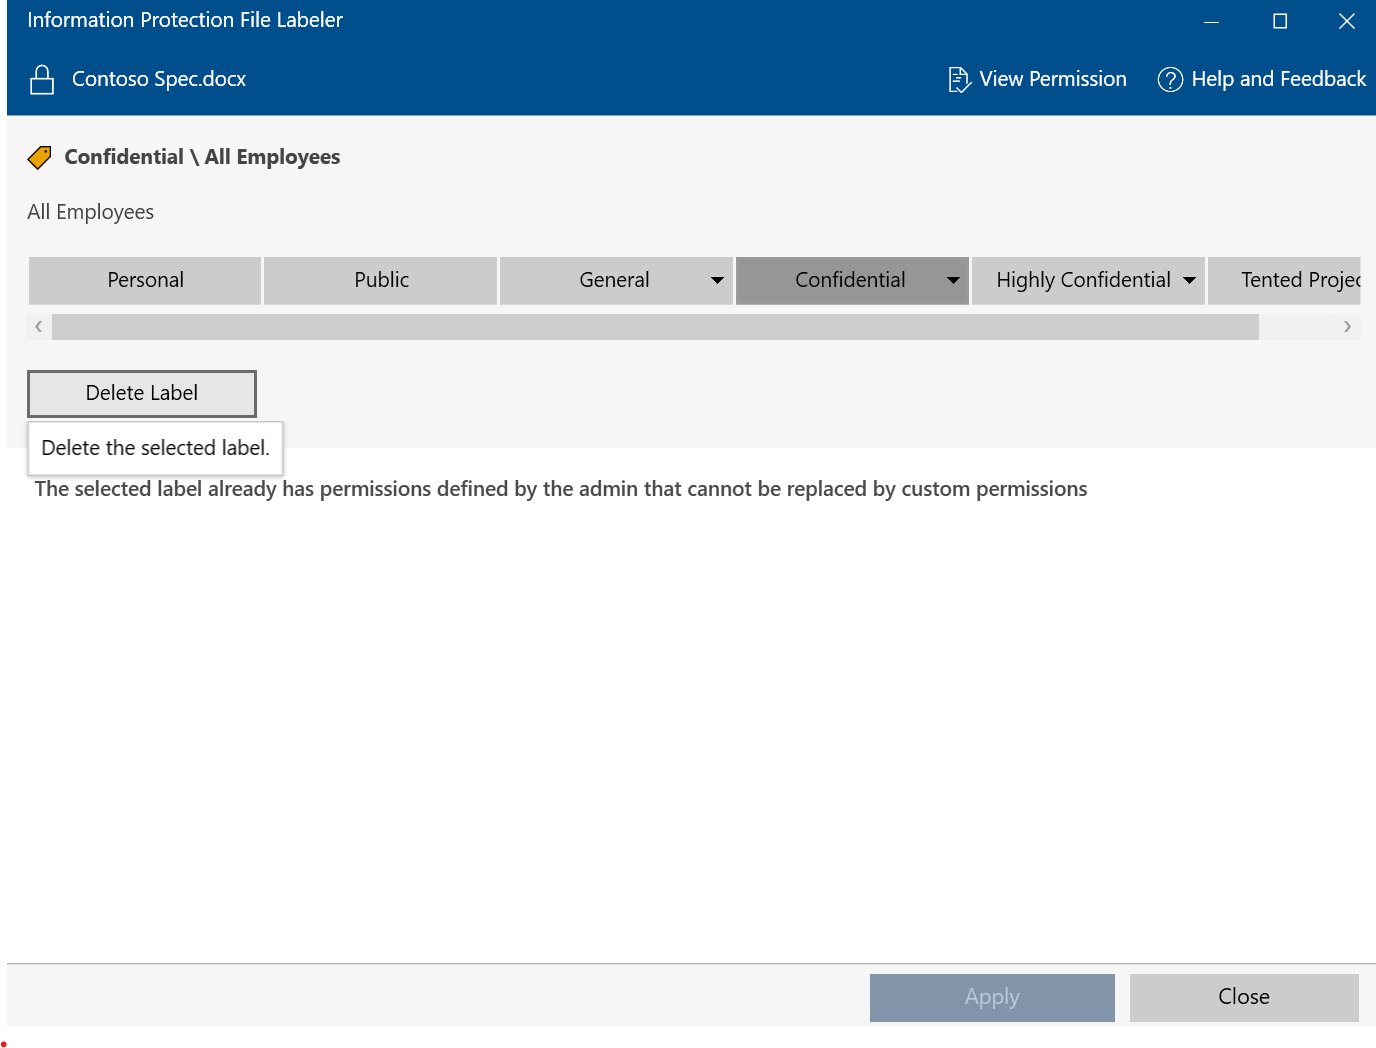
To remove a label, click Delete Label. If the label was configured to apply protection, that protection is automatically removed.
-
To remove custom protection from a single file, clear the Protect with custom permissions check box.
-
To remove custom protection from multiple files, click Remove custom permissions.
-
-
Click Apply and wait for the Work finished message to see the results. Click Close.
Supported and unsupported file types
Some file types support labeling without protection, while other file types require protection to be enabled for a label to be applied to a file. For files that support labeling without protection, like Office files, all labels will be displayed.
The following file types can be labeled even when they are not protected.
-
Adobe Portable Document Format: .pdf
-
Microsoft Project: .mpp, .mpt
-
Microsoft Publisher: .pub
-
Microsoft XPS: .xps .oxps
-
Images: .jpg, .jpe, .jpeg, .jif, .jfif, .jfi. png, .tif, .tiff
-
Autodesk Design Review 2013: .dwfx
-
Adobe Photoshop: .psd
-
Digital Negative: .dng
-
Microsoft Office: The following file types, including 97-2003 file formats and Office Open XML formats for Word, Excel, and PowerPoint: .doc, .docm, .docx, .dot, .dotm, .dotx, .potm, .potx, .pps, .ppsm, .ppsx, .ppt, .pptm, .pptx, .vdw, .vsd, .vsdm, .vsdx, .vss, .vssm, .vst, .vstm, .vssx, .vst, .xls, .xlsb, .xlt, .xlsm, .xlsx, .xltm, .xltx
Some labels may be unavailable for file types that support labeling only as part of protection, and they cannot be applied until protection has been selected. First, check the custom permissions, which will apply protection. After you enable protection for these file types, you can apply a label.
For more information about labels and supported file types, see Supported file types.
Examples:
If the General sensitivity label applies labeling and does not apply protection: You can apply the General label to a file named sales.pdf but you cannot apply this label to a file named sales.txt.
If the Confidential \ All Employees sensitivity label applies labeling and protection: You can apply this label to both a file named sales.pdf and a file named sales.txt.
Note: Some files, such as executable files and your Windows folder, are automatically excluded from labeling and protection because changing them might stop your PC from running. Although you can select these files, they will be excluded from labeling.


