
Word for Microsoft 365 for Windows, Word for Microsoft 365 for Mac
You can apply Sensitivity labels to your files to classify your organization’s data and remain compliant with your organization’s information protection policies without hindering your productivity and ability to collaborate. Depending on your organization’s policies around sensitivity labels, content marks such as header and footer text or watermarks may be added to your document when a sensitivity label is applied.
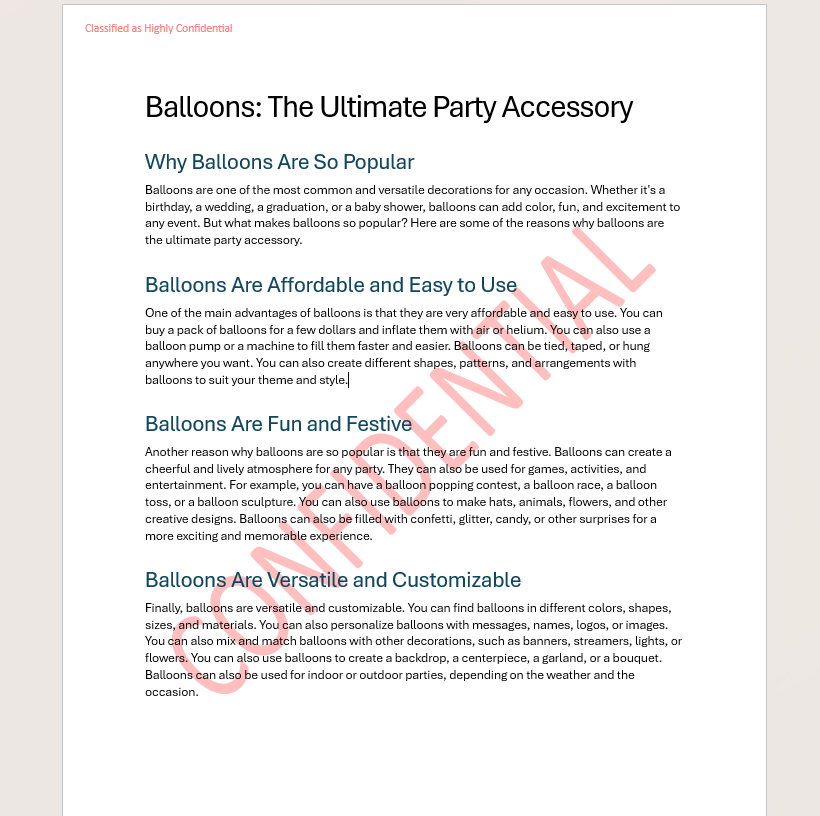
In the example below, adding the sensitivity label “Highly Confidential” added a watermark (‘Highly Confidential’ in red text across the document) and a label (‘Highly Confidential’) in red text in the header.
To minimize the disruption to existing document content, content marks are inserted in the header or footer with text wrapping so that you can quickly move them around with a mouse or arrow keys on your keyboard. Any overlapping text or other content will wrap around them.
After a sensitivity label is applied to your document, you may want to adjust the positioning of your header or footer content or adjust the positioning of the content mark itself. Here are some tips to help ensure your document looks great.
-
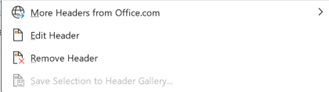
Double-click the header or footer you want to edit or select Header or Footer (in the Ribbon Insert tab, and then select Edit Header or Edit Footer.
-
Select the content you want to adjust.
-
Select the Layout tab in the Ribbon

-
Make various adjustments to your content such as
-
Drag and reposition the content mark in the header and footer by selecting and dragging the object
-
Text Wrapping: Adjusting how text interacts and flows around the inserted content. Options include:
-
In Line with Text: This is the default option when you insert the content mark. The content sits within the text, and the text flows around it.
-
Square: The text wraps around the rectangular boundary of the object.
-
Tight: The text wraps closely around the content mark
-
Through: The text wraps around the content mark, but it also flows through the object’s transparent areas.
-
Top and Bottom: The text wraps above and below the content mark, leaving space on the sides.
-
Behind Text: The content mark is placed behind the text, and the text appears in front of it.
-
In Front of Text: The content mark is placed in front of the text, obscuring the text behind it.
-
-
Bring the content mark forward or backward to put the object on top or below other objects
-
-
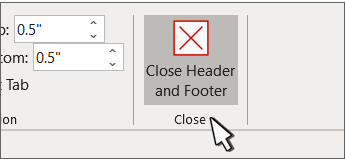
When you're done, select Close Header and Footer or press Esc.
-
Double-click the header or footer you want to edit or select Header or Footer (in the Ribbon Insert tab, and then select Edit Header or Edit Footer.

-
Select the content you want to adjust.
-
Select the Layout tab in the Ribbon

-
Make various adjustments to your content such as
-
Drag and reposition the content mark in the header and footer by selecting and dragging the object
-
Text Wrapping: Adjusting how text interacts and flows around the inserted content. Options include:
-
In Line with Text: This is the default option when you insert the content mark. The content sits within the text, and the text flows around it.
-
Square: The text wraps around the rectangular boundary of the object.
-
Tight: The text wraps closely around the content mark
-
Through: The text wraps around the content mark, but it also flows through the object’s transparent areas.
-
Top and Bottom: The text wraps above and below the content mark, leaving space on the sides.
-
Behind Text: The content mark is placed behind the text, and the text appears in front of it.
-
In Front of Text: The content mark is placed in front of the text, obscuring the text behind it.
-
-
Bring the content mark forward or backward to put the object on top or below other objects
-
-
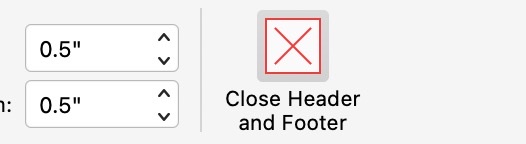
When you're done, select Close Header and Footer or press Esc.
For more info on text wrap options and wrap points, see Text wrapping options.
For more on headers and footers, see Headers and Footers in Word.


