Summary
Microsoft Skype for Business Server 2015 is now supported for installation on Windows Server 2016. The latest version of Skype for Business Server 2015 provides the same support for all the collaboration features in Windows Server 2016 as it does for earlier Windows operating systems.
Initial installation of Skype for Business Server 2015
You can install Skype for Business Server 2015 on Windows Server 2016 through Windows Update. By doing this, you will install the original release of the program together with cumulative update 5 (CU5) for Skype for Business Server 2015.
To install Skype for Business Server 2015 on Windows Server 2016, follow these steps:
-
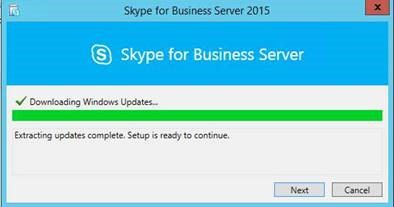
Connect the server to the internet, and then start Windows Update or WSUS.
-
Run Setup.exe from the RTM build or a setup CD.
-
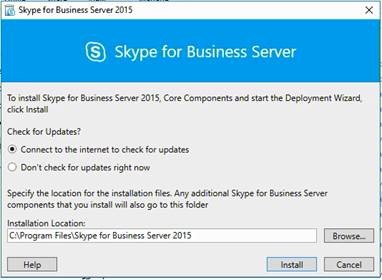
When you are prompted, select the Connect to the internet to check for updates option, and then select Install.
-
After the core components are installed, the Deployment wizard is started. In the wizard window, select the Install or Update Skype for Business server system option, and then continue the rest of the deployment.
Cumulative updates after Skype For Business Server 2015 CU5
Windows Update does not offer Skype for Business 2015 CUs to Windows Server 2016-based servers. On Windows 2016-based servers, you must download CUs for Skype for Business Server 2015 from the Microsoft Download Center. After you install Skype for Business Server 2015 on Windows Server 2016, you can get future Skype for Business Server 2015 CUs only from the Download Center.
To get future CUs, follow these steps:
-
Download SkypeForBusinessInstaller.exe from the Download Center.
-
Follow the installation steps in KB 3061064.


