
Unlike Microsoft Word, Microsoft Excel doesn't have a Change Case button for changing capitalization. However, you can use the UPPER, LOWER, or PROPER functions to automatically change the case of existing text to uppercase, lowercase, or proper case. Functions are just built-in formulas that are designed to accomplish specific tasks—in this case, converting text case.
How to Change Case
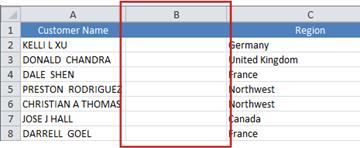
In the example below, the PROPER function is used to convert the uppercase names in column A to proper case, which capitalizes only the first letter in each name.
-
First, insert a temporary column next to the column that contains the text you want to convert. In this case, we’ve added a new column (B) to the right of the Customer Name column.
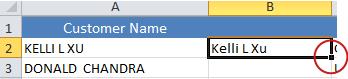
In cell B2, type =PROPER(A2), then press Enter.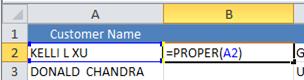
This formula converts the name in cell A2 from uppercase to proper case. To convert the text to lowercase, type =LOWER(A2) instead. Use =UPPER(A2) in cases where you need to convert text to uppercase, replacing A2 with the appropriate cell reference. -
Now, fill down the formula in the new column. The quickest way to do this is by selecting cell B2, and then double-clicking the small black square that appears in the lower-right corner of the cell.
Tip: If your data is in an Excel table, a calculated column is automatically created with values filled down for you when you enter the formula.
-
At this point, the values in the new column (B) should be selected. Press CTRL+C to copy them to the Clipboard.

Right-click cell A2, click Paste, and then click Values. This step enables you to paste just the names and not the underlying formulas, which you don’t need to keep. -
You can then delete column (B), since it is no longer needed.
Need more help?
You can always ask an expert in the Excel Tech Community or get support in Communities.


