Pastaba: Norėtume jums kuo greičiau pateikti naujausią žinyno turinį jūsų kalba. Šis puslapis išverstas automatiškai, todėl gali būti gramatikos klaidų ar netikslumų. Mūsų tikslas – padaryti, kad šis turinys būtų jums naudingas. Gal galite šio puslapio apačioje mums pranešti, ar informacija buvo naudinga? Čia yra straipsnis anglų kalba, kuriuo galite pasinaudoti kaip patogia nuoroda.
Su "Microsoft InfoPath 2010", galite tinkinti formas, naudojamas kaip sukurti ir redaguoti "SharePoint" sąrašo elementus. Pagal numatytuosius parametrus, kai kūrimas arba redagavimas elementus, visų laukų sąraše rodomos pagrindinės dviejų stulpelių maketo lentelės. Kai tai tinka kai kuriais atvejais, yra kitų, jei norite labiau kontroliuoti maketą. Be to, galite įtraukti dinaminio į formą.
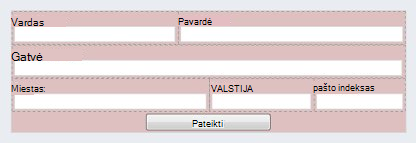
Į "SharePoint" sąrašo formos tinkinimas naudojant "InfoPath" leidžia jums pertvarkyti valdiklius, pvz., kur City ir State laukus į vartotojo informacijos formos-šalia toje pačioje eilutėje. Patobulintos InfoPath funkcijos, pvz., sąlyginį formatavimą, galima naudoti dinamiškai Rodyti arba slėpti formos skyriuose.
Šiuos vaizdo įrašus rodoma, kaip "SharePoint 2010" sąrašo formos tinkinimas:
Šiame straipsnyje
Atidarykite arba sukurkite sąrašą
Yra du būdai, galite atidaryti "SharePoint" sąrašo tinkinimas.
Atidarykite esamas SharePoint sąrašas iš SharePoint
-
Pereikite į sąrašą.
-
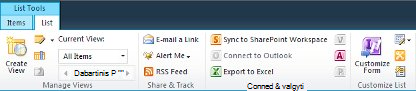
Pasirinkite sąrašą, ir tada skirtuko sąrašas grupėje Tinkinimo sąrašas spustelėkite Tinkinti formą pradėti InfoPath ir automatiškai įkelti sąraše pritaikyti.
Sukurkite naują sąrašą arba atidarykite esamą sąrašą iš programos InfoPath
-
Spustelėkite Failas.
-
Spustelėkite naujas, ir pasirinkite "SharePoint" sąrašo.
-
Duomenų ryšio vedlysįveskite "SharePoint" svetainės žiniatinklio adresą.
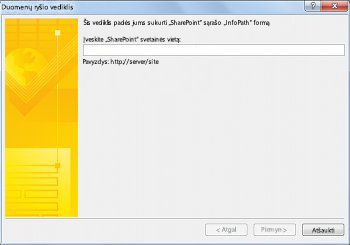
-
Spustelėkite Pirmyn.
-
Atlikite vieną iš šių veiksmų:
-
Esamo sąrašo formos tinkinimas
-
Pasirinkite Tinkinti esamame "SharePoint" sąraše, ir tada pasirinkite sąrašą, kuriame norite tinkinti.
-
Spustelėkite Pirmyn.
-
Sukurkite naują sąrašą ir tinkintų forma
-
-
Pasirinkite kurti naują "SharePoint" sąrašą, ir tada įveskite naujo sąrašo pavadinimą.
-
Spustelėkite Gerai.
-
-
Spustelėkite Baigti.
Programoje "InfoPath" sąrašo tinkinimas
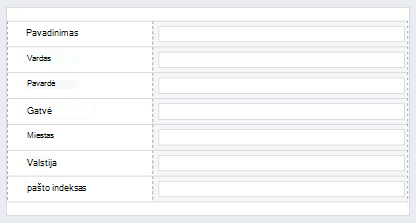
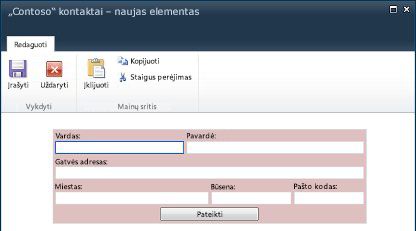
Atidarius naują arba esamą sąrašą forma rodoma kaip numatytoji SharePoint su dviejų stulpelių maketo lentelę.
Dabar galite kurti formą, pakeisti maketą, taisykles ir tikrinimo. Naujų stulpelių programoje "SharePoint" sukuria naują laukų įtraukimas į programos InfoPath formos.
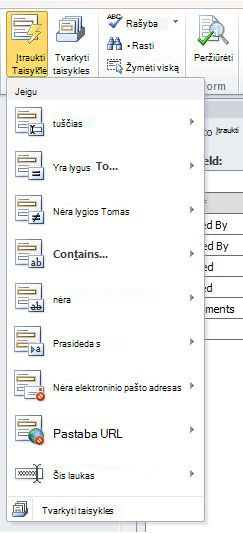
Dinaminio įtraukiamas valdymo taisykles.
-
Norėdami įtraukti taisyklę į valdiklį, skirtuke Pagrindinis , grupėje taisyklės spustelėkite Įtraukti taisyklę.
Taisyklių padėti patikrinti, kad datą ateityje arba, elektroninio pašto adresą lauke įvestas tekstas yra tinkamo formato.
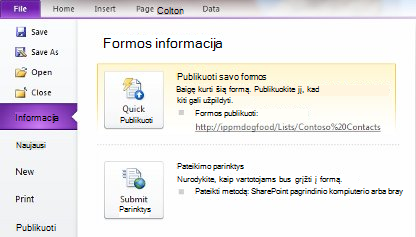
Skelbti atgal į "SharePoint" sąrašą
Baigę tinkinti sąrašą, jis turi būti publikuota į "SharePoint".
-
Spustelėkite skirtuką failas , ir spustelėkite skelbti Greitai publikuoti . Spustelėkite gerai , kai būsite paraginti.
-
Grįžti į sąrašą, ir pridėkite elementą Rodyti užpildyta forma.
Kitas pavyzdys tinkinimo SharePoint sąrašo formų programoje "InfoPath", pradedant "SharePoint Designer 2010", ieškokite sąrašo formų redagavimas naudojant "InfoPath 2010".