You can add a watermark to your Excel sheet printout that reads, for example, "Draft" or "Confidential." However, there is no Watermark button for this feature in Excel for Mac.
Instead, you can follow the steps below:
Change your view
-
On the View tab, click Page Layout. Page Layout view is helpful because you can easily see the margins of each printed page.
-
Resize the window of the workbook so that you can see the entire first page.
Create a watermark text box
-
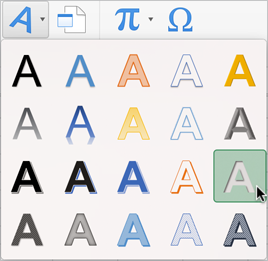
On the Insert tab, click the WordArt button, and then choose this option:

-
In the text box, enter "Confidential" or any of your own text in place of Your Text Here.
-
Rotate and move the watermark as you see fit.
Change the transparency settings for the watermark
Most likely the text in the watermark overlaps some of your data, making it hard to see. To fix this, you can change the transparency of the watermark so that the data can be seen through the watermark.
-
Press and hold the Ctrl key, click the watermark text box, and then click Format Text Effects.
The Format Shape task pane appears on the right side.
-
Click the Text Fill & Outline tab.

-
Under Text Fill, find the Transparency slider.
-
Change the Transparency slider to 50% or more.
-
Close the Format Shape task pane.
Copy and paste the watermark
If your workbook has more than one page, you can copy and paste the watermark to other pages by doing the following:
-
Select the watermark text box.
-
Press

-
Click inside another page in the workbook.
-
Press

-
Reposition the watermark if it's not placed in the exact spot you want.
-
On the View tab, click Normal to continue working in Normal view.


