In the Clipchamp video editor, you can use the brand kit feature to store branded assets like fonts, colors, and logos to keep your videos consistent, organized, and on-brand.
In Clipchamp for personal accounts,
-
You can create and add 1 brand kit to your account and access it in video editing projects.
In Clipchamp for work or for education accounts,
-
You can create and add multiple brand kits to your account, access them in video editing projects and share them with others in your organization.
-
Your Microsoft 365 administrator can create brand kits that are available to all Clipchamp users in the organization.
Read on to learn how to work with brand kits and how to add your branding elements to videos.
Where can I find the brand kit tool?
-
After signing into Clipchamp for personal accounts at app.clipchamp.com or in the Clipchamp desktop app, the brand kit tool is available on the video editor homepage. There, click on the brand kit tab to set and access your brand logos, fonts, and colors.
-
Alternatively, if you're already in the video editor user interface, click on the brand kit tab on the toolbar to locate brand logos, fonts, and colors. You can also add new brand kit assets there.
How to add branding to the brand kit
Add brand logos
-
Click on the add logos button to select your logo from your computer files. Your computer files will automatically open.
-
Select your logo, then click on the open button. Note: all logos must be a PNG, JPEG, or SVG file types with a maximum size of 10MB.
Add brand fonts
-
Click on the add fonts button to upload your customized fonts. A new font option will appear.
-
Click on the drop-down arrow to select an existing font or import your own font file. You can rename your font by clicking on the three horizontal dots then clicking rename. Note: all fonts must be OTF, TTF, or WOFF. file types with a maximum size of 10MB. You can add multiple logos at once.
Add brand color palette
-
Click on the add palette button to upload your personalized color palette.
-
Next, click on the plus (+) button to add a color. Here, you can type in a Hex code, select a color from the color picker, or choose an existing color option using the palette button.
How to add branding to your videos
-
To use the brand kit, click on the brand kit tab on the toolbar. Here, you will be able to add logos to video, use brand fonts, and colors.
-
To add a logo to video to create a watermark effect or video overlay, drag and drop your logo onto the timeline above your video clip or click on the plus button to add to the timeline.
-
Next, to make your logo a watermark, use the transparency option inside the adjust colors tab on the property panel. Click on the adjust colors tab then drag the transparency slider to the right to increase the transparency.
-
To edit the size and location of your logo by dragging in and out the corners to resize, or freely click to move the logo around the video preview screen.
-
Don't forget to edit the duration of your logo to match the length of your video. Drag the green handles to the right to increase the length, or drag the green handle to the left of the timeline to decrease.
-
To use your customized font, just add a text animation to your video. Click on the text tab on the toolbar, then drag and drop a title onto the timeline.
-
To edit the font of your motion title, click on the text tab on the property panel, then click on the drop down arrow to select your brand kit font. Your brand kit font will be at the top of the fonts list.
-
To change the color of your text with your brand color palette, click on the text tab on the property panel. Next, click on the color button.
-
Inside the color options, select a color from the brand kit color palette. Your text will automatically change color to your selected brand kit color.
Compared to the brand kit feature that you might have seen in Clipchamp for personal accounts, users of Clipchamp for work and school are able to include a more comprehensive collection of video editing elements into a brand kit and use them in projects.
If you access Clipchamp and other Microsoft 365 apps with a work or school Microsoft account that was issued to you by your organization or educational institution, you have access to the feature and can use brand kits in video editing projects.
What is a brand kit?
The brand kit tool is a space where users can store branded media assets like colors and fonts to add to videos.
There are intentional limits placed on the brand kit feature to focus creation around branding elements that are most important. At the same time, anyone can create and share a brand kit. This means individuals can reuse them for their personal branding and small teams can create and share assets among their group.
Technically what is a brand kit?
At the technical level, a brand kit consists of 2 elements - a file with the .brandkit extension and an associated assets folder. The .brandkit file contains a (technically encoded) catalogue of brand assets; the Assets folder contains the media files that are part of the brand kit.
When you create a new brand kit in a Clipchamp project and save it, this creates both a new .brandkit file and an Assets folder in the location you selected during the creation process, for instance in your OneDrive.
A .brandkit file can get imported into a Clipchamp project so its brand assets appear in the Clipchamp UI and can get used in the project.
You can store a brand kit folder, that is, the folder that contains the .brandkit file and its associated Assets folder, in your OneDrive, on your local computer, or elsewhere. Just make sure the .brandkit file and the Assets folder remain together so that you can use the kit in editing projects and Clipchamp can find the media assets.
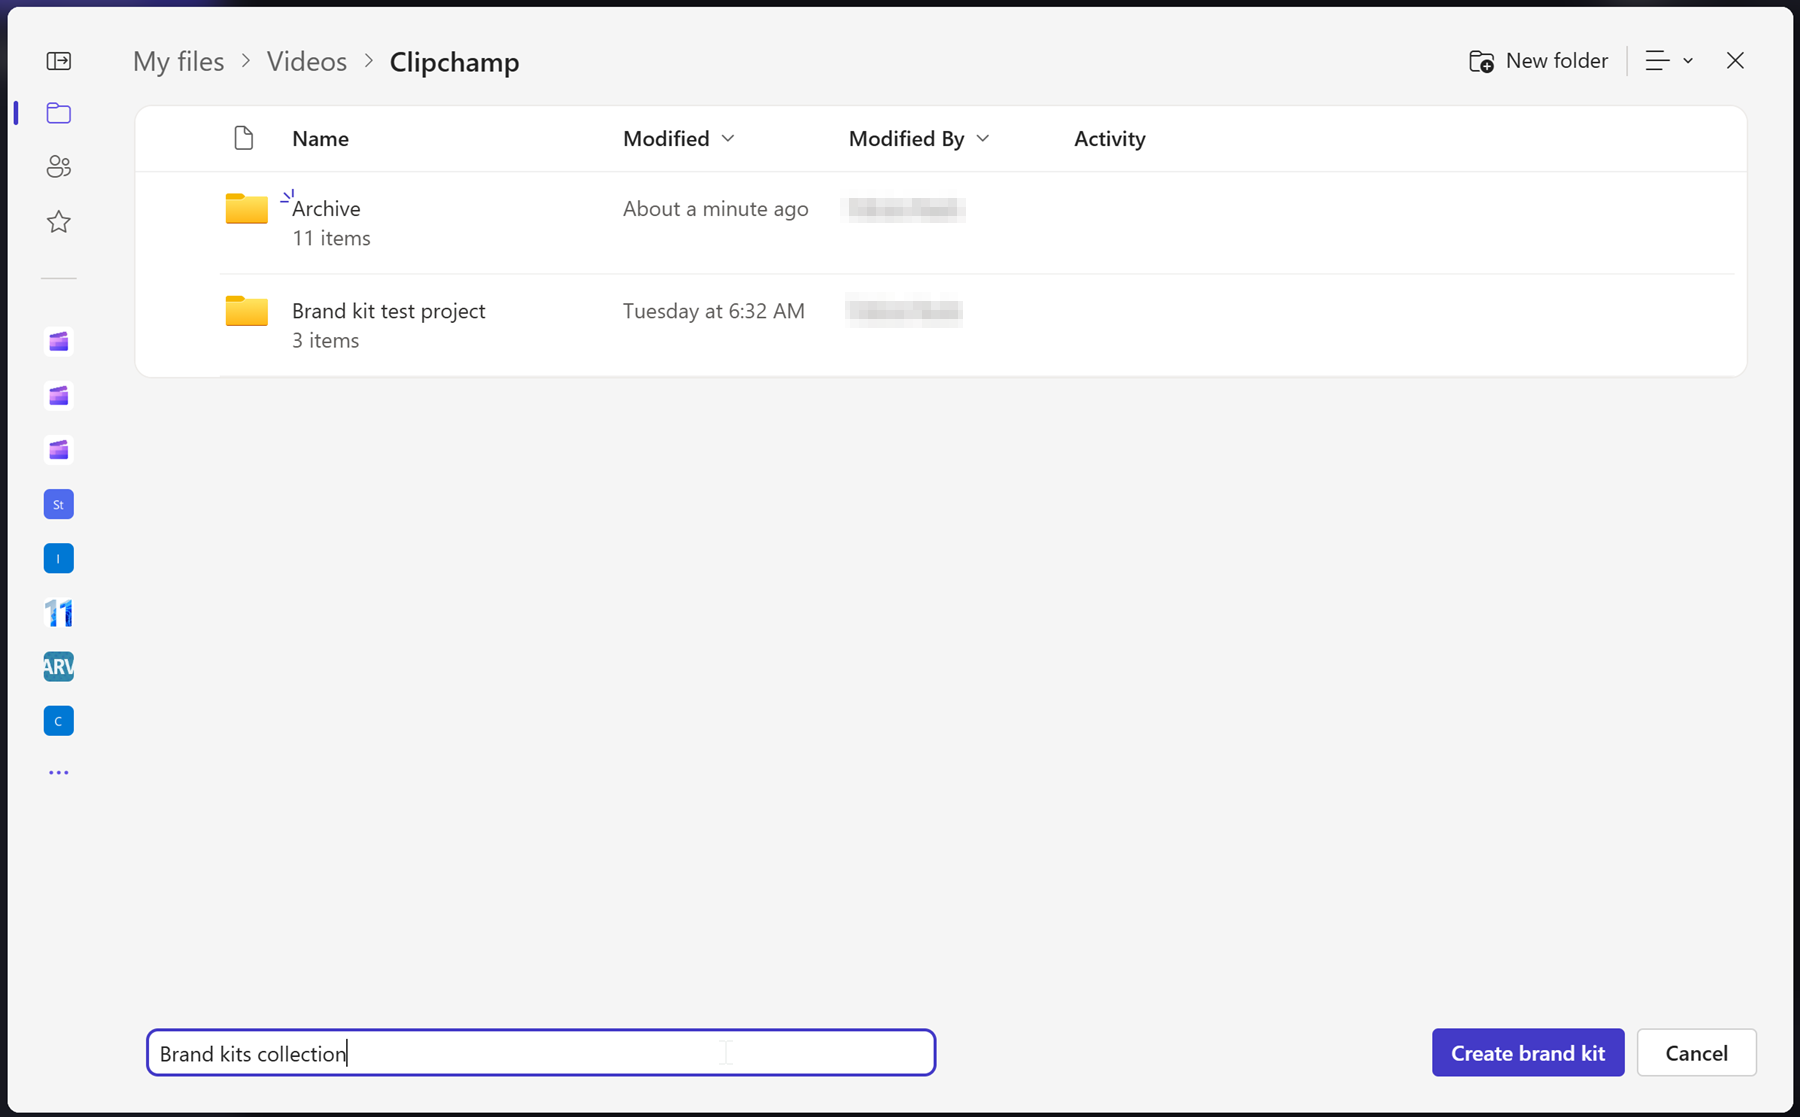
We recommend storing it in OneDrive in a similar location to where you save your Clipchamp projects, for instance in the my files > videos > Clipchamp parent folder. This makes it easier to find brand kits and the video editing projects you are using them in, and makes them available on any computer where you're logged into OneDrive.
Branding elements that can get added to a brand kit
|
Brand kit asset type |
Amount, size limits, file types |
|---|---|
|
Logos |
Up to 300 per brand kit. File types: .png, .jfif, .pjpeg, .jpeg, .pjp, .jpg, .svgz, .svg |
|
Colors |
Unlimited colors. Select your collection through the color picker or the HEX code field. Both are available when adding a color palette to a brand kit. |
|
Fonts |
Unlimited fonts. 50 MB per file. File types: .ttf, .otf, .woff |
|
Images |
Up to 300 per brand kit. File types: .png, .jfif, .pjpeg, .jpeg, .pjp, .jpg, .svgz, .svg |
|
Videos |
Up to 300 per brand kit. File types: .m4v, .mp4, .mov, .webm, .avi, .3gp, .wmv, .mkv |
|
Graphics |
Up to 300 per brand kit. File types .png, .jfif, .pjpeg, .jpeg, .pjp, .jpg, .svgz, .svg |
|
Music |
Up to 300 per brand kit. File types .3gp, .3g2, .mid, .mp3, .opus, .oga, .ogg, .wav |
|
Sound effects |
Up to 300 per brand kit. File types .3gp, .3g2, .mid, .mp3, .opus, .oga, .ogg, .wav |
How to use brand kit
This section covers the basic ways to use a brand kit, including how to create, import, remove, and share. Since it's a powerful feature with many options, it's a good idea to give it a try in a test Clipchamp project to get a better understanding and see it in action. This way, you'll be able to create, manage and use your branding in videos in no time.
Create a new brand kit or import a brand kit
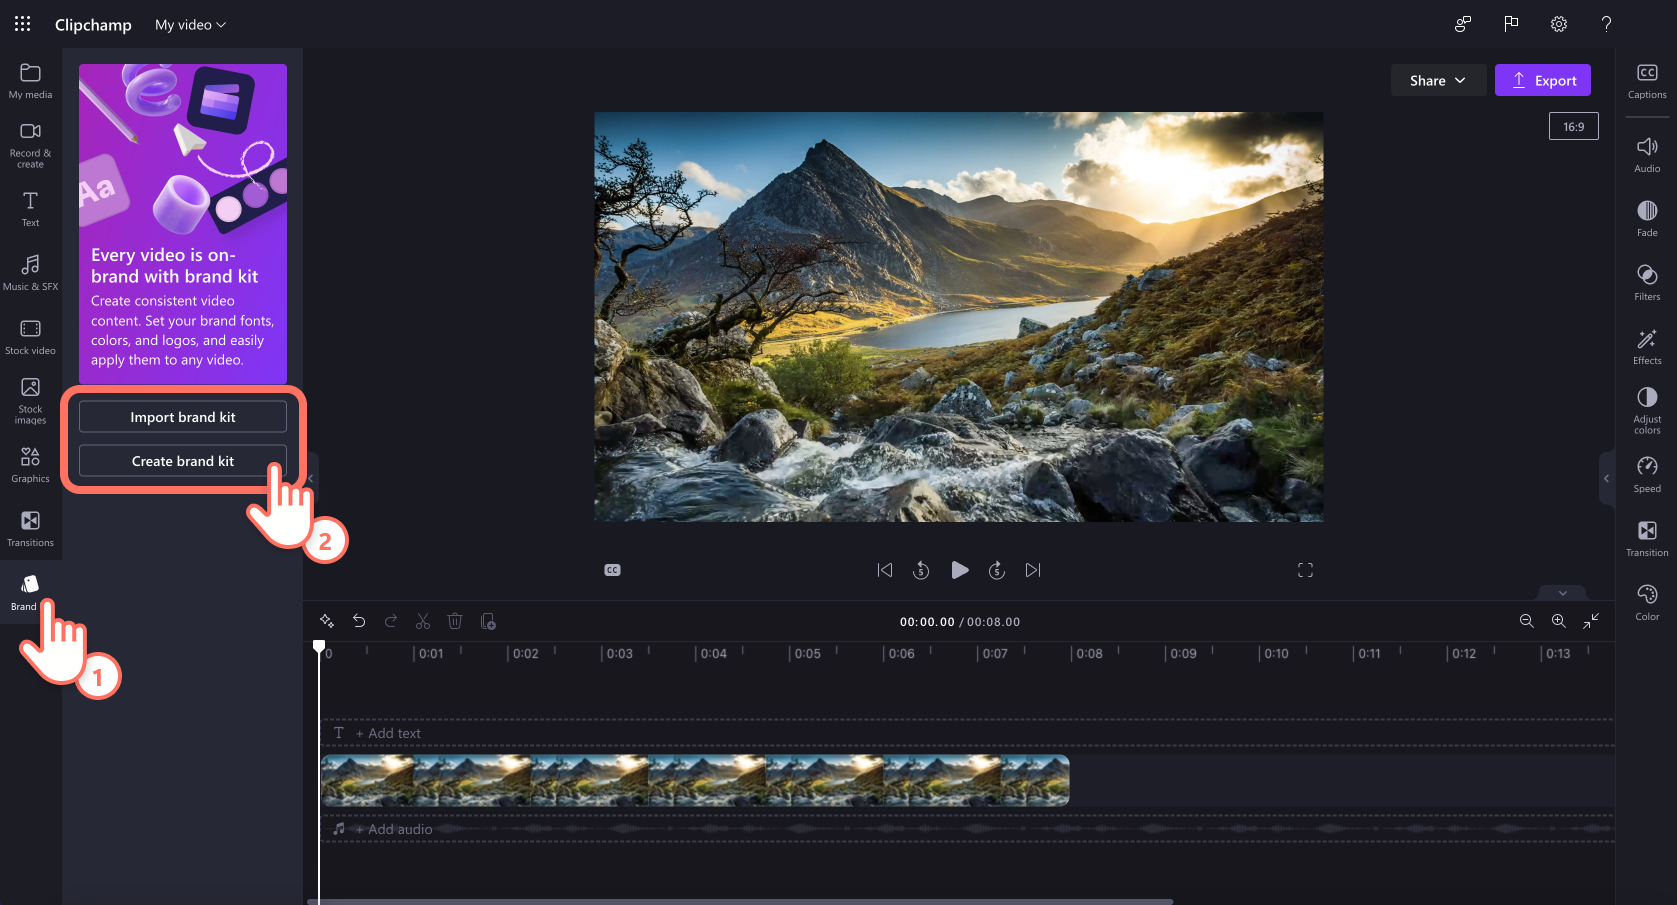
After starting a Clipchamp project, click on the brand kit tab on the toolbar. Here, select create a new brand kit to start.
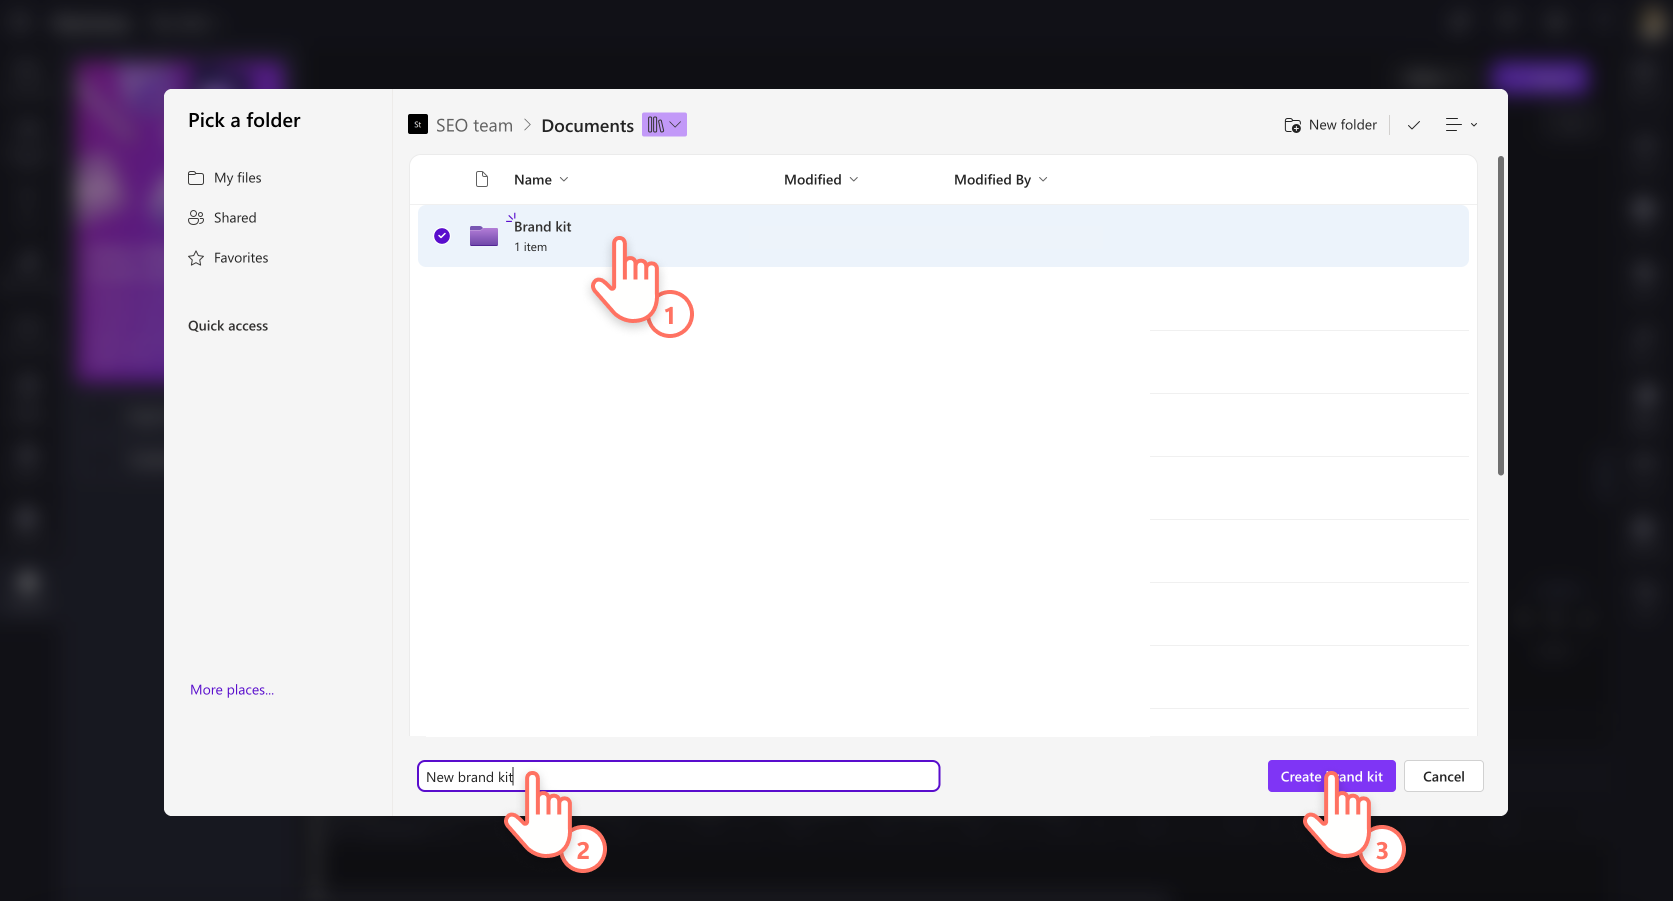
Choose a place on your OneDrive for Business (only you can access these unless you share the brand kit folder) or SharePoint, and give the brand kit a name. The created kit will then be linked to your project.
You can also add brand kit assets like logos, images, videos, fonts, and more manually once a brand kit is created.
OR
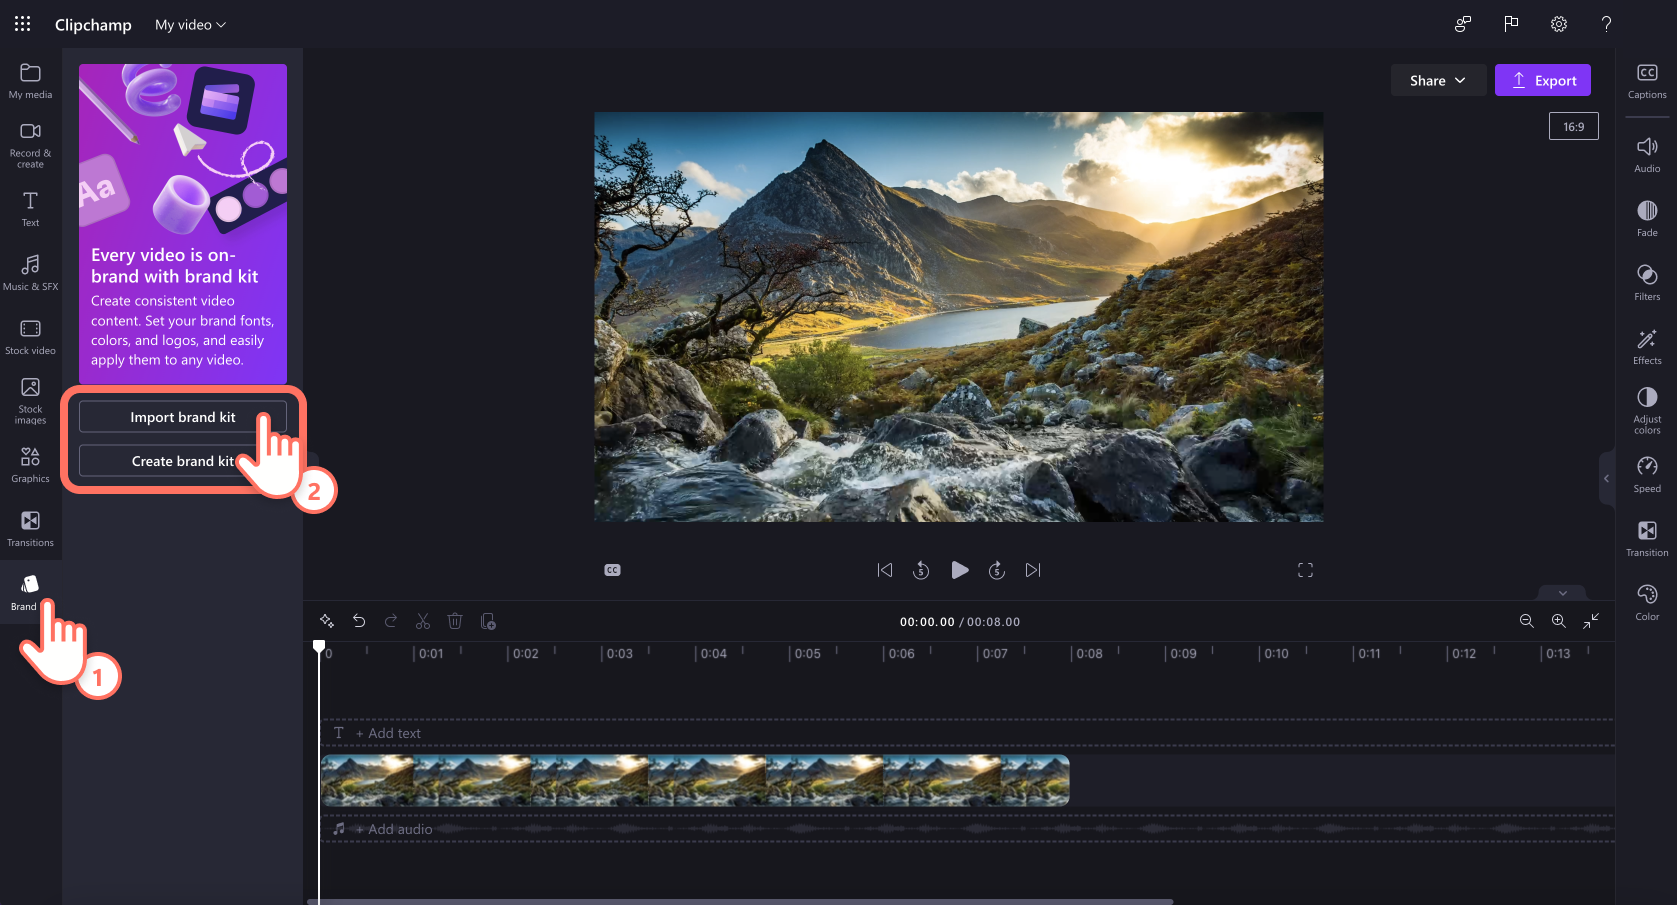
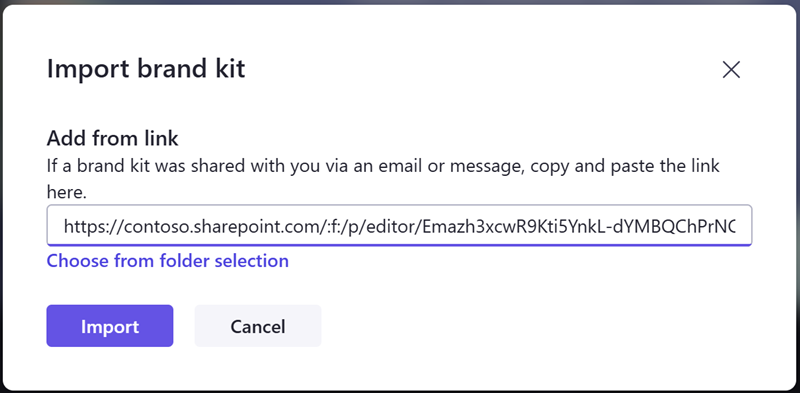
If you would like to import an existing brand kit, there are two different ways to do this. First, click on the import brand kit button.
Option 1:
If someone shared a brand kit link with you, paste it in the field. The share link must point to a .brandkit file and the whole brand kit folder should be shared with you so that your Clipchamp project can access all the media assets in the shared kit.
Option 2:
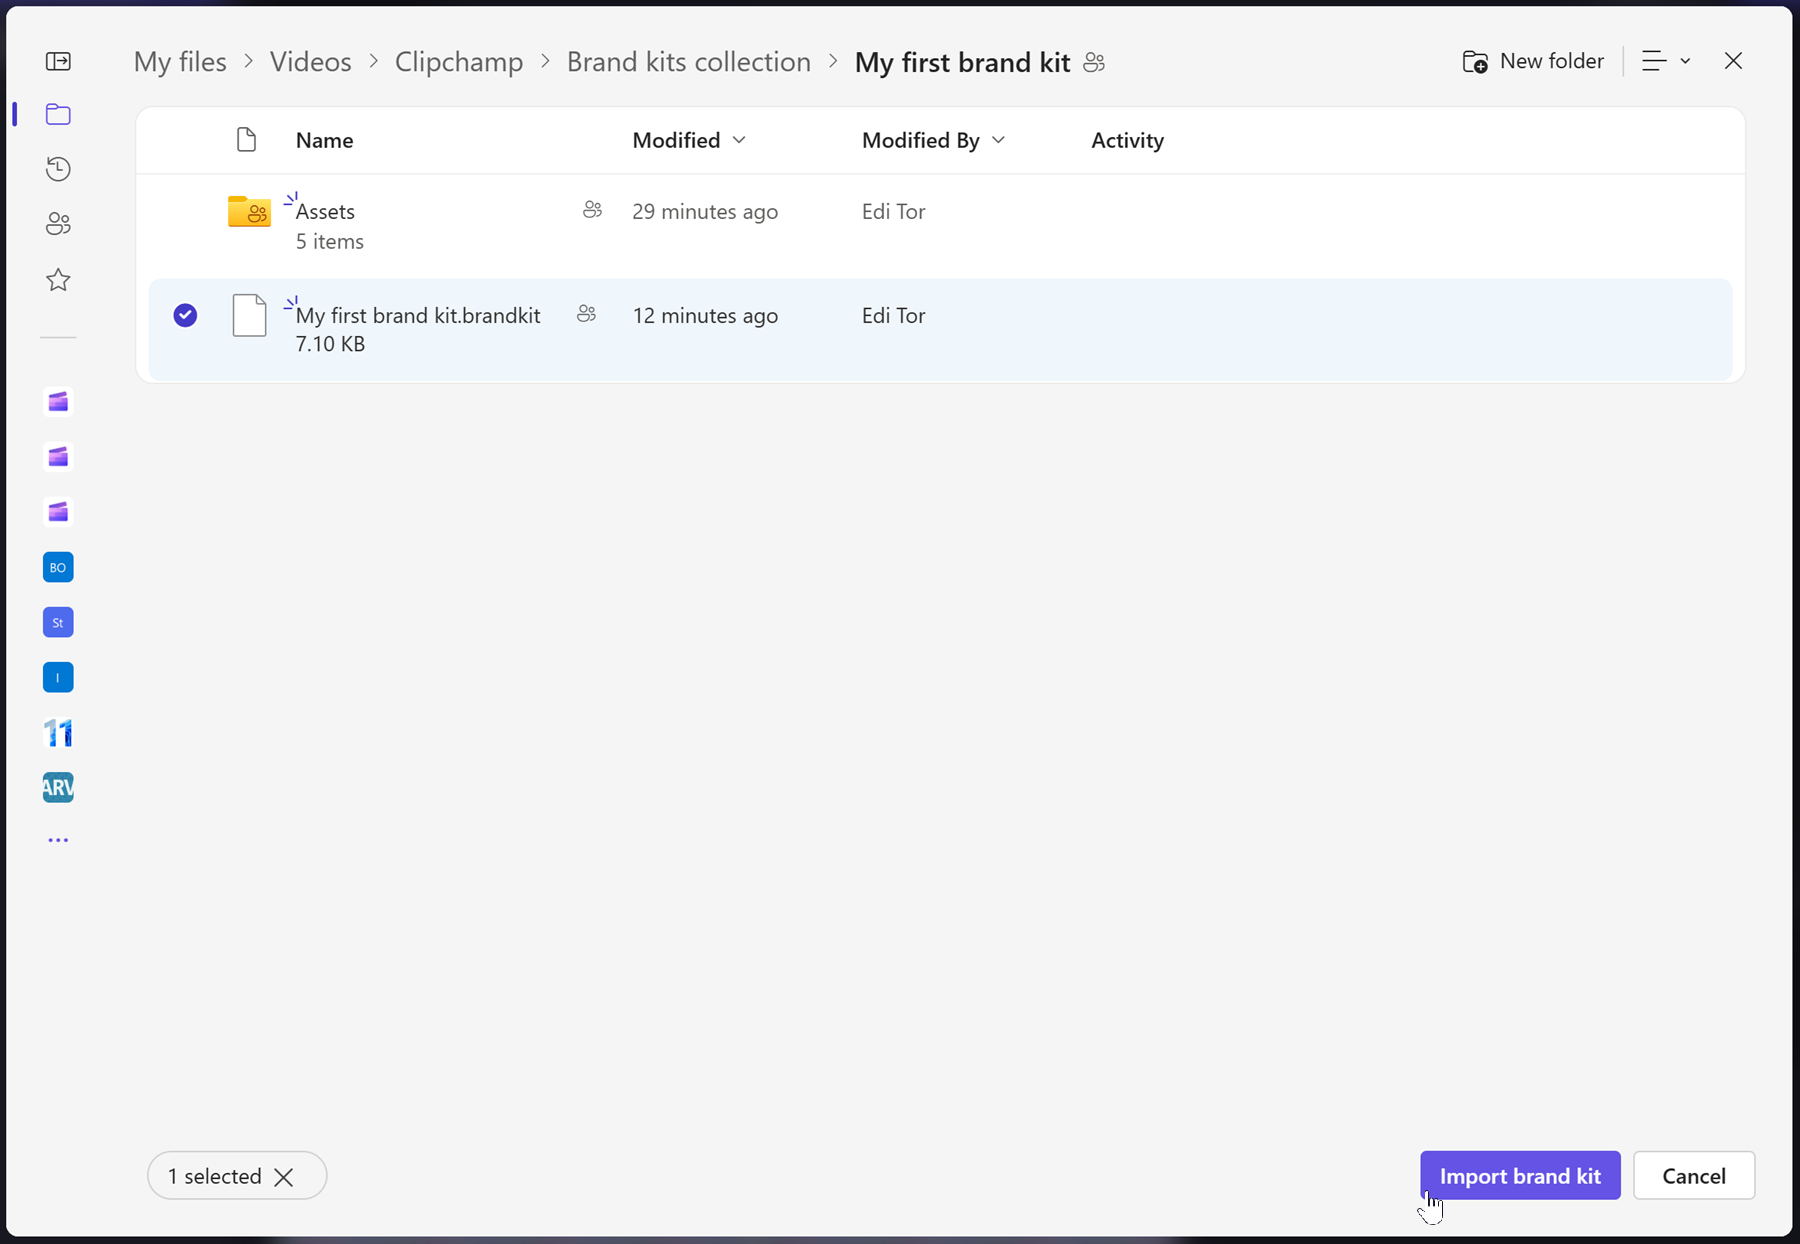
If you know the location of the .brandkit file you want to import, you can also select choose from folder selection, then navigate to the brand kit on OneDrive or SharePoint and select the .brandkit file. This will load the kit and its contents into your Clipchamp project.
How to remove a brand kit from a project
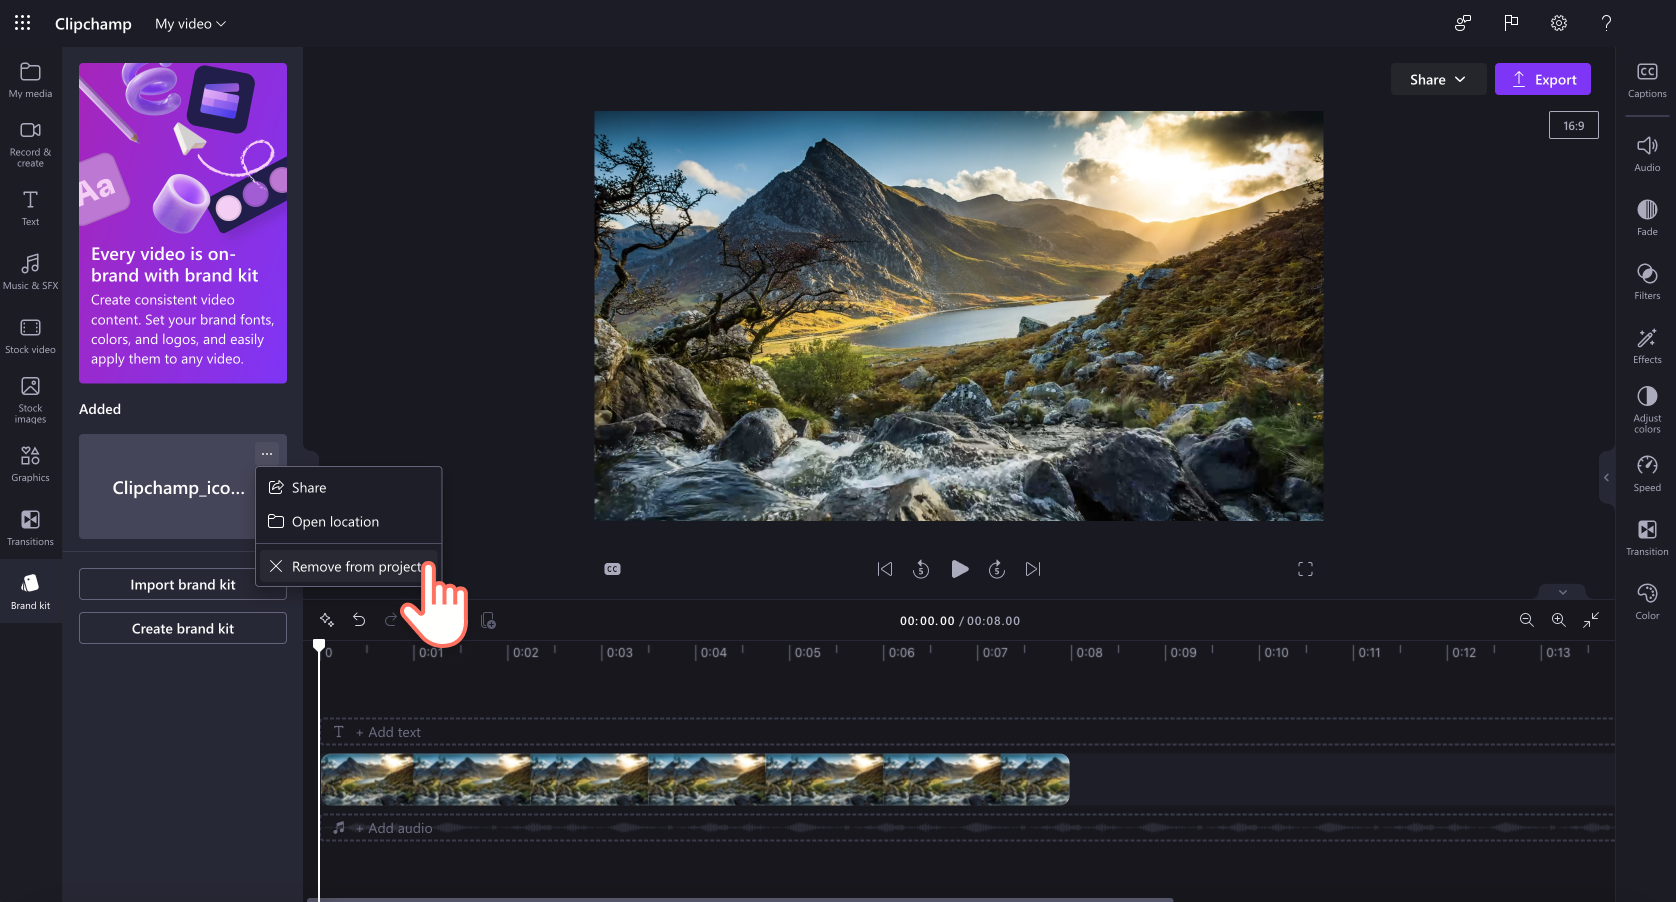
In the brand kit section of the Clipchamp project, select the context menu (the 3 horizontal dots). This will open more options. Next, click on the remove from project button.
Note that this does not delete the .brandkit file and its Assets folder in OneDrive/SharePoint. To delete these, navigate to them in OneDrive/SharePoint and remove them there.
How to add branding to your videos
To add your branding to the timeline, click on the add to timeline button or drag and drop the asset onto the timeline above your video.
How to share a brand kit
Select the context menu (the 3 horizontal dots) and then click on the share button. Provide the link that gets generated to the person you'd like to share it with. They can paste the link into their project's brand kit section at import as described above. This will load your brand kit into their Clipchamp project.
If stored on OneDrive, the whole brand kit folder needs to be shared with the recipient. This should be the case by default when you create a shareable link for a brand kit. However, if the recipient can't open the link, check the brand kit folder's sharing settings in your OneDrive.
How to share a project that has at least one brand kit attached to it
You can share such a Clipchamp project as usual via the share button next to the export button in the project UI. The person opening the project will see the brand kit attached. However, note that they also must have access to your OneDrive/SharePoint folder where that brand kit is located.
How to share a brand kit that you don't want others to edit
You can follow the same steps as above about how to share a brand kit but change the share link settings to view-only.
Things to keep in mind when working with brand kits
Managing brand kits and media assets in them needs to be done in the Clipchamp project UI. Open the project containing your brand kit and delete or change items from there.
Adding/removing assets in the OneDrive or other folder where you placed the .brandkit file and its Asset folder will not sync back to the Clipchamp editing project that this brand kit is connected to.
Volume limits:
-
Every user can create an unlimited number of brand kits for themselves and share them with others.
-
You can have 1 brand kit connected to a project at a time. If you would like to add a new one, you need to replace the one already connected. Note that any assets added to the project from the brand kit will remain with the project (and won't require the original brand kit to remain connected).
-
Microsoft 365 organizations can create an unlimited number of "official" or corporate brand kits and make them available to their users so they can access them in their editing projects.
It's currently not possible to automatically import media assets into brand kits. They must be added via the Clipchamp project interface manually in the brand kit section. It is possible to drag and drop multiple items into the brand kit at once.
Branded templates (project and brand kit combined) are not available at this stage. However, as a workaround you can create a Clipchamp project, share it on OneDrive/SharePoint and others can duplicate the project.
Does updating a media asset, such as a logo, in a brand kit update it in all Clipchamp projects where it's used?
No. When a brand asset is used in a project on the editing timeline, it is copied into that project and stays with that project. This means when you update a logo in one of your brand kits and now would like to ensure the updated logo is used in your existing Clipchamp projects, to achieve an update, you have to open the projects and manually replace the logo file with its new version.

