
Summary
Virtualization lets your Windows device emulate a different operating system, like Android or Linux. Enabling virtualization gives you access to a larger library of apps to use and install on your device. If you upgraded your device from Windows 10 to Windows 11, these steps help you enable virtualization.
Note
Many Windows devices already have virtualization enabled, so you might not need to follow these steps.
Before you begin, determine your device model and manufacturer. You'll need this information later in the process.
1. Access the UEFI (or BIOS)
Before you begin, we recommend opening this page on a different device. Here's how to get to the UEFI from Windows:
In the
 Settings app on your Windows device, select System > Recovery.
Note
In Windows 10, you can access from Update & Security > Recovery.
Under Recovery options, next to Advanced startup, select Restart now.
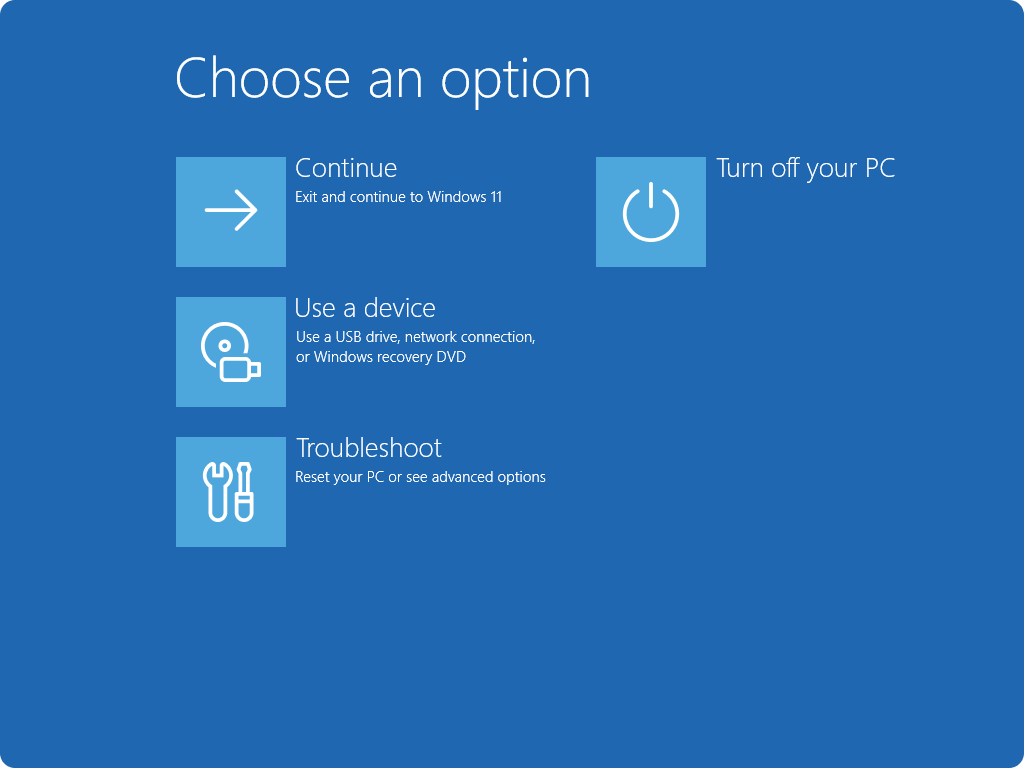
Your PC will restart in the Windows Recovery Environment. Select Troubleshoot > Advanced options > UEFI Settings > Restart.
Your PC will restart again and you'll be in the UEFI utility. At this step, you might see the UEFI referred to as the BIOS on your PC.
2. Make changes in the UEFI (or BIOS)
The way the UEFI (or BIOS) appears depends on your PC manufacturer. Once you've enabled virtualization and exited the UEFI, your PC will restart.
Important
Only change what you need to in the UEFI (or BIOS). Adjusting other settings might prevent you from accessing Windows.
Instructions based on your PC manufacturer
Choose your PC manufacturer for specific instructions on enabling virtualization. If you don't see your manufacturer listed, refer to your device documentation.
These are external links to the manufacturers' websites.
| PC manufacturer | Link |
|---|---|
| Acer | How to Enable Virtualization Technology on Acer Products |
| Asus | For PCs with AMD processors: [Notebook] How to enable or disable AMD Virtualization (AMD-V™) technology? For PCs with Intel processors: [Motherboard] How to enable Intel(VMX) Virtualization Technology in the BIOS? [Notebook] How to enable or disable Intel® Virtualization Technology (VT-x)? |
| Dell | How To Enable or Disable Hardware Virtualization on Dell Systems | Dell US |
| HP | HP PCs - Enable Virtualization Technology in the BIOS |
| Lenovo | How to enable Virtualization Technology on Lenovo PC computers - Lenovo Support US |
| Microsoft | Virtualization is already enabled on Surface devices. |
Instructions based on your UEFI (or BIOS)
If your PC manufacturer isn't listed or you're unsure who it is, you may be able to find instructions for your UEFI (or BIOS). Choose your UEFI firmware developer for specific instructions on enabling virtualization. If you don't see your firmware developer listed, refer to your device documentation.
| AMI | Refer to your device's firmware documentation |
|---|---|
| Phoenix | Refer to your device's firmware documentation |
3. Turn on Virtual Machine Platform in Windows
Note
These instructions might apply if you upgraded your PC from Windows 10 to Windows 11.
- Select Start
 , type Windows features, and select Turn Windows features on or off from the list of results.
 - In the Windows Features window that just opened, find Virtual Machine Platform and select it.
- Select OK. You might need to restart your PC.