摘要
本文簡要說明如何在 Windows 7 中變更網路連線的優先順序,讓它們遵循特定的連線順序。
在 Windows 7 中變更網路連接優先順序的步驟
-
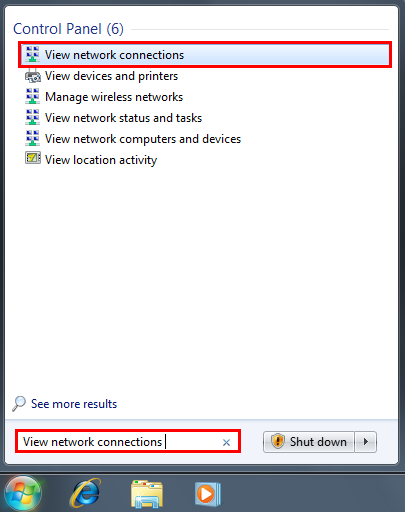
按一下 [ 開始], 然後在 [搜尋] 欄位中輸入 [查看網路連線]。
-
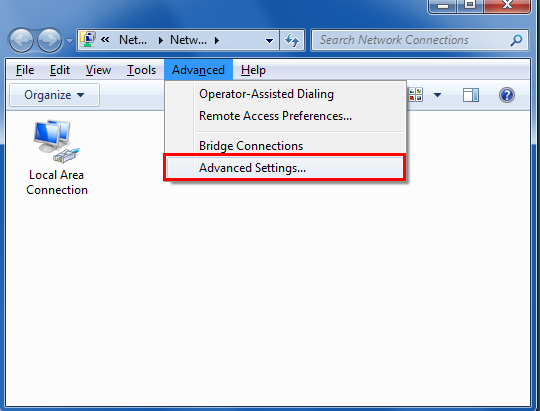
按ALT 鍵,按一下 [ 高級選項 ],然後按一下 [ 高級設定...]。
-
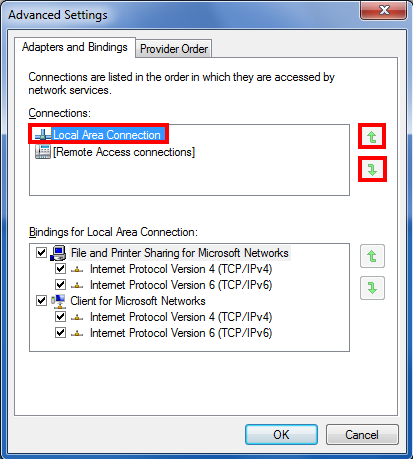
選取 [局域 連線],然後按一下綠色箭號,給予所需的連線優先順序。
-
根據您的喜好設定組織可用的網路連線之後,按一下 [確定]。
-
在檢測可用的連線時,電腦將遵循優先順序順序。
在 Windows 7 中變更無線網路連接優先順序的步驟
電腦可以一次偵測一個以上的無線網路。 本文說明如何排列您想要的無線網路優先。
-
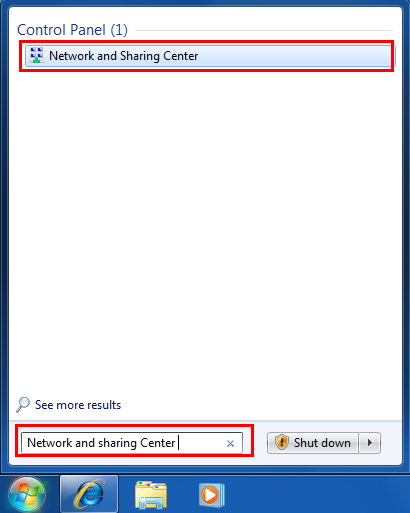
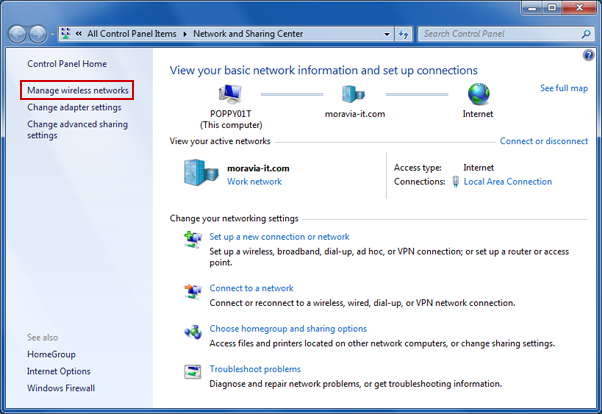
按一下 [ 開始], 然後在 [搜尋] 欄位中,輸入 [ 網路和共用中心]。
-
在 [ 網路和共用中心] 中,按一下 [ 管理無線網路]。
-
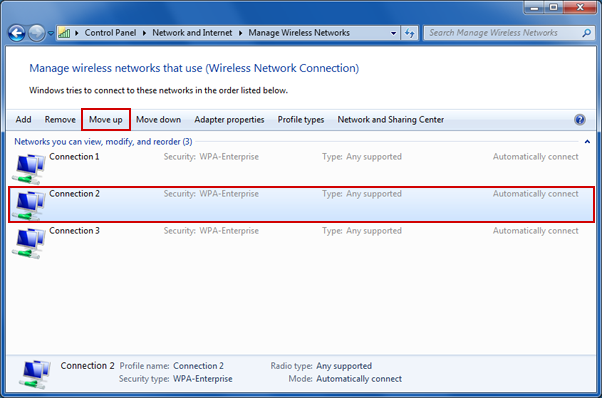
按一下 [連接],取得優先順序(例如, 連接 2 的優先順序低於 [ 連接 1]),然後按一下 [ 上移]。

-
下次檢測網路時,電腦將提供比連接1更多的連接優先順序至連線2。
您的意見對我們很重要: 使用底部的 [批註] 欄位,在這些文章中傳送您的意見。 您將協助我們改善內容。 謝謝!