
Overview
These instructions will explain how to add a standard statement to your Dragon Copilot or DAX Copilot AI-written note. You may wish to add such a statement to cover attestations or for general purpose information.
There are two main methods for achieving this goal.
- Insert additional text every time before or after a document section.
- Use Customizable Templates to insert text every time.
These instructions are optimized for Dragon Copilot, but similar instructions apply to DAX Copilot.
Option 1: Additional static text insertion
Both Dragon Copilot and DAX Copilot give you the option to insert a string of static text before or after document sections. This text is included whenever text is transferred to the EHR, either automatically or through copy/paste or transfer using voice commands.
- Define a text or auto-text with the text you want to include in your note. For example:

2. Navigate to Settings > Note style & format > Sections > Assessment and Plan; then activate "Additional text."
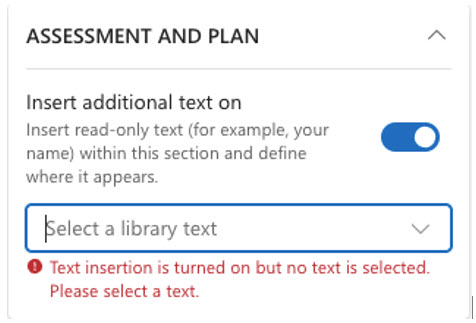
3. Select the text you wish to display and where to display it.
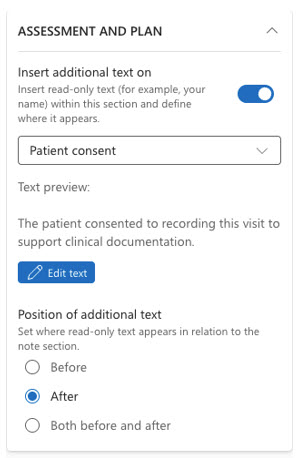
4. You are done. In the user interface, you will see the additional text represented outside of the main text, and that text will be included in any transfer operation.

Option 2: Customizable template approach
The directions that follow assume basic familiarity with customizable templates. Additional information can be found in our documentation:
- Dragon Copilot: Intro to customizable templates - Microsoft Support
- DAX Copilot: DAX Copilot-Customizable templates
1. From any session or encounter, enter the Style Wizard configuration. The easiest way to do this is to select the gear icon.
![]()
2. Select the option to use the customizable template for Assessment and Plan and select "Edit template."
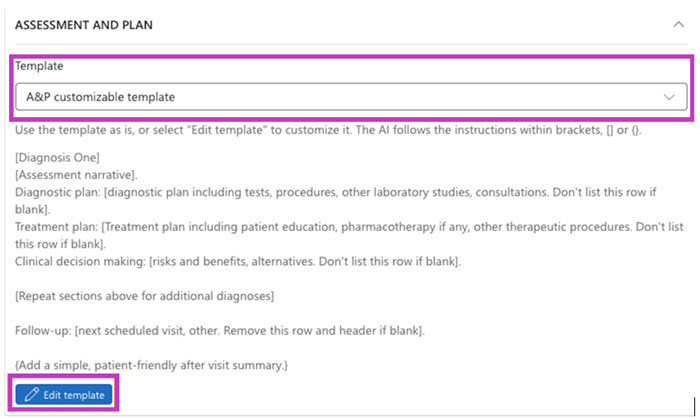
Note that if you want to use one of the other template formats, you can copy the templates of that format into your customizable template..
3. Add the static text that you wish to have in every note. to the end of the customizable template. For example:
{Add this statement of patient recording consent unless I say not to include it, "The patient consented to recording this visit to support clinical documentation."}
After adding this text, you should monitor its effectiveness across several sessions. Adjustments to the text may improve its consistency if you find cases in which it is not effective.
Additional template-writing instructions and capabilities can be found in our documentation: How to edit default customizable templates.
Note to administrators
Administrators who wish to prepare the texts or customizable templates for individual users may do so by editing text/auto-text in administrative systems. These capabilities are available for both Nuance (NMC) and Microsoft (Dragon Admin Center) administrative users.
For customizable templates, admins should edit "AP customizable template." End users must then elect to use the customizable template through their style wizard.
Related Topics
Intro to customizable templates
Use default customizable templates
How to edit default customizable templates