
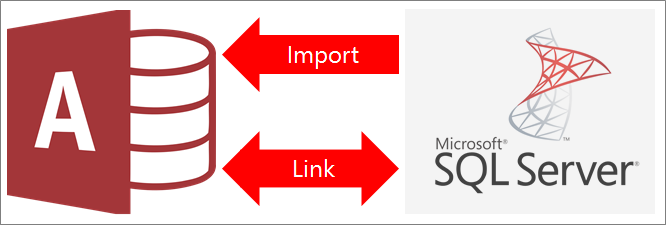
You can link to or import data from a SQL Server database. For more information, see SQL Server 2016.
- When you link to data, Access creates a two-way connection that synchronizes changes between Access and the SQL Server database.
- When you import data, Access creates a one-time copy of the data. Changes in either Access or the SQL Server database aren't synchronized.
Before you begin
To help the process go smoothly, make these preparations before you link or import:
- Locate the SQL Server database server name, identify the connection information that you need, and choose an authentication method (Windows or SQL Server). For more information about authentication methods, see Connect to Server (Database Engine) and Securing your database.
- Identify the tables or views that you want to link to or import, and uniquely-valued fields for linked tables. You can link to or import more than one table or view in a single operation.
- Consider the number of columns in each table or view. Access doesn't support more than 255 fields in a table, so it links or imports only the first 255 columns. As a workaround, you can create a view in the SQL Server database to access columns beyond the limit.
- Determine the total amount of data being imported. The maximum size of an Access database is two gigabytes, minus the space needed for system objects. If the SQL Server database contains large tables, you might not be able to import them all into a single Access database. In this case, consider linking to the data instead of importing.
- Secure your Access database and the connection information it contains by using a trusted location and an Access database password. This is especially important if you choose to save the SQL Server password in Access.
- Plan for making additional relationships. Access does not automatically create relationships between related tables at the end of an import operation. You can manually create the relationships between new and existing tables by using the Relationships window. For more information, see What is the Relationships window? and Create, edit or delete a relationship.
Stage 1: Get started
Select External Data > New Data Source > From Database > From SQL Server.
In the Get External Data – ODBC Database dialog box, do one of the following:
- To import data, select Import the source data into a new table in the current database.
- To link to data, select Link the data source by creating a linked table.
Select OK.
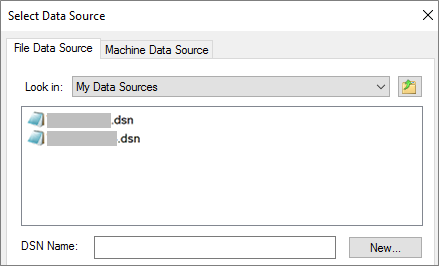
Stage 2: Create or reuse a DSN file
You can create a DSN (data source name) file or reuse an existing one. Use a DSN file when you want to reuse the same connection information for different link and import operations, or when you want to share that information with another app that also uses DSN files. You can create a DSN file directly by using Data Connection Manager. For more information, see Administer ODBC data sources.
Although you can still use earlier versions of the SQL ODBC driver, we recommend version 13.1 because it includes many improvements and supports new SQL Server 2016 features. For more information, see Microsoft ODBC Driver for SQL Server on Windows.
Do one of the following:
If the DSN file you want to use already exists, select it from the list.
Depending on which authentication method you entered in the connection information, you may need to enter a password again.
To create a new DSN file:
Select New.
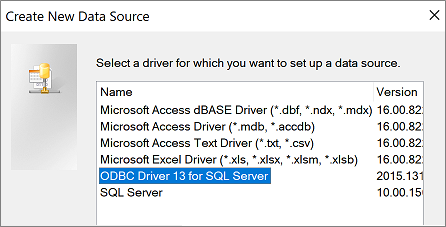
Select ODBC Driver 13 for SQL Server, and then select Next.
Enter a name for the DSN file, or select Browse to create the file in a different location.
Select Next to review the summary information, and then select Finish.
Stage 3: Use the Create a New Data Source to SQL Server wizard
In the Create a New Data Source to SQL Server wizard, do the following:
On page one, enter identification information:
- In the Description box, you can enter descriptive information about the DSN file.
- In the Server box, enter the name of the SQL Server. Don't select the down arrow.
On page two, select one of the following authentication methods:
- With Integrated Windows authentication: Connect through a Windows user account. You can also enter a Service Principal Name (SPN). For more information, see Service Principal Names (SPNs) in Client Connections (ODBC).
- With SQL Server authentication…: Connect by entering the login ID and password that are set up in the database.
On pages three and four, select the options that you want to customize for the connection. For more information about these options, see Microsoft ODBC Driver for SQL Server.
A screen appears to confirm your settings. Select Test Data Source to confirm your connection.
You might need to log in to the database. In the SQL Server Login dialog box, enter the login ID and password. To change additional settings, select Options.
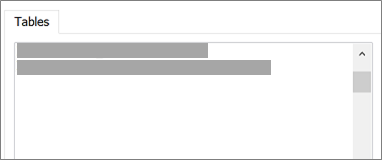
Stage 4: Select tables and views to link to or import
In the Link Tables or Import Objects dialog box, under Tables, select each table or view that you want to link or import, and then select OK.
In a link operation, decide whether to select Save Password.
Selecting this option means you don't have to enter credentials each time you open Access and access the data. However, it stores an unencrypted password in the Access database. Anyone who can access the source contents can see the user name and password. If you select this option, we strongly recommend storing the Access database in a trusted location and creating an Access database password. For more information, see Decide whether to trust a database and Encrypt a database by using a database password.
If you decide not to save the password and later change your mind, you need to delete and re-create the linked table, and then select Save Password.
Stage 5: Create specifications and tasks (Import only)
- In the Get External Data - ODBC Database dialog box, you can save the import steps as a specification and create an Outlook task to automate the import operation on a regular basis. For more information, see Save the details of an import or export operation as a specification.
Results
When a link or import operation finishes, the tables appear in the Navigation Pane with the same name as the SQL Server table or view combined with the owner name. For example, if the SQL name is dbo.Product, the Access name is dbo_Product. If that name is already in use, Access appends 1 to the new table name, such as dbo_Product1. If dbo_Product1 is also already in use, Access creates dbo_Product2, and so on. You can rename the tables to something more meaningful.
In an import operation, Access never overwrites a table in the database. Although you can't directly append SQL Server data to an existing table, you can create an append query after you import data from similar tables.
In a link operation, if columns are read-only in a SQL Server table, they're also read-only in Access.
Tip
To see the connection string, hover over the table in the Navigation Pane.
Update the linked table design
You can't add, delete, or modify columns or change data types in a linked table. If you want to make design changes, make them in the SQL Server database. To see the design changes in Access, update the linked tables:
- Select External Data > Linked Table Manager.
- Select each linked table you want to update, select OK, and then select Close.
Compare data types
Access and SQL Server use different names for some data types. For example, a SQL Server column that uses the bit data type is imported or linked into Access as the Yes/No data type. For more information, see Comparing Access and SQL Server data types.
What else should I know?
- For information on how to save the details of your import into a specification that you can reuse later, see the article Save the details of an import or export operation as a specification.
- For information on how to run saved import specifications, see the article Run a saved import or export operation.
- For information on how to schedule specifications to run at specific times, see the article Schedule an import or export operation.
- For information on how to change a specification name, delete specifications, or update the names of source files in specifications, see the article Manage Data Tasks.