

Summary
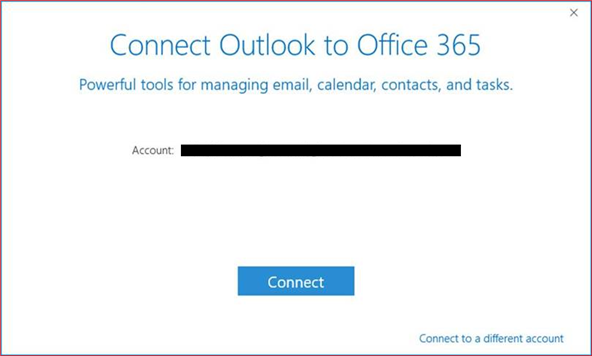
When you configure an Office 365 account in Outlook for Office 365, you see the Simplified Account Creation feature, which is presented as the "Connect Outlook to Office 365" wizard in Outlook.
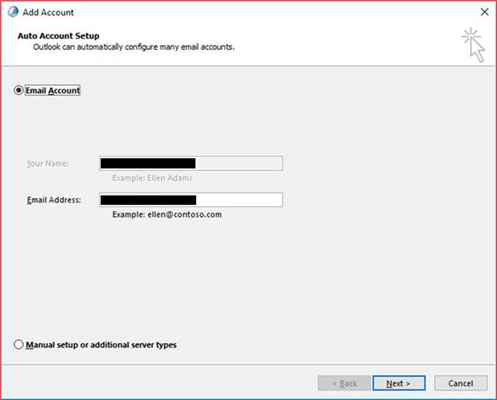
However, you may prefer to use the traditional account dialog box to configure new accounts in Outlook for Office 365, as shown in the following image:
More information
To disable the Simplified Account Creation dialog box in Outlook for Office 365 and use the traditional account dialog box instead, follow these steps.
Important
Follow the steps in this section carefully. Serious problems might occur if you modify the registry incorrectly. Before you modify it, back up the registry for restoration in case problems occur.
Exit Outlook.
Start Registry Editor. To do this, use the following procedure.
- Windows 11: Press Windows Key + R to open the Run dialog box. Type regedit.exe, and then click OK.
In Registry Editor, locate and then click the user settings subkey in the registry:
HKEY_CURRENT_USER\SOFTWARE\Microsoft\Office\16.0\Outlook\setup
or the group policy subkey in the registry:
HKEY_CURRENT_USER\SOFTWARE\Policies\Microsoft\Office\16.0\Outlook\setupOn the Edit menu, point to New and then DWORD (32-bit) Value.
Type DisableOffice365SimplifiedAccountCreation, and then press Enter.
Right-click DisableOffice365SimplifiedAccountCreation, and then select Modify.
In the Value data box, type 1, and then click OK.
On the File menu, select Exit to exit Registry Editor.
About the Simplified Account Creation feature
The Simplified Account Creation feature was first introduced in Click-to-Run installations of Outlook, starting with version 16.0.6769.2015. You must be signed in to an Office 365 account to activate this feature.
To see the account that you used to sign in, select File, select Office Account, and then view your User Information.