You can use the Outlook Address Book—a collection of address books or address lists created from your contact folders—to look up and select names, email addresses, and distribution lists when you address email messages.
If you use Outlook with an Exchange Server account, your address book list will include the Global Address List (GAL). The GAL contains the names and email addresses of everyone that has an account with that Exchange Server and is configured automatically by Exchange.
Select a tab option below for the version of Outlook you're using. What version of Outlook do I have?
In new Outlook, you can:
Open your address book to send an email to a contact | Add an LDAP address book | Remove an address book
Send an email to a contact in your address book from the New mail screen.
On the Home tab, select New mail, then Mail.
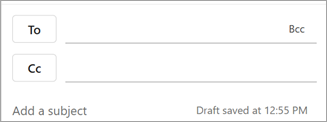
To open the address book, select any of the To, Cc, or Bcc buttons. The Bcc field can be found on the same line as To. Select Bcc and then select the Bcc button that appears.
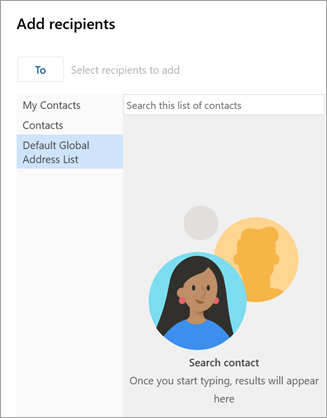
When your address book opens, you can search for contacts in your lists to add them to your message.
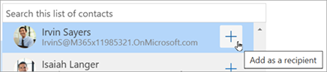
When you find the contact you'd like to send the message to, select Add
 next to their name.
Add any other recipients using the same process, and then continue composing your message.
Back to top
Add an LDAP address book in new Outlook
If your organization uses a Lightweight Directory Access Protocol (LDAP) directory, you can configure new Outlook for Windows to search and access directory information such as employee names, email addresses, phone numbers, and other contact details directly from the corporate directory. You can locate an LDAP server on the Internet, on your organization's intranet, or through another company that hosts an LDAP server.
- Select the File tab, then select Settings.
- In the Settings window, select Mail, then LDAP.
- Under LDAP, select + Add new address book, add any required information such as the Server URL and Directory detials, then select Save.
Note
Directory settings and supported authentication methods depend on the LDAP server being used. The exact values for Server URL, port, and security settings must be provided by the organization managing the directory service.
Back to top
Remove an address book in new Outlook.
- Select the File tab, then select Settings.
- In the Settings window, select Mail, then LDAP.
- Under LDAP, select the Delete button next to the Directory name, then select Save.
Back to top
In classic Outlook, you can:
Open your address book to send an email to a contact | View an address book | Add an address book | Remove an address book
Send an email to a contact in your address book from the New Email screen.
Select New Email.
Select the To button.
When your address book opens, you can search for contacts in your lists to add them to your message.
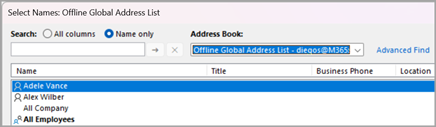
Select the name of the contact you'd like to send the email to. With the contact selected, press the To, Cc, or Bcc button to add that contact to the appropriate field. To remove a contact from any of those fields, place your curser after the name and use Backspace on your keyboard to delete the contact.
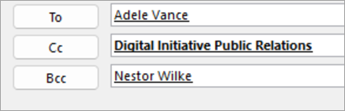
Add any other recipients using the same process, select OK, and then continue composing your message.
Back to top
View an address book in classic Outlook
The default view of an address book typically is the Global Address Book (GAL).
- On the Home tab, in the Find group, choose Address Book.
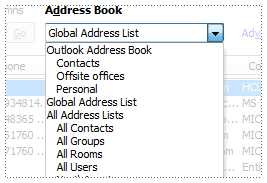
- In the Address Book list, choose the address book you want to view.
- From here, you can Search by Name only or All columns if you know the contact's Title, Location, etc.
- Double click the contact's name to reveal their contact card. From here, you have the options to Start an audio call, Start chat or Send email.
Back to top
Add an address book in classic Outlook
On the File tab, select Account Settings > Account Settings.
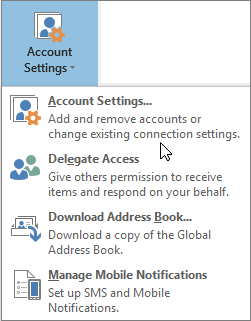
In the Account Settings dialog box, on the Address Books tab, select New.
Note
Existing address books are listed here.
You'll be prompted to select one of two types of address books: Internet Directory Service (LDAP) or Additional Address Book.
Exit and restart classic Outlook to use the address book that you added.
Back to top
Remove an address book in classic Outlook
- On the File tab, select Account Settings > Account Settings.
- On the Address Books tab, select the address book that you want to remove, and then select Remove.
Back to top
Create a New mail to search for and add a contact from the address book.
Select New mail > Mail from the Home tab.
To open the address book, select any of the To, Cc, or the Bcc buttons. The Cc and Bcc fields can be found on the same line as To. Select Cc or Bcc and then select one of the buttons that appear.
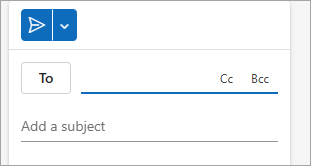
When your address book opens, you can search for contacts in your lists to add them to your message.
When you find the contact you'd like to send the message to, select Add
next to their name.
Add any other recipients using the same process, and then continue composing your message.
Back to top
See also
Add, find, edit, or delete a contact in Outlook
Manage contacts in Outlook
Create address book in classic Outlook
