
To provide additional emphasis or show your information in phases, you can add an animation to your SmartArt graphic or to an individual shape in your SmartArt graphic. For example, you can make a shape fly in quickly from one side of your screen or slowly fade in.
Add an animation
- Select the SmartArt graphic to animate, and choose the Animations tab.
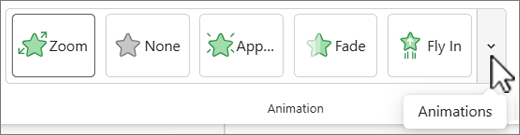
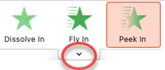
- In the Animation group, select the animation effect you want. Select
 Animation Styles to expand the gallery for more choices.
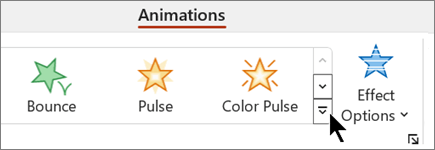
To remove the animation, select None from the gallery of animation options.
Animate individual shapes in your SmartArt graphic
Once you've added the animation, you can animate individual shapes.
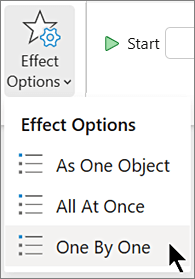
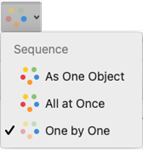
- On the Animations tab, select Effect Options in the Animation group, and choose One by One.
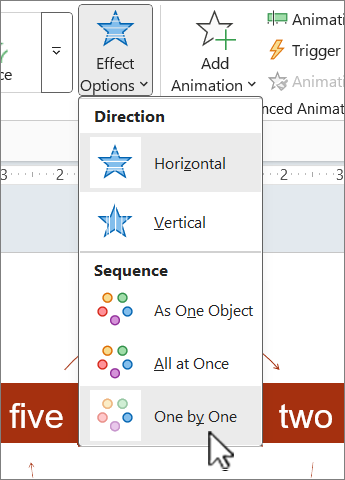
Note: The button icon and menu options vary with the animation effect you choose. - In the Advanced Animation group, select
 Animation Pane.
 - In the Animation Pane list, select the expand chevron
 to display all of the shapes in your SmartArt graphic.
 - Select all of the shapes that you don't want to animate, (hold down Ctrl and then select each shape in turn).
- Choose None in the Animation group. (This removes the animation effect from the shape. It doesn't remove the shape from your SmartArt graphic.)

- For each remaining shape, right-click the shape in the
Animation Pane, and select the animation options you want.
Tip
Use Animation Painter on the Animations tab to quickly copy animations from one SmartArt graphic to another.
Reverse the order of an animation
- Go to the SmartArt graphic with the animation you want to reverse.
- On the Animations tab, in the Animation group, select the
 Show Additional Effects Options dialog box launcher.
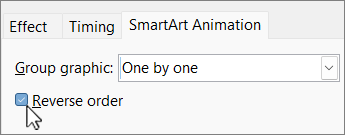
 - On the SmartArt Animation tab, select the Reverse order check box.
Fine-tune an animation
You can tweak your animation by using effect options.
Important
Some animation effects that aren't available for SmartArt graphics are available for shapes. To apply those effects to a SmartArt, right-click it, then select Convert to Shapes.
Go to the SmartArt graphic with the animation you want to adjust.
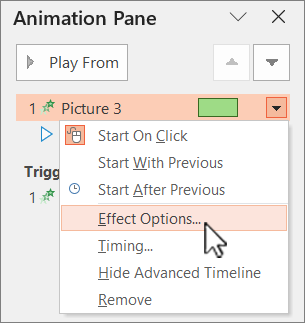
On the Animations tab, select
Animation Pane in the Advanced Animation group.In the Animation Pane list, select the arrow to the right of the animation you want to change, and then choose Effect Options.
Select the SmartArt Animation tab in the Group graphic list, select one of the following options from the dialog box:
Option Description As One Object Animates the whole SmartArt graphic as one large picture or object. All at Once Animates each shape individually at the same time. The difference between this animation and As one object is most notable in animations where the shapes rotate or grow. With All at once, each shape rotates or grows individually. With As one object, the whole SmartArt graphic rotates or grows. One by One Animates each shape individually, one after the other. Level at Once Animates all shapes at the same level at the same time. For example, if you have three shapes with Level 1 text and three shapes with Level 2 text, the Level 1 shapes are animated together first, and then Level 2 shapes are animated together. Level One by One Animates each shape within each level one after the other before going to the shapes in the next level. For example, if you have four shapes with Level 1 text and three shapes with Level 2 text, each of the Level 1 shapes are animated one after the other, before each of the three Level 2 shapes are animated one after the other.
Note
- Option choices vary by how your SmartArt is animated.
- The All at Once animation behaves differently than the As One Object animation. For example, if you pick the All at Once option and the Fly In animation, shapes that have farther to fly will fly at a faster speed so that all of the shapes arrive at their destinations at the same time. If you pick this same animation and the As One Object option, all the shapes fly at the same speed.
- If you pick any animation except As One Object, the background of the SmartArt graphic will show on your slide. You can't animate the background, so if it's messing up your slide, try setting the fill and lines of your SmartArt graphic to None.
Remove an animation
- Go to the SmartArt graphic with the animation you want to remove.
- On the Animations tab, in the Advanced Animation group, select
Animation Pane.
- In the Animation Pane list, select the arrow to the right of the animation you want to change, and then select Remove.




Tips for picking an animation
To decide which animation works best, look at the information in the SmartArt graphic text pane, because most animation starts with the top bullet in the Text pane and moves down from there. Alternatively, you can play an animation in reverse order (see the section "Reverse the order of an animation" above). If you can't see the Text pane, select Text Pane in the Create Graphic group on the SmartArt Tools Design tab.
The animations that are available depend on the layout of your SmartArt graphic, but you can always animate all of the shapes at once or one shape at time.
Animations that you apply to a SmartArt graphic are different from animations that you can apply to shapes, text, or WordArt in the following ways:
- Connecting lines between shapes are always associated with the second shape and are not animated individually.
- If you apply an animation to shapes in a SmartArt graphic, the animation plays in the order that the shapes appear. The order can be reversed only as a whole.
Example: If you have six shapes and each contains a single letter A through F, you can play the animation from A to F or F to A. You can't play the animation out of order, such as A to C and then F to D. but, you can create multiple slides to mimic this order. In this example, you can create one slide that animates shapes A to C and a second slide that animates shapes F to D. - When you switch SmartArt graphic layouts, any animation that you have added is transferred to the new layout.