
A page border can give your publication more flair as well as add a professional look and feel. You can add a page border to a single page or to all pages. If you're adding a border to all pages, you need to add it to only the master page and it will appear on all pages.
Add a border to a master page
To add a border to all the pages in your publication, add the border to the master page.
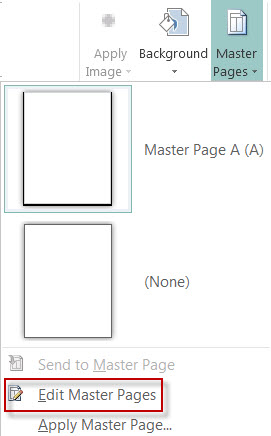
Click Page Design > Master Pages.
Select your master page, and click Edit Master Pages.
Click Home > Shapes, and in the Basic Shapes section click Rectangle
 .
.Drag on the page to draw the page border.
Right-click the border, and then select Format Autoshape.
Note
Be sure that the Shape Fill is set to No Fill or your page will be completely filled with the fill color.
Tip
To add the border equally to both the inside and the outside of the rectangle, rather than to the inside only, clear the Draw border inside frame check box. This helps to prevent the border from overlapping objects that are located inside of the rectangle.
Click the Colors and Lines tab, choose a color and type of line, and then click OK.
On the Master Page tab, click Close Master Page.
Add a line border to a single page
With the page selected, click Home > Shapes.
In the Basic Shapes section click Rectangle
, and then drag to draw the page border.Important
If there are already things on the page, such as pictures or text boxes, send the rectangle to the back by selecting the rectangle and clicking Send Backward > Send to Back. This will place everything on top of the rectangle.
Right-click the border, and then select Format Autoshape.
Note
Be sure that the Shape Fill is set to No Fill or your page will be completely filled with the fill color.
Tip
To add the border equally to both the inside and the outside of the rectangle, rather than to the inside only, clear the Draw border inside frame check box.
Click the Colors and Lines tab, choose a color and type of line, and then click OK.
Add a pre-designed pattern border to a page
- With the page selected, click Home > Shapes.
- In the Basic Shapes section click Rectangle
, and then drag to draw the page border.
- Right-click the border, and then select Format Autoshape.
- Click the Colors and Lines tab, and then click BorderArt.
- In the Available Borders list, click the border you want, and then click OK.
Create a custom border
For extra pizzaz, add a custom border from a picture file, a scanned photograph, or a picture that you created in a drawing program. Your custom border will be stored with Publisher border art.
Note
The picture file that you use for a custom border must be smaller than 64 kilobytes (KB).
Click BorderArt and in the dialog box that appears, click Create Custom.
Click Select Picture.
In the Insert Pictures dialog box, browse to the picture you want to use, either on your computer or from Bings Images search.
Click the picture, and then click Insert.
In the Name Custom Border dialog box, name your custom border, and then click OK.
Note
If the picture is too large (greater than 64 KB), or if it contains text, you may get an error message. If this happens, select a smaller picture.
Remove a border
Select the border.
Note
To remove a border on a master page, click Master Page on the View tab, and then select the border.
Press Delete.
See also
Add a border around a text box, picture, or other object in Publisher