
Language Accessory Pack for Microsoft 365
Language packs add additional display, help, and proofing tools to Microsoft 365. You can install additional language accessory packs after installing Microsoft 365. If a language accessory pack is described as having partial localization, some parts of Microsoft 365 may still display in the language of your copy of Microsoft 365.
If a language is listed only once, German for example, then that pack includes the tools for all countries/regions that use that language.
Important: If your organization installed Microsoft 365 on your computer, contact your IT department to install any language packs.
-
If you're an administrator who has deployed Office LTSC 2021 to your users, you can deploy language packs by using the Deployment Tool.
-
If you're an administrator who has deployed a volume licensed version of Office 2019 to your users, you can deploy language packs by using the Deployment Tool.
-
If you're an administrator who has deployed a volume licensed version of Office 2016 to your users, you can download an ISO image of the language packs, language interface packs, and proofing tools from the Volume Licensing Service Center (VLSC).
Step 1: Install the language accessory pack
Select the version of Microsoft 365 you're using from the tabs below, then select the language desired from the drop-down list. Then choose the appropriate architecture (32-bit or 64-bit) from the download links provided. If you're not sure what you're using, see What version am I using?
Once the file is downloaded, open it to start installation.
|
Language |
Culture (ll-cc) |
Native name |
Extent of localization |
Description |
Links |
Download Instructions |
|
Afrikaans |
af-za |
Afrikaans |
Partial |
The pack includes your selected display language for some Microsoft 365 applications and includes proofing tools. |
Lees oor hoe om die pakket te konfigureer nadat dit geïnstalleer is. |
|
Language |
Culture (ll-cc) |
Native name |
Extent of localization |
Description |
Links |
Download Instructions |
|
Albanian |
sq-al |
Shqip |
Partial |
The pack includes your selected display language for some Microsoft 365 applications and includes proofing tools. |
|
Language |
Culture (ll-cc) |
Native name |
Extent of localization |
Description |
Links |
Download Instructions |
|
Amharic |
am-et |
አማርኛ |
Partial |
The pack includes your selected display language for some applications but does not include proofing tools. |
|
Language |
Culture (ll-cc) |
Native name |
Extent of localization |
Description |
Links |
Download Instructions |
|
Arabic |
ar-sa |
العربية |
Full |
The pack includes:
|
|
Language |
Culture (ll-cc) |
Native name |
Extent of localization |
Description |
Links |
Download Instructions |
|
Armenian |
hy-am |
Հայերեն |
Partial |
The pack includes your selected display language for some applications and includes proofing tools. |
Ծանոթացեք՝ ինչպես կարող եք կազմաձևել փաթեթը տեղադրումից հետո: |
|
Language |
Culture (ll-cc) |
Native name |
Extent of localization |
Description |
Links |
Download Instructions |
|
Assamese |
as-in |
অসমীয়া |
Partial |
The pack includes your selected display language for some applications and includes proofing tools. |
|
Language |
Culture (ll-cc) |
Native name |
Extent of localization |
Description |
Links |
Download Instructions |
|
Azerbaijani (Latin) |
az-Latn-az |
azərbaycan dili |
Partial |
The pack includes your selected display language for some applications and includes proofing tools. |
Quraşdırdıqdan sonra paketi necə konfiqurasiya etmək haqqında oxuyun. |
|
Language |
Culture (ll-cc) |
Native name |
Extent of localization |
Description |
Links |
Download Instructions |
|
Bangla (Bangladesh) |
bn-bd |
বাংলা (বাংলাদেশ) |
Proofing Tools only |
The pack includes a spell checker. |
ইনস্টল করার পর প্যাকটি কিভাবে কনফিগার করবেন সে বিষয়ে আরো জানুন৷ |
|
Language |
Culture (ll-cc) |
Native name |
Extent of localization |
Description |
Links |
Download Instructions |
|
Bangla (Bengali India) |
bn-in |
বাংলা |
Partial |
The pack includes your selected display language for some applications and includes proofing tools. |
ইনস্টল করার পর প্যাকটি কিভাবে কনফিগার করবেন সে বিষয়ে আরো জানুন৷ |
|
Language |
Culture (ll-cc) |
Native name |
Extent of localization |
Description |
Links |
Download Instructions |
|
Basque (Basque) |
eu-es |
euskara |
Partial |
The pack includes your selected display language for some applications and includes proofing tools. |
|
Language |
Culture (ll-cc) |
Native name |
Extent of localization |
Description |
Links |
Download Instructions |
|
Belarusian |
be-by |
Беларуская |
Partial |
The pack includes your selected display language for some applications but does not include proofing tools. |
Прачытайце аб тым, як сканфігурыраваць пакет пасля яго ўсталявання. |
|
Language |
Culture (ll-cc) |
Native name |
Extent of localization |
Description |
Links |
Download Instructions |
|
Bosnian (Latin) |
bs-Latn-ba |
bosanski |
Partial |
The pack includes your selected display language for some applications and includes proofing tools. |
|
Language |
Culture (ll-cc) |
Native name |
Extent of localization |
Description |
Links |
Download Instructions |
|
Bulgarian |
bg-bg |
български |
Full |
The pack includes:
|
|
Language |
Culture (ll-cc) |
Native name |
Extent of localization |
Description |
Links |
Download Instructions |
|
Catalan |
ca-es |
català |
Partial |
The pack includes your selected display language for some applications and includes proofing tools. |
Obtén més informació sobre la configuració del paquet després de la instal·lació. |
|
Language |
Culture (ll-cc) |
Native name |
Extent of localization |
Description |
Links |
Download Instructions |
|
Chinese (Simplified) |
zh-cn |
中文(简体) |
Full |
The pack includes:
|
|
Language |
Culture (ll-cc) |
Native name |
Extent of localization |
Description |
Links |
Download Instructions |
|
Chinese (Traditional) |
zh-tw |
中文(繁體) |
Full |
The pack includes:
|
|
Language |
Culture (ll-cc) |
Native name |
Extent of localization |
Description |
Links |
Download Instructions |
|
Croatian |
hr-hr |
hrvatski |
Full |
The pack includes:
|
|
Language |
Culture (ll-cc) |
Native name |
Extent of localization |
Description |
Links |
Download Instructions |
|
Czech |
cs-cz |
čeština |
Full |
The pack includes:
|
|
Language |
Culture (ll-cc) |
Native name |
Extent of localization |
Description |
Links |
Download Instructions |
|
Danish |
da-dk |
dansk |
Full |
The pack includes:
|
|
Language |
Culture (ll-cc) |
Native name |
Extent of localization |
Description |
Links |
Download Instructions |
|
Dutch |
nl-nl |
Nederlands |
Full |
The pack includes:
|
|
Language |
Culture (ll-cc) |
Native name |
Extent of localization |
Description |
Links |
Download Instructions |
|
English |
en-us |
English |
Full |
The pack includes:
|
|
Note: This language is only available for Version 2108 or later and isn't compatible with Office 2019. |
||||||
|
Language |
Culture (ll-cc) |
Native name |
Extent of localization |
Description |
Links |
Download Instructions |
|
English (United Kingdom) |
en-gb |
English (United Kingdom) |
Full |
The pack includes:
|
||
|
Language |
Culture (ll-cc) |
Native name |
Extent of localization |
Description |
Links |
Download Instructions |
|
Estonian |
et-ee |
eesti |
Full |
The pack includes:
|
|
Language |
Culture (ll-cc) |
Native name |
Extent of localization |
Description |
Links |
Download Instructions |
|
Filipino |
fil-ph |
Filipino |
Partial |
The pack includes your selected display language for some applications but does not include proofing tools. |
Magbasa tungkol sa paraan ng pag-configure sa pack pagkatapos ng pag-i-install. |
|
Language |
Culture (ll-cc) |
Native name |
Extent of localization |
Description |
Links |
Download Instructions |
|
Finnish |
fi-fi |
suomi |
Full |
The pack includes:
|
|
Language |
Culture (ll-cc) |
Native name |
Extent of localization |
Description |
Links |
Download Instructions |
|
French |
fr-fr |
Français |
Full |
The pack includes:
|
|
Note: This language is only available for Version 2108 or later and isn't compatible with Office 2019. |
||||||
|
Language |
Culture (ll-cc) |
Native name |
Extent of localization |
Description |
Links |
Download Instructions |
|
French (Canada) |
fr-ca |
Français (Canada) |
Full |
The pack includes:
|
||
|
Language |
Culture (ll-cc) |
Native name |
Extent of localization |
Description |
Links |
Download Instructions |
|
Galician |
gl-es |
Galego |
Partial |
The pack includes your selected display language for some applications and includes proofing tools. |
Obtén información sobre como configurar o paquete despois de instalalo. |
|
Language |
Culture (ll-cc) |
Native name |
Extent of localization |
Description |
Links |
Download Instructions |
|
Georgian |
ka-ge |
ქართული |
Partial |
The pack includes your selected display language for some applications and includes proofing tools. |
წაიკითხეთ, თუ როგორ უნდა დააკონფიგურიროთ პაკეტი ინსტალაციის შემდეგ. |
|
Language |
Culture (ll-cc) |
Native name |
Extent of localization |
Description |
Links |
Download Instructions |
|
German |
de-de |
Deutsch |
Full |
The pack includes:
|
|
Language |
Culture (ll-cc) |
Native name |
Extent of localization |
Description |
Links |
Download Instructions |
|
Greek |
el-gr |
Ελληνικά |
Full |
The pack includes:
|
|
Language |
Culture (ll-cc) |
Native name |
Extent of localization |
Description |
Links |
Download Instructions |
|
Gujarati |
gu-in |
ગુજરાતી |
Partial |
The pack includes your selected display language for some applications and includes proofing tools. |
ઇન્સ્ટોલ કર્યા પછી પૅક કેવી રીતે કન્ફિગર કરવું તે વિષે વાંચો. |
|
Language |
Culture (ll-cc) |
Native name |
Extent of localization |
Description |
Links |
Download Instructions |
|
Hausa |
ha-Latn-ng |
Hausa |
Proofing Tools only |
The pack includes a spell checker. |
|
Language |
Culture (ll-cc) |
Native name |
Extent of localization |
Description |
Links |
Download Instructions |
|
Hebrew |
he-il |
עברית |
Full |
The pack includes:
|
|
Language |
Culture (ll-cc) |
Native name |
Extent of localization |
Description |
Links |
Download Instructions |
|
Hindi |
hi-in |
हिंदी |
Partial |
The pack includes:
This pack does not include Project or Visio |
|
Language |
Culture (ll-cc) |
Native name |
Extent of localization |
Description |
Links |
Download Instructions |
|
Hungarian |
hu-hu |
magyar |
Full |
The pack includes:
|
|
Language |
Culture (ll-cc) |
Native name |
Extent of localization |
Description |
Links |
Download Instructions |
|
Icelandic |
is-is |
íslenska |
Partial |
The pack includes your selected display language for some applications and includes proofing tools. |
Lestu þér til um hvernig á að grunnstilla pakkann eftir að hann er settur upp. |
|
Language |
Culture (ll-cc) |
Native name |
Extent of localization |
Description |
Links |
Download Instructions |
|
Igbo |
ig-ng |
Igbo |
Proofing Tools only |
The pack includes a spell checker. |
|
Language |
Culture (ll-cc) |
Native name |
Extent of localization |
Description |
Links |
Download Instructions |
|
Indonesian |
id-id |
Bahasa Indonesia |
Full |
The pack includes:
|
|
Language |
Culture (ll-cc) |
Native name |
Extent of localization |
Description |
Links |
Download Instructions |
|
Irish |
ga-ie |
Gaeilge |
Partial |
The pack includes your selected display language for some applications and includes proofing tools. |
|
Language |
Culture (ll-cc) |
Native name |
Extent of localization |
Description |
Links |
Download Instructions |
|
isiXhosa |
xh-za |
isiXhosa |
Proofing Tools only |
The pack includes a spell checker. |
Funda malunga nendlela yokulungiselela iphekhi emva kokufakela. |
|
Language |
Culture (ll-cc) |
Native name |
Extent of localization |
Description |
Links |
Download Instructions |
|
isiZulu |
zu-za |
isiZulu |
Proofing Tools only |
The pack includes a spell checker. |
|
Language |
Culture (ll-cc) |
Native name |
Extent of localization |
Description |
Links |
Download Instructions |
|
Italian |
it-it |
Italiano |
Full |
The pack includes:
|
|
Language |
Culture (ll-cc) |
Native name |
Extent of localization |
Description |
Links |
Download Instructions |
|
Japanese |
ja-jp |
日本語 |
Full |
The pack includes:
|
|
Language |
Culture (ll-cc) |
Native name |
Extent of localization |
Description |
Links |
Download Instructions |
|
Kannada |
kn-in |
ಕನ್ನಡ |
Partial |
The pack includes your selected display language for some applications and includes proofing tools. |
ಸ್ಥಾಪನೆಗೊಳಿಸಿದ ನಂತರ ಪ್ಯಾಕ್ ಅನ್ನು ಹೇಗೆ ಕಾನ್ಫಿಗರ್ ಮಾಡಬೇಕೆಂಬ ಕುರಿತು ಓದಿ. |
|
Language |
Culture (ll-cc) |
Native name |
Extent of localization |
Description |
Links |
Download Instructions |
|
Kazakh |
kk-kz |
қазақ тілі |
Full |
The pack includes:
|
|
Language |
Culture (ll-cc) |
Native name |
Extent of localization |
Description |
Links |
Download Instructions |
|
Khmer |
km-kh |
ភាសាខ្មែរ |
Partial |
The pack includes your selected display language for some applications but does not include proofing tools. |
|
Language |
Culture (ll-cc) |
Native name |
Extent of localization |
Description |
Links |
Download Instructions |
|
Kinyarwanda |
rw-rw |
Kinyarwanda |
Proofing Tools only |
The pack includes a spell checker. |
Soma uko utunganya imikoreshereze y'ipaki nyuma yo kuyinjiza |
|
Language |
Culture (ll-cc) |
Native name |
Extent of localization |
Description |
Links |
Download Instructions |
|
KiSwahili |
sw-ke |
Kiswahili |
Proofing Tools only |
The pack includes a spell checker. |
Soma kuhusu jinsi ya kusanidi kifurushi baada ya kusakinisha. |
|
Language |
Culture (ll-cc) |
Native name |
Extent of localization |
Description |
Links |
Download Instructions |
|
Konkani |
kok-in |
कोंकणी |
Partial |
The pack includes your selected display language for some applications and includes proofing tools. |
|
Language |
Culture (ll-cc) |
Native name |
Extent of localization |
Description |
Links |
Download Instructions |
|
Korean |
ko-kr |
한국어 |
Full |
The pack includes:
|
|
Language |
Culture (ll-cc) |
Native name |
Extent of localization |
Description |
Links |
Download Instructions |
|
Kyrgyz |
ky-kg |
Кыргыз |
Proofing Tools only |
The pack includes a spell checker. |
|
Language |
Culture (ll-cc) |
Native name |
Extent of localization |
Description |
Links |
Download Instructions |
|
Latvian |
lv-lv |
latviešu |
Full |
The pack includes:
|
|
Language |
Culture (ll-cc) |
Native name |
Extent of localization |
Description |
Links |
Download Instructions |
|
Lithuanian |
lt-lt |
lietuvių |
Full |
The pack includes:
|
|
Language |
Culture (ll-cc) |
Native name |
Extent of localization |
Description |
Links |
Download Instructions |
|
Luxembourgish |
lb-lu |
Lëtzebuergesch |
Partial |
The pack includes your selected display language for some applications and includes proofing tools. |
|
Language |
Culture (ll-cc) |
Native name |
Extent of localization |
Description |
Links |
Download Instructions |
|
Macedonian (North Macedonia) |
mk-mk |
Македонски |
Partial |
The pack includes your selected display language for some applications and includes proofing tools. |
Прочитајте како да го конфигурирате пакетот по инсталирањето. |
|
Language |
Culture (ll-cc) |
Native name |
Extent of localization |
Description |
Links |
Download Instructions |
|
Malay (Latin) |
ms-my |
Bahasa Melayu |
Full |
The pack includes:
|
|
Language |
Culture (ll-cc) |
Native name |
Extent of localization |
Description |
Links |
Download Instructions |
|
Malayalam |
ml-in |
മലയാളം |
Partial |
The pack includes your selected display language for some applications and includes proofing tools. |
പായ്ക്ക് ഇൻസ്റ്റാൾ ചെയ്തതിന് ശേഷം അത് കോൺഫിഗർ ചെയ്യുന്ന വിധത്തെക്കുറിച്ച് വായിക്കുക. |
|
Language |
Culture (ll-cc) |
Native name |
Extent of localization |
Description |
Links |
Download Instructions |
|
Maltese |
mt-mt |
Malti |
Partial |
The pack includes your selected display language for some applications and includes proofing tools. |
|
Language |
Culture (ll-cc) |
Native name |
Extent of localization |
Description |
Links |
Download Instructions |
|
Maori |
mi-nz |
Reo Māori |
Partial |
The pack includes your selected display language for some applications and includes proofing tools. |
Pānuitia me pēhea e whirihoratia ngā mōkī i muri i te tāutanga. |
|
Language |
Culture (ll-cc) |
Native name |
Extent of localization |
Description |
Links |
Download Instructions |
|
Marathi |
mr-in |
[मराठी] |
Partial |
The pack includes your selected display language for some applications and includes proofing tools. |
स्थापित केल्यानंतर पॅक कॉनिफगर कसा करायचा याबद्दल अधिक वाचा. |
|
Language |
Culture (ll-cc) |
Native name |
Extent of localization |
Description |
Links |
Download Instructions |
|
Nepali |
ne-np |
नेपाली |
Partial |
The pack includes your selected display language for some applications and includes proofing tools. |
|
Language |
Culture (ll-cc) |
Native name |
Extent of localization |
Description |
Links |
Download Instructions |
|
Norwegian Bokmål |
nb-no |
norsk bokmål |
Full |
The pack includes:
|
|
Language |
Culture (ll-cc) |
Native name |
Extent of localization |
Description |
Links |
Download Instructions |
|
Norwegian Nynorsk |
nn-no |
nynorsk |
Partial |
The pack includes your selected display language for some applications and includes proofing tools. |
Les om korleis du kan konfigurere pakken etter installering. |
|
Language |
Culture (ll-cc) |
Native name |
Extent of localization |
Description |
Links |
Download Instructions |
|
Odia |
or-in |
ଓଡିଆ |
Partial |
The pack includes your selected display language for some applications and includes proofing tools. |
ସଂସ୍ଥାପନ କରିବା ପରେ ପ୍ୟାକ୍କୁ କିପରି ବିନ୍ୟାସ କରିବେ ସେ ସମ୍ପର୍କରେ ପଢନ୍ତୁ. |
|
Language |
Culture (ll-cc) |
Native name |
Extent of localization |
Description |
Links |
Download Instructions |
|
Pashto |
ps-af |
پښتو |
Proofing Tools only |
The pack includes a spell checker. |
له نصب څخه وروسته د بنډل د سازونې څرنګوالي په اړه معلومات ترلاسه کړئ |
|
Language |
Culture (ll-cc) |
Native name |
Extent of localization |
Description |
Links |
Download Instructions |
|
Persian (Farsi) |
fa-ir |
فارسی |
Partial |
The pack includes your selected display language for some applications and includes proofing tools. |
|
Language |
Culture (ll-cc) |
Native name |
Extent of localization |
Description |
Links |
Download Instructions |
|
Polish |
pl-pl |
polski |
Full |
The pack includes:
|
|
Language |
Culture (ll-cc) |
Native name |
Extent of localization |
Description |
Links |
Download Instructions |
|
Portuguese (Portugal) |
pt-pt |
Português (Portugal) |
Full |
The pack includes:
|
|
Language |
Culture (ll-cc) |
Native name |
Extent of localization |
Description |
Links |
Download Instructions |
|
Portuguese (Brazil) |
pt-br |
Português (Brasil) |
Full |
The pack includes:
|
|
Language |
Culture (ll-cc) |
Native name |
Extent of localization |
Description |
Links |
Download Instructions |
|
Punjabi (Gurmukhi) |
pa-in |
ਪੰਜਾਬੀ |
Partial |
The pack includes your selected display language for some applications and includes proofing tools. |
ਇੰਸਟਾਲ ਕਰਨ ਤੋਂ ਬਾਅਦ ਪੈਕ ਨੂੰ ਸੰਰਚਿਤ ਕਿਵੇਂ ਕਰੀਏ, ਇਸ ਬਾਰੇ ਪੜ੍ਹੋ। |
|
Language |
Culture (ll-cc) |
Native name |
Extent of localization |
Description |
Links |
Download Instructions |
|
Quechua |
quz-pe |
Runasimi |
Partial |
The pack includes your selected display language for some applications but does not include proofing tools. |
|
Language |
Culture (ll-cc) |
Native name |
Extent of localization |
Description |
Links |
Download Instructions |
|
Romanian |
ro-ro |
Română |
Full |
The pack includes:
|
|
Language |
Culture (ll-cc) |
Native name |
Extent of localization |
Description |
Links |
Download Instructions |
|
Romansh |
rm-ch |
Rumantsch |
Proofing Tools only |
The pack includes a spell checker. |
|
Language |
Culture (ll-cc) |
Native name |
Extent of localization |
Description |
Links |
Download Instructions |
|
Russian |
ru-ru |
русский |
Full |
The pack includes:
|
|
Language |
Culture (ll-cc) |
Native name |
Extent of localization |
Description |
Links |
Download Instructions |
|
Scottish Gaelic |
gd-gb |
Gàidhlig |
Partial |
The pack includes your selected display language for some applications and includes proofing tools. |
Faic an stiùireadh mu rèiteachadh na pacaide an dèidh an stàlaidh. |
|
Language |
Culture (ll-cc) |
Native name |
Extent of localization |
Description |
Links |
Download Instructions |
|
Serbian (Cyrillic, Serbia) |
sr-cyrl-rs |
српски |
Partial |
The pack includes your selected display language for some applications and includes proofing tools. |
|
Language |
Culture (ll-cc) |
Native name |
Extent of localization |
Description |
Links |
Download Instructions |
|
Serbian (Latin, Serbia) |
sr-latn-rs |
srpski (latinica, Srbija) |
Full |
The pack includes:
|
|
Language |
Culture (ll-cc) |
Native name |
Extent of localization |
Description |
Links |
Download Instructions |
|
Serbian (Cyrillic, Bosnia & Herzegovina) |
sr-cyrl-ba |
српски |
Partial |
The pack includes your selected display language for some applications and includes proofing tools. |
|
Language |
Culture (ll-cc) |
Native name |
Extent of localization |
Description |
Links |
Download Instructions |
|
Sesotho sa Leboa |
nso-za |
Sesotho sa Leboa |
Proofing Tools only |
The pack includes a spell checker. |
|
Language |
Culture (ll-cc) |
Native name |
Extent of localization |
Description |
Links |
Download Instructions |
|
Setswana |
tn-za |
Setswana |
Proofing Tools only |
The pack includes a spell checker. |
Bala gore o ka rulaganya jang sephuthelo seno fa se sena go tsenngwa. |
|
Language |
Culture (ll-cc) |
Native name |
Extent of localization |
Description |
Links |
Download Instructions |
|
Sinhala |
si-lk |
සිංහල |
Proofing Tools only |
The pack includes a spell checker. |
ස්ථාපනය කිරීමෙන් පසුව ඇසුරුම වින්යාස කරන ආකාරය ගැන කියවන්න. |
|
Language |
Culture (ll-cc) |
Native name |
Extent of localization |
Description |
Links |
Download Instructions |
|
Slovak |
sk-sk |
slovenčina |
Full |
The pack includes:
|
|
Language |
Culture (ll-cc) |
Native name |
Extent of localization |
Description |
Links |
Download Instructions |
|
Slovenian |
sl-si |
slovenščina |
Full |
The pack includes:
|
|
Language |
Culture (ll-cc) |
Native name |
Extent of localization |
Description |
Links |
Download Instructions |
|
Spanish |
es-es |
Español |
Full |
The pack includes:
|
|
Note: This language is only available for Version 2108 or later and isn't compatible with Office 2019. |
||||||
|
Language |
Culture (ll-cc) |
Native name |
Extent of localization |
Description |
Links |
Download Instructions |
|
Spanish |
es-mx |
Español (Mexico) |
Full |
The pack includes:
|
||
|
Language |
Culture (ll-cc) |
Native name |
Extent of localization |
Description |
Links |
Download Instructions |
|
Swedish |
sv-se |
Svenska |
Full |
The pack includes:
|
|
Language |
Culture (ll-cc) |
Native name |
Extent of localization |
Description |
Links |
Download Instructions |
|
Tamil |
ta-in |
தமிழ் |
Partial |
The pack includes your selected display language for some applications and includes proofing tools. |
நிறுவுதலுக்கு பிறகு தொகுப்பை எப்படி கட்டமைப்பது என்பதைப் பற்றி படிக்கவும். |
|
Language |
Culture (ll-cc) |
Native name |
Extent of localization |
Description |
Links |
Download Instructions |
|
Tatar (Cyrillic) |
tt-ru |
Татар |
Partial |
The pack includes your selected display language for some applications and includes proofing tools. |
|
Language |
Culture (ll-cc) |
Native name |
Extent of localization |
Description |
Links |
Download Instructions |
|
Telugu |
te-in |
తెలుగు |
Partial |
The pack includes your selected display language for some applications and includes proofing tools. |
వ్యవస్థాపించిన తర్వాత ప్యాక్ని ఎలా కాన్ఫిగర్ చేయాలో తెలుసుకోండి. |
|
Language |
Culture (ll-cc) |
Native name |
Extent of localization |
Description |
Links |
Download Instructions |
|
Thai |
th-th |
ไทย |
Full |
The pack includes:
|
|
Language |
Culture (ll-cc) |
Native name |
Extent of localization |
Description |
Links |
Download Instructions |
|
Turkish |
tr-tr |
Türkçe |
Full |
The pack includes:
|
|
Language |
Culture (ll-cc) |
Native name |
Extent of localization |
Description |
Links |
Download Instructions |
|
Ukrainian |
uk-ua |
українська |
Full |
The pack includes:
|
|
Language |
Culture (ll-cc) |
Native name |
Extent of localization |
Description |
Links |
Download Instructions |
|
Urdu |
ur-pk |
اردو |
Partial |
The pack includes your selected display language for some applications and includes proofing tools. |
|
Language |
Culture (ll-cc) |
Native name |
Extent of localization |
Description |
Links |
Download Instructions |
|
Uyghur |
ug-cn |
ئۇيغۇرچە |
Partial |
The pack includes your selected display language for some applications but does not include proofing tools. |
قاچىلىغاندىن كېيىن ئەپنى قانداق تەڭشەش كېرەكلىكىنى بىلىۋېلىڭ |
|
Language |
Culture (ll-cc) |
Native name |
Extent of localization |
Description |
Links |
Download Instructions |
|
Uzbek (Latin) |
uz-Latn-uz |
o'zbekcha |
Partial |
The pack includes your selected display language for some applications and includes proofing tools. |
Paketni o'rnatgandan so'ng uni qanday sozlash haqida o'qing. |
|
Language |
Culture (ll-cc) |
Native name |
Extent of localization |
Description |
Links |
Download Instructions |
|
Valencian |
ca-es-valencia |
Valencià |
Partial |
The pack includes your selected display language for some applications and includes proofing tools. |
Obteniu informació sobre com configurar el paquet després d'instal·lar-lo. |
|
Language |
Culture (ll-cc) |
Native name |
Extent of localization |
Description |
Links |
Download Instructions |
|
Vietnamese |
vi-vn |
Tiếng Việt |
Full |
The pack includes:
|
|
Language |
Culture (ll-cc) |
Native name |
Extent of localization |
Description |
Links |
Download Instructions |
|
Welsh |
cy-gb |
Cymraeg |
Partial |
The pack includes your selected display language for some applications and includes proofing tools. |
|
Language |
Culture (ll-cc) |
Native name |
Extent of localization |
Description |
Links |
Download Instructions |
|
Wolof |
wo-sn |
Wolof |
Proofing Tools only |
The pack includes a spell checker. |
|
Language |
Culture (ll-cc) |
Native name |
Extent of localization |
Description |
Links |
Download Instructions |
|
Yoruba |
yo-ng |
Ede Yorùbá |
Proofing Tools only |
The pack includes a spell checker. |
Step 2: Configure Microsoft 365 language
After you install the language accessory pack, you must configure Microsoft 365 for your new language preferences. This configuration affects all your Microsoft 365 applications.
Note: If you're using Office 365 and the commands available are different from what's shown here, select the Office 2016 tab and follow the instructions there.
-
In any Microsoft 365 application, on the File tab, select Options.
-
On the left, select Language.
-
Under Office display Language, make sure the display language you want to use is listed.
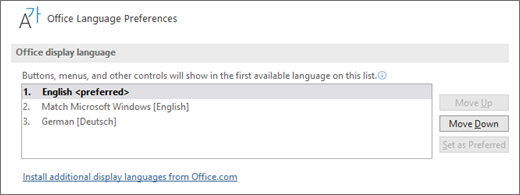
-
Under Office authoring languages and proofing, make sure the language you want to use for authoring your document is listed.
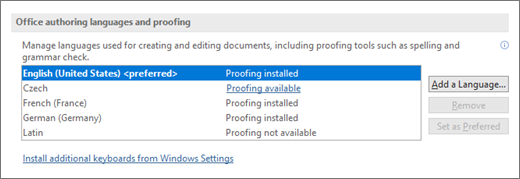
If the language accessory pack includes proofing tools for that language, its status appears as Proofing installed. If the status is Proofing available, select the link to install the proofing tools.
-
Restart all programs for your changes to take effect.
You can change the default language for all your Microsoft 365 applications in the Set the Office Language Preferences dialog. For more information, see Add a language or set language preferences in Office.
|
Language |
Culture (ll-cc) |
Native name |
Extent of localization |
Description |
Links |
Download Instructions |
|
Afrikaans |
af-za |
Afrikaans |
Partial |
The pack includes your selected display language for some Microsoft 365 applications and includes proofing tools. |
Lees oor hoe om die pakket te konfigureer nadat dit geïnstalleer is. |
|
Language |
Culture (ll-cc) |
Native name |
Extent of localization |
Description |
Links |
Download Instructions |
|
Albanian |
sq-al |
Shqip |
Partial |
The pack includes your selected display language for some Microsoft 365 applications and includes proofing tools. |
|
Language |
Culture (ll-cc) |
Native name |
Extent of localization |
Description |
Links |
Download Instructions |
|
Amharic |
am-et |
አማርኛ |
Partial |
The pack includes your selected display language for some applications but does not include proofing tools. |
|
Language |
Culture (ll-cc) |
Native name |
Extent of localization |
Description |
Links |
Download Instructions |
|
Arabic |
ar-sa |
العربية |
Full |
The pack includes:
|
|
Language |
Culture (ll-cc) |
Native name |
Extent of localization |
Description |
Links |
Download Instructions |
|
Armenian |
hy-am |
Հայերեն |
Partial |
The pack includes your selected display language for some applications and includes proofing tools. |
Ծանոթացեք՝ ինչպես կարող եք կազմաձևել փաթեթը տեղադրումից հետո: |
|
Language |
Culture (ll-cc) |
Native name |
Extent of localization |
Description |
Links |
Download Instructions |
|
Assamese |
as-in |
অসমীয়া |
Partial |
The pack includes your selected display language for some applications and includes proofing tools. |
|
Language |
Culture (ll-cc) |
Native name |
Extent of localization |
Description |
Links |
Download Instructions |
|
Azerbaijani (Latin) |
az-Latn-az |
azərbaycan dili |
Partial |
The pack includes your selected display language for some applications and includes proofing tools. |
Quraşdırdıqdan sonra paketi necə konfiqurasiya etmək haqqında oxuyun. |
|
Language |
Culture (ll-cc) |
Native name |
Extent of localization |
Description |
Links |
Download Instructions |
|
Bangla (Bangladesh) |
bn-bd |
বাংলা (বাংলাদেশ) |
Partial |
The pack includes your selected display language for some applications and includes proofing tools. |
ইনস্টল করার পর প্যাকটি কিভাবে কনফিগার করবেন সে বিষয়ে আরো জানুন৷ |
|
Language |
Culture (ll-cc) |
Native name |
Extent of localization |
Description |
Links |
Download Instructions |
|
Bangla (Bengali India) |
bn-in |
বাংলা |
Partial |
The pack includes your selected display language for some applications and includes proofing tools. |
ইনস্টল করার পর প্যাকটি কিভাবে কনফিগার করবেন সে বিষয়ে আরো জানুন৷ |
|
Language |
Culture (ll-cc) |
Native name |
Extent of localization |
Description |
Links |
Download Instructions |
|
Basque (Basque) |
eu-es |
euskara |
Partial |
The pack includes your selected display language for some applications and includes proofing tools. |
|
Language |
Culture (ll-cc) |
Native name |
Extent of localization |
Description |
Links |
Download Instructions |
|
Belarusian |
be-by |
Беларуская |
Partial |
The pack includes your selected display language for some applications but does not include proofing tools. |
Прачытайце аб тым, як сканфігурыраваць пакет пасля яго ўсталявання. |
|
Language |
Culture (ll-cc) |
Native name |
Extent of localization |
Description |
Links |
Download Instructions |
|
Bosnian (Latin) |
bs-Latn-ba |
bosanski |
Partial |
The pack includes your selected display language for some applications and includes proofing tools. |
|
Language |
Culture (ll-cc) |
Native name |
Extent of localization |
Description |
Links |
Download Instructions |
|
Bulgarian |
bg-bg |
български |
Full |
The pack includes:
|
|
Language |
Culture (ll-cc) |
Native name |
Extent of localization |
Description |
Links |
Download Instructions |
|
Catalan |
ca-es |
català |
Partial |
The pack includes your selected display language for some applications and includes proofing tools. |
Obtén més informació sobre la configuració del paquet després de la instal·lació. |
|
Language |
Culture (ll-cc) |
Native name |
Extent of localization |
Description |
Links |
Download Instructions |
|
Chinese (Simplified) |
zh-cn |
中文(简体) |
Full |
The pack includes:
|
|
Language |
Culture (ll-cc) |
Native name |
Extent of localization |
Description |
Links |
Download Instructions |
|
Chinese (Traditional) |
zh-tw |
中文(繁體) |
Full |
The pack includes:
|
|
Language |
Culture (ll-cc) |
Native name |
Extent of localization |
Description |
Links |
Download Instructions |
|
Croatian |
hr-hr |
hrvatski |
Full |
The pack includes:
|
|
Language |
Culture (ll-cc) |
Native name |
Extent of localization |
Description |
Links |
Download Instructions |
|
Czech |
cs-cz |
čeština |
Full |
The pack includes:
|
|
Language |
Culture (ll-cc) |
Native name |
Extent of localization |
Description |
Links |
Download Instructions |
|
Danish |
da-dk |
dansk |
Full |
The pack includes:
|
|
Language |
Culture (ll-cc) |
Native name |
Extent of localization |
Description |
Links |
Download Instructions |
|
Dari |
prs-af |
درى |
Partial |
The pack includes your selected display language for some applications but does not include proofing tools. |
|
Language |
Culture (ll-cc) |
Native name |
Extent of localization |
Description |
Links |
Download Instructions |
|
Dutch |
nl-nl |
Nederlands |
Full |
The pack includes:
|
|
Language |
Culture (ll-cc) |
Native name |
Extent of localization |
Description |
Links |
Download Instructions |
|
English |
en-us |
English |
Full |
The pack includes:
|
|
Note: This language is only available for Version 2108 or later and isn't compatible with Office 2019. |
||||||
|
Language |
Culture (ll-cc) |
Native name |
Extent of localization |
Description |
Links |
Download Instructions |
|
English (United Kingdom) |
en-gb |
English (United Kingdom) |
Full |
The pack includes:
|
||
|
Language |
Culture (ll-cc) |
Native name |
Extent of localization |
Description |
Links |
Download Instructions |
|
Estonian |
et-ee |
eesti |
Full |
The pack includes:
|
|
Language |
Culture (ll-cc) |
Native name |
Extent of localization |
Description |
Links |
Download Instructions |
|
Filipino |
fil-ph |
Filipino |
Partial |
The pack includes your selected display language for some applications but does not include proofing tools. |
Magbasa tungkol sa paraan ng pag-configure sa pack pagkatapos ng pag-i-install. |
|
Language |
Culture (ll-cc) |
Native name |
Extent of localization |
Description |
Links |
Download Instructions |
|
Finnish |
fi-fi |
suomi |
Full |
The pack includes:
|
|
Language |
Culture (ll-cc) |
Native name |
Extent of localization |
Description |
Links |
Download Instructions |
|
French |
fr-fr |
Français |
Full |
The pack includes:
|
|
Note: This language is only available for Version 2108 or later and isn't compatible with Office 2019. |
||||||
|
Language |
Culture (ll-cc) |
Native name |
Extent of localization |
Description |
Links |
Download Instructions |
|
French (Canada) |
fr-ca |
Français (Canada) |
Full |
The pack includes:
|
||
|
Language |
Culture (ll-cc) |
Native name |
Extent of localization |
Description |
Links |
Download Instructions |
|
Galician |
gl-es |
Galego |
Partial |
The pack includes your selected display language for some applications and includes proofing tools. |
Obtén información sobre como configurar o paquete despois de instalalo. |
|
Language |
Culture (ll-cc) |
Native name |
Extent of localization |
Description |
Links |
Download Instructions |
|
Georgian |
ka-ge |
ქართული |
Partial |
The pack includes your selected display language for some applications and includes proofing tools. |
წაიკითხეთ, თუ როგორ უნდა დააკონფიგურიროთ პაკეტი ინსტალაციის შემდეგ. |
|
Language |
Culture (ll-cc) |
Native name |
Extent of localization |
Description |
Links |
Download Instructions |
|
German |
de-de |
Deutsch |
Full |
The pack includes:
|
|
Language |
Culture (ll-cc) |
Native name |
Extent of localization |
Description |
Links |
Download Instructions |
|
Greek |
el-gr |
Ελληνικά |
Full |
The pack includes:
|
|
Language |
Culture (ll-cc) |
Native name |
Extent of localization |
Description |
Links |
Download Instructions |
|
Gujarati |
gu-in |
ગુજરાતી |
Partial |
The pack includes your selected display language for some applications and includes proofing tools. |
ઇન્સ્ટોલ કર્યા પછી પૅક કેવી રીતે કન્ફિગર કરવું તે વિષે વાંચો. |
|
Language |
Culture (ll-cc) |
Native name |
Extent of localization |
Description |
Links |
Download Instructions |
|
Hausa |
ha-Latn-ng |
Hausa |
Proofing Tools only |
The pack includes a spell checker. |
|
Language |
Culture (ll-cc) |
Native name |
Extent of localization |
Description |
Links |
Download Instructions |
|
Hebrew |
he-il |
עברית |
Full |
The pack includes:
|
|
Language |
Culture (ll-cc) |
Native name |
Extent of localization |
Description |
Links |
Download Instructions |
|
Hindi |
hi-in |
हिंदी |
Partial |
The pack includes:
This pack does not include Project or Visio |
|
Language |
Culture (ll-cc) |
Native name |
Extent of localization |
Description |
Links |
Download Instructions |
|
Hungarian |
hu-hu |
magyar |
Full |
The pack includes:
|
|
Language |
Culture (ll-cc) |
Native name |
Extent of localization |
Description |
Links |
Download Instructions |
|
Icelandic |
is-is |
íslenska |
Partial |
The pack includes your selected display language for some applications and includes proofing tools. |
Lestu þér til um hvernig á að grunnstilla pakkann eftir að hann er settur upp. |
|
Language |
Culture (ll-cc) |
Native name |
Extent of localization |
Description |
Links |
Download Instructions |
|
Igbo |
ig-ng |
Igbo |
Proofing Tools only |
The pack includes a spell checker. |
|
Language |
Culture (ll-cc) |
Native name |
Extent of localization |
Description |
Links |
Download Instructions |
|
Indonesian |
id-id |
Bahasa Indonesia |
Full |
The pack includes:
|
|
Language |
Culture (ll-cc) |
Native name |
Extent of localization |
Description |
Links |
Download Instructions |
|
Irish |
ga-ie |
Gaeilge |
Partial |
The pack includes your selected display language for some applications and includes proofing tools. |
|
Language |
Culture (ll-cc) |
Native name |
Extent of localization |
Description |
Links |
Download Instructions |
|
isiXhosa |
xh-za |
isiXhosa |
Proofing Tools only |
The pack includes a spell checker. |
Funda malunga nendlela yokulungiselela iphekhi emva kokufakela. |
|
Language |
Culture (ll-cc) |
Native name |
Extent of localization |
Description |
Links |
Download Instructions |
|
isiZulu |
zu-za |
isiZulu |
Proofing Tools only |
The pack includes a spell checker. |
|
Language |
Culture (ll-cc) |
Native name |
Extent of localization |
Description |
Links |
Download Instructions |
|
Italian |
it-it |
Italiano |
Full |
The pack includes:
|
|
Language |
Culture (ll-cc) |
Native name |
Extent of localization |
Description |
Links |
Download Instructions |
|
Japanese |
ja-jp |
日本語 |
Full |
The pack includes:
|
|
Language |
Culture (ll-cc) |
Native name |
Extent of localization |
Description |
Links |
Download Instructions |
|
Kannada |
kn-in |
ಕನ್ನಡ |
Partial |
The pack includes your selected display language for some applications and includes proofing tools. |
ಸ್ಥಾಪನೆಗೊಳಿಸಿದ ನಂತರ ಪ್ಯಾಕ್ ಅನ್ನು ಹೇಗೆ ಕಾನ್ಫಿಗರ್ ಮಾಡಬೇಕೆಂಬ ಕುರಿತು ಓದಿ. |
|
Language |
Culture (ll-cc) |
Native name |
Extent of localization |
Description |
Links |
Download Instructions |
|
Kazakh |
kk-kz |
қазақ тілі |
Full |
The pack includes:
|
|
Language |
Culture (ll-cc) |
Native name |
Extent of localization |
Description |
Links |
Download Instructions |
|
Khmer |
km-kh |
ភាសាខ្មែរ |
Partial |
The pack includes your selected display language for some applications but does not include proofing tools. |
|
Language |
Culture (ll-cc) |
Native name |
Extent of localization |
Description |
Links |
Download Instructions |
|
Kinyarwanda |
rw-rw |
Kinyarwanda |
Proofing Tools only |
The pack includes a spell checker. |
Soma uko utunganya imikoreshereze y'ipaki nyuma yo kuyinjiza |
|
Language |
Culture (ll-cc) |
Native name |
Extent of localization |
Description |
Links |
Download Instructions |
|
KiSwahili |
sw-ke |
Kiswahili |
Partial |
The pack includes your selected display language for some applications and includes proofing tools. |
Soma kuhusu jinsi ya kusanidi kifurushi baada ya kusakinisha. |
|
Language |
Culture (ll-cc) |
Native name |
Extent of localization |
Description |
Links |
Download Instructions |
|
Konkani |
kok-in |
कोंकणी |
Partial |
The pack includes your selected display language for some applications and includes proofing tools. |
|
Language |
Culture (ll-cc) |
Native name |
Extent of localization |
Description |
Links |
Download Instructions |
|
Korean |
ko-kr |
한국어 |
Full |
The pack includes:
|
|
Language |
Culture (ll-cc) |
Native name |
Extent of localization |
Description |
Links |
Download Instructions |
|
Kyrgyz |
ky-kg |
Кыргыз |
Partial |
The pack includes your selected display language for some applications and includes proofing tools. |
|
Language |
Culture (ll-cc) |
Native name |
Extent of localization |
Description |
Links |
Download Instructions |
|
Latvian |
lv-lv |
latviešu |
Full |
The pack includes:
|
|
Language |
Culture (ll-cc) |
Native name |
Extent of localization |
Description |
Links |
Download Instructions |
|
Lithuanian |
lt-lt |
lietuvių |
Full |
The pack includes:
|
|
Language |
Culture (ll-cc) |
Native name |
Extent of localization |
Description |
Links |
Download Instructions |
|
Luxembourgish |
lb-lu |
Lëtzebuergesch |
Partial |
The pack includes your selected display language for some applications and includes proofing tools. |
|
Language |
Culture (ll-cc) |
Native name |
Extent of localization |
Description |
Links |
Download Instructions |
|
Macedonian (North Macedonia) |
mk-mk |
Македонски |
Partial |
The pack includes your selected display language for some applications and includes proofing tools. |
Прочитајте како да го конфигурирате пакетот по инсталирањето. |
|
Language |
Culture (ll-cc) |
Native name |
Extent of localization |
Description |
Links |
Download Instructions |
|
Malay (Latin) |
ms-my |
Bahasa Melayu |
Full |
The pack includes:
|
|
Language |
Culture (ll-cc) |
Native name |
Extent of localization |
Description |
Links |
Download Instructions |
|
Malayalam |
ml-in |
മലയാളം |
Partial |
The pack includes your selected display language for some applications and includes proofing tools. |
പായ്ക്ക് ഇൻസ്റ്റാൾ ചെയ്തതിന് ശേഷം അത് കോൺഫിഗർ ചെയ്യുന്ന വിധത്തെക്കുറിച്ച് വായിക്കുക. |
|
Language |
Culture (ll-cc) |
Native name |
Extent of localization |
Description |
Links |
Download Instructions |
|
Maltese |
mt-mt |
Malti |
Partial |
The pack includes your selected display language for some applications and includes proofing tools. |
|
Language |
Culture (ll-cc) |
Native name |
Extent of localization |
Description |
Links |
Download Instructions |
|
Maori |
mi-nz |
Reo Māori |
Partial |
The pack includes your selected display language for some applications and includes proofing tools. |
Pānuitia me pēhea e whirihoratia ngā mōkī i muri i te tāutanga. |
|
Language |
Culture (ll-cc) |
Native name |
Extent of localization |
Description |
Links |
Download Instructions |
|
Marathi |
mr-in |
[मराठी] |
Partial |
The pack includes your selected display language for some applications and includes proofing tools. |
स्थापित केल्यानंतर पॅक कॉनिफगर कसा करायचा याबद्दल अधिक वाचा. |
|
Language |
Culture (ll-cc) |
Native name |
Extent of localization |
Description |
Links |
Download Instructions |
|
Mongolian (Cyrillic) |
mn-mn |
Монгол хэл |
Partial |
The pack includes your selected display language for some applications but does not include proofing tools. |
|
Language |
Culture (ll-cc) |
Native name |
Extent of localization |
Description |
Links |
Download Instructions |
|
Nepali |
ne-np |
नेपाली |
Partial |
The pack includes your selected display language for some applications and includes proofing tools. |
|
Language |
Culture (ll-cc) |
Native name |
Extent of localization |
Description |
Links |
Download Instructions |
|
Norwegian Bokmål |
nb-no |
norsk bokmål |
Full |
The pack includes:
|
|
Language |
Culture (ll-cc) |
Native name |
Extent of localization |
Description |
Links |
Download Instructions |
|
Norwegian Nynorsk |
nn-no |
nynorsk |
Partial |
The pack includes your selected display language for some applications and includes proofing tools. |
Les om korleis du kan konfigurere pakken etter installering. |
|
Language |
Culture (ll-cc) |
Native name |
Extent of localization |
Description |
Links |
Download Instructions |
|
Odia |
or-in |
ଓଡିଆ |
Partial |
The pack includes your selected display language for some applications and includes proofing tools. |
ସଂସ୍ଥାପନ କରିବା ପରେ ପ୍ୟାକ୍କୁ କିପରି ବିନ୍ୟାସ କରିବେ ସେ ସମ୍ପର୍କରେ ପଢନ୍ତୁ. |
|
Language |
Culture (ll-cc) |
Native name |
Extent of localization |
Description |
Links |
Download Instructions |
|
Pashto |
ps-af |
پښتو |
Proofing Tools only |
The pack includes a spell checker. |
له نصب څخه وروسته د بنډل د سازونې څرنګوالي په اړه معلومات ترلاسه کړئ |
|
Language |
Culture (ll-cc) |
Native name |
Extent of localization |
Description |
Links |
Download Instructions |
|
Persian (Farsi) |
fa-ir |
فارسی |
Partial |
The pack includes your selected display language for some applications and includes proofing tools. |
|
Language |
Culture (ll-cc) |
Native name |
Extent of localization |
Description |
Links |
Download Instructions |
|
Polish |
pl-pl |
polski |
Full |
The pack includes:
|
|
Language |
Culture (ll-cc) |
Native name |
Extent of localization |
Description |
Links |
Download Instructions |
|
Portuguese (Portugal) |
pt-pt |
Português (Portugal) |
Full |
The pack includes:
|
|
Language |
Culture (ll-cc) |
Native name |
Extent of localization |
Description |
Links |
Download Instructions |
|
Portuguese (Brazil) |
pt-br |
Português (Brasil) |
Full |
The pack includes:
|
|
Language |
Culture (ll-cc) |
Native name |
Extent of localization |
Description |
Links |
Download Instructions |
|
Punjabi (Gurmukhi) |
pa-in |
ਪੰਜਾਬੀ |
Partial |
The pack includes your selected display language for some applications and includes proofing tools. |
ਇੰਸਟਾਲ ਕਰਨ ਤੋਂ ਬਾਅਦ ਪੈਕ ਨੂੰ ਸੰਰਚਿਤ ਕਿਵੇਂ ਕਰੀਏ, ਇਸ ਬਾਰੇ ਪੜ੍ਹੋ। |
|
Language |
Culture (ll-cc) |
Native name |
Extent of localization |
Description |
Links |
Download Instructions |
|
Quechua |
quz-pe |
Runasimi |
Partial |
The pack includes your selected display language for some applications but does not include proofing tools. |
|
Language |
Culture (ll-cc) |
Native name |
Extent of localization |
Description |
Links |
Download Instructions |
|
Romanian |
ro-ro |
Română |
Full |
The pack includes:
|
|
Language |
Culture (ll-cc) |
Native name |
Extent of localization |
Description |
Links |
Download Instructions |
|
Romansh |
rm-ch |
Rumantsch |
Proofing Tools only |
The pack includes a spell checker. |
|
Language |
Culture (ll-cc) |
Native name |
Extent of localization |
Description |
Links |
Download Instructions |
|
Russian |
ru-ru |
русский |
Full |
The pack includes:
|
|
Language |
Culture (ll-cc) |
Native name |
Extent of localization |
Description |
Links |
Download Instructions |
|
Scottish Gaelic |
gd-gb |
Gàidhlig |
Partial |
The pack includes your selected display language for some applications and includes proofing tools. |
Faic an stiùireadh mu rèiteachadh na pacaide an dèidh an stàlaidh. |
|
Language |
Culture (ll-cc) |
Native name |
Extent of localization |
Description |
Links |
Download Instructions |
|
Serbian (Cyrillic, Serbia) |
sr-cyrl-rs |
српски |
Partial |
The pack includes your selected display language for some applications and includes proofing tools. |
|
Language |
Culture (ll-cc) |
Native name |
Extent of localization |
Description |
Links |
Download Instructions |
|
Serbian (Latin, Serbia) |
sr-latn-rs |
srpski (latinica, Srbija) |
Full |
The pack includes:
|
|
Language |
Culture (ll-cc) |
Native name |
Extent of localization |
Description |
Links |
Download Instructions |
|
Serbian (Cyrillic, Bosnia & Herzegovina) |
sr-cyrl-ba |
српски |
Partial |
The pack includes your selected display language for some applications and includes proofing tools. |
|
Language |
Culture (ll-cc) |
Native name |
Extent of localization |
Description |
Links |
Download Instructions |
|
Sesotho sa Leboa |
nso-za |
Sesotho sa Leboa |
Proofing Tools only |
The pack includes a spell checker. |
|
Language |
Culture (ll-cc) |
Native name |
Extent of localization |
Description |
Links |
Download Instructions |
|
Setswana |
tn-za |
Setswana |
Proofing Tools only |
The pack includes a spell checker. |
Bala gore o ka rulaganya jang sephuthelo seno fa se sena go tsenngwa. |
|
Language |
Culture (ll-cc) |
Native name |
Extent of localization |
Description |
Links |
Download Instructions |
|
Sindhi (Arabic) |
sd-Arab-pk |
سنڌي |
Partial |
The pack includes your selected display language for some applications but does not include proofing tools. |
|
Language |
Culture (ll-cc) |
Native name |
Extent of localization |
Description |
Links |
Download Instructions |
|
Sinhala |
si-lk |
සිංහල |
Partial |
The pack includes your selected display language for some applications and includes proofing tools. |
ස්ථාපනය කිරීමෙන් පසුව ඇසුරුම වින්යාස කරන ආකාරය ගැන කියවන්න. |
|
Language |
Culture (ll-cc) |
Native name |
Extent of localization |
Description |
Links |
Download Instructions |
|
Slovak |
sk-sk |
slovenčina |
Full |
The pack includes:
|
|
Language |
Culture (ll-cc) |
Native name |
Extent of localization |
Description |
Links |
Download Instructions |
|
Slovenian |
sl-si |
slovenščina |
Full |
The pack includes:
|
|
Language |
Culture (ll-cc) |
Native name |
Extent of localization |
Description |
Links |
Download Instructions |
|
Spanish |
es-es |
Español |
Full |
The pack includes:
|
|
Note: This language is only available for Version 2108 or later and isn't compatible with Office 2019. |
||||||
|
Language |
Culture (ll-cc) |
Native name |
Extent of localization |
Description |
Links |
Download Instructions |
|
Spanish |
es-mx |
Español (Mexico) |
Full |
The pack includes:
|
||
|
Language |
Culture (ll-cc) |
Native name |
Extent of localization |
Description |
Links |
Download Instructions |
|
Swedish |
sv-se |
Svenska |
Full |
The pack includes:
|
|
Language |
Culture (ll-cc) |
Native name |
Extent of localization |
Description |
Links |
Download Instructions |
|
Tamil |
ta-in |
தமிழ் |
Partial |
The pack includes your selected display language for some applications and includes proofing tools. |
நிறுவுதலுக்கு பிறகு தொகுப்பை எப்படி கட்டமைப்பது என்பதைப் பற்றி படிக்கவும். |
|
Language |
Culture (ll-cc) |
Native name |
Extent of localization |
Description |
Links |
Download Instructions |
|
Tatar (Cyrillic) |
tt-ru |
Татар |
Partial |
The pack includes your selected display language for some applications and includes proofing tools. |
|
Language |
Culture (ll-cc) |
Native name |
Extent of localization |
Description |
Links |
Download Instructions |
|
Telugu |
te-in |
తెలుగు |
Partial |
The pack includes your selected display language for some applications and includes proofing tools. |
వ్యవస్థాపించిన తర్వాత ప్యాక్ని ఎలా కాన్ఫిగర్ చేయాలో తెలుసుకోండి. |
|
Language |
Culture (ll-cc) |
Native name |
Extent of localization |
Description |
Links |
Download Instructions |
|
Thai |
th-th |
ไทย |
Full |
The pack includes:
|
|
Language |
Culture (ll-cc) |
Native name |
Extent of localization |
Description |
Links |
Download Instructions |
|
Turkish |
tr-tr |
Türkçe |
Full |
The pack includes:
|
|
Language |
Culture (ll-cc) |
Native name |
Extent of localization |
Description |
Links |
Download Instructions |
|
Turkmen (Latin) |
tk-tm |
türkmen dili |
Partial |
The pack includes your selected display language for some applications but does not include proofing tools. |
|
Language |
Culture (ll-cc) |
Native name |
Extent of localization |
Description |
Links |
Download Instructions |
|
Ukrainian |
uk-ua |
українська |
Full |
The pack includes:
|
|
Language |
Culture (ll-cc) |
Native name |
Extent of localization |
Description |
Links |
Download Instructions |
|
Urdu |
ur-pk |
اردو |
Partial |
The pack includes your selected display language for some applications and includes proofing tools. |
|
Language |
Culture (ll-cc) |
Native name |
Extent of localization |
Description |
Links |
Download Instructions |
|
Uyghur |
ug-cn |
ئۇيغۇرچە |
Partial |
The pack includes your selected display language for some applications but does not include proofing tools. |
قاچىلىغاندىن كېيىن ئەپنى قانداق تەڭشەش كېرەكلىكىنى بىلىۋېلىڭ |
|
Language |
Culture (ll-cc) |
Native name |
Extent of localization |
Description |
Links |
Download Instructions |
|
Uzbek (Latin) |
uz-Latn-uz |
o'zbekcha |
Partial |
The pack includes your selected display language for some applications and includes proofing tools. |
Paketni o'rnatgandan so'ng uni qanday sozlash haqida o'qing. |
|
Language |
Culture (ll-cc) |
Native name |
Extent of localization |
Description |
Links |
Download Instructions |
|
Valencian |
ca-es-valencia |
Valencià |
Partial |
The pack includes your selected display language for some applications and includes proofing tools. |
Obteniu informació sobre com configurar el paquet després d'instal·lar-lo. |
|
Language |
Culture (ll-cc) |
Native name |
Extent of localization |
Description |
Links |
Download Instructions |
|
Vietnamese |
vi-vn |
Tiếng Việt |
Full |
The pack includes:
|
|
Language |
Culture (ll-cc) |
Native name |
Extent of localization |
Description |
Links |
Download Instructions |
|
Welsh |
cy-gb |
Cymraeg |
Partial |
The pack includes your selected display language for some applications and includes proofing tools. |
|
Language |
Culture (ll-cc) |
Native name |
Extent of localization |
Description |
Links |
Download Instructions |
|
Wolof |
wo-sn |
Wolof |
Proofing Tools only |
The pack includes a spell checker. |
|
Language |
Culture (ll-cc) |
Native name |
Extent of localization |
Description |
Links |
Download Instructions |
|
Yoruba |
yo-ng |
Ede Yorùbá |
Proofing Tools only |
The pack includes a spell checker. |
Step 2: Configure Microsoft 365 language
After you install the language accessory pack, you must configure Microsoft 365 for your new language preferences. This configuration affects all your Microsoft 365 applications.
Note: If you're using Office 365 and the commands available are different from what's shown here, select the Office 2016 tab and follow the instructions there.
-
In any Microsoft 365 application, go to File > Options > Language.
-
Under Office display language, make sure the display language you want to use is listed.
-
Under Office authoring languages and proofing, make sure the language you want to use for authoring your document is listed.
If the language accessory pack includes proofing tools for that language, its status appears as Proofing installed. If the status is Proofing available, select the link to install the proofing tools.
-
Restart all programs for your changes to take effect.
You can change the default language for all your Microsoft 365 applications in the Set the Office Language Preferences dialog. For more information, see Add a language or set language preferences in Office.
|
Language |
Culture (ll-cc) |
Native name |
Extent of localization |
Description |
Links |
Download Instructions |
|
Afrikaans |
af-za |
Afrikaans |
Partial |
The pack includes your selected display language for some Microsoft 365 applications and includes proofing tools. |
Lees oor hoe om die pakket te konfigureer nadat dit geïnstalleer is. |
|
Language |
Culture (ll-cc) |
Native name |
Extent of localization |
Description |
Links |
Download Instructions |
|
Albanian |
sq-al |
Shqip |
Partial |
The pack includes your selected display language for some Microsoft 365 applications and includes proofing tools. |
|
Language |
Culture (ll-cc) |
Native name |
Extent of localization |
Description |
Links |
Download Instructions |
|
Amharic |
am-et |
አማርኛ |
Partial |
The pack includes your selected display language for some applications but does not include proofing tools. |
|
Language |
Culture (ll-cc) |
Native name |
Extent of localization |
Description |
Links |
Download Instructions |
|
Arabic |
ar-sa |
العربية |
Full |
The pack includes:
|
|
Language |
Culture (ll-cc) |
Native name |
Extent of localization |
Description |
Links |
Download Instructions |
|
Armenian |
hy-am |
Հայերեն |
Partial |
The pack includes your selected display language for some applications and includes proofing tools. |
Ծանոթացեք՝ ինչպես կարող եք կազմաձևել փաթեթը տեղադրումից հետո: |
|
Language |
Culture (ll-cc) |
Native name |
Extent of localization |
Description |
Links |
Download Instructions |
|
Assamese |
as-in |
অসমীয়া |
Partial |
The pack includes your selected display language for some applications and includes proofing tools. |
|
Language |
Culture (ll-cc) |
Native name |
Extent of localization |
Description |
Links |
Download Instructions |
|
Azerbaijani (Latin) |
az-Latn-az |
azərbaycan dili |
Partial |
The pack includes your selected display language for some applications and includes proofing tools. |
Quraşdırdıqdan sonra paketi necə konfiqurasiya etmək haqqında oxuyun. |
|
Language |
Culture (ll-cc) |
Native name |
Extent of localization |
Description |
Links |
Download Instructions |
|
Bangla (Bangladesh) |
bn-bd |
বাংলা (বাংলাদেশ) |
Partial |
The pack includes your selected display language for some applications and includes proofing tools. |
ইনস্টল করার পর প্যাকটি কিভাবে কনফিগার করবেন সে বিষয়ে আরো জানুন৷ |
|
Language |
Culture (ll-cc) |
Native name |
Extent of localization |
Description |
Links |
Download Instructions |
|
Bangla (Bengali India) |
bn-in |
বাংলা |
Partial |
The pack includes your selected display language for some applications and includes proofing tools. |
ইনস্টল করার পর প্যাকটি কিভাবে কনফিগার করবেন সে বিষয়ে আরো জানুন৷ |
|
Language |
Culture (ll-cc) |
Native name |
Extent of localization |
Description |
Links |
Download Instructions |
|
Basque (Basque) |
eu-es |
euskara |
Partial |
The pack includes your selected display language for some applications and includes proofing tools. |
|
Language |
Culture (ll-cc) |
Native name |
Extent of localization |
Description |
Links |
Download Instructions |
|
Belarusian |
be-by |
Беларуская |
Partial |
The pack includes your selected display language for some applications but does not include proofing tools. |
Прачытайце аб тым, як сканфігурыраваць пакет пасля яго ўсталявання. |
|
Language |
Culture (ll-cc) |
Native name |
Extent of localization |
Description |
Links |
Download Instructions |
|
Bosnian (Latin) |
bs-Latn-ba |
bosanski |
Partial |
The pack includes your selected display language for some applications and includes proofing tools. |
|
Language |
Culture (ll-cc) |
Native name |
Extent of localization |
Description |
Links |
Download Instructions |
|
Bulgarian |
bg-bg |
български |
Full |
The pack includes:
|
|
Language |
Culture (ll-cc) |
Native name |
Extent of localization |
Description |
Links |
Download Instructions |
|
Catalan |
ca-es |
català |
Partial |
The pack includes your selected display language for some applications and includes proofing tools. |
Obtén més informació sobre la configuració del paquet després de la instal·lació. |
|
Language |
Culture (ll-cc) |
Native name |
Extent of localization |
Description |
Links |
Download Instructions |
|
Chinese (Simplified) |
zh-cn |
中文(简体) |
Full |
The pack includes:
|
|
Language |
Culture (ll-cc) |
Native name |
Extent of localization |
Description |
Links |
Download Instructions |
|
Chinese (Traditional) |
zh-tw |
中文(繁體) |
Full |
The pack includes:
|
|
Language |
Culture (ll-cc) |
Native name |
Extent of localization |
Description |
Links |
Download Instructions |
|
Croatian |
hr-hr |
hrvatski |
Full |
The pack includes:
|
|
Language |
Culture (ll-cc) |
Native name |
Extent of localization |
Description |
Links |
Download Instructions |
|
Czech |
cs-cz |
čeština |
Full |
The pack includes:
|
|
Language |
Culture (ll-cc) |
Native name |
Extent of localization |
Description |
Links |
Download Instructions |
|
Danish |
da-dk |
dansk |
Full |
The pack includes:
|
|
Language |
Culture (ll-cc) |
Native name |
Extent of localization |
Description |
Links |
Download Instructions |
|
Dari |
prs-af |
درى |
Partial |
The pack includes your selected display language for some applications but does not include proofing tools. |
|
Language |
Culture (ll-cc) |
Native name |
Extent of localization |
Description |
Links |
Download Instructions |
|
Dutch |
nl-nl |
Nederlands |
Full |
The pack includes:
|
|
Language |
Culture (ll-cc) |
Native name |
Extent of localization |
Description |
Links |
Download Instructions |
|
English |
en-us |
English |
Full |
The pack includes:
|
|
Language |
Culture (ll-cc) |
Native name |
Extent of localization |
Description |
Links |
Download Instructions |
|
Estonian |
et-ee |
eesti |
Full |
The pack includes:
|
|
Language |
Culture (ll-cc) |
Native name |
Extent of localization |
Description |
Links |
Download Instructions |
|
Filipino |
fil-ph |
Filipino |
Partial |
The pack includes your selected display language for some applications but does not include proofing tools. |
Magbasa tungkol sa paraan ng pag-configure sa pack pagkatapos ng pag-i-install. |
|
Language |
Culture (ll-cc) |
Native name |
Extent of localization |
Description |
Links |
Download Instructions |
|
Finnish |
fi-fi |
suomi |
Full |
The pack includes:
|
|
Language |
Culture (ll-cc) |
Native name |
Extent of localization |
Description |
Links |
Download Instructions |
|
French |
fr-fr |
français |
Full |
The pack includes:
|
|
Language |
Culture (ll-cc) |
Native name |
Extent of localization |
Description |
Links |
Download Instructions |
|
Galician |
gl-es |
Galego |
Partial |
The pack includes your selected display language for some applications and includes proofing tools. |
Obtén información sobre como configurar o paquete despois de instalalo. |
|
Language |
Culture (ll-cc) |
Native name |
Extent of localization |
Description |
Links |
Download Instructions |
|
Georgian |
ka-ge |
ქართული |
Partial |
The pack includes your selected display language for some applications and includes proofing tools. |
წაიკითხეთ, თუ როგორ უნდა დააკონფიგურიროთ პაკეტი ინსტალაციის შემდეგ. |
|
Language |
Culture (ll-cc) |
Native name |
Extent of localization |
Description |
Links |
Download Instructions |
|
German |
de-de |
Deutsch |
Full |
The pack includes:
|
|
Language |
Culture (ll-cc) |
Native name |
Extent of localization |
Description |
Links |
Download Instructions |
|
Greek |
el-gr |
Ελληνικά |
Full |
The pack includes:
|
|
Language |
Culture (ll-cc) |
Native name |
Extent of localization |
Description |
Links |
Download Instructions |
|
Gujarati |
gu-in |
ગુજરાતી |
Partial |
The pack includes your selected display language for some applications and includes proofing tools. |
ઇન્સ્ટોલ કર્યા પછી પૅક કેવી રીતે કન્ફિગર કરવું તે વિષે વાંચો. |
|
Language |
Culture (ll-cc) |
Native name |
Extent of localization |
Description |
Links |
Download Instructions |
|
Hausa |
ha-Latn-ng |
Hausa |
Proofing Tools only |
The pack includes a spell checker. |
|
Language |
Culture (ll-cc) |
Native name |
Extent of localization |
Description |
Links |
Download Instructions |
|
Hebrew |
he-il |
עברית |
Full |
The pack includes:
|
|
Language |
Culture (ll-cc) |
Native name |
Extent of localization |
Description |
Links |
Download Instructions |
|
Hindi |
hi-in |
हिंदी |
Partial |
The pack includes:
This pack does not include Project or Visio |
|
Language |
Culture (ll-cc) |
Native name |
Extent of localization |
Description |
Links |
Download Instructions |
|
Hungarian |
hu-hu |
magyar |
Full |
The pack includes:
|
|
Language |
Culture (ll-cc) |
Native name |
Extent of localization |
Description |
Links |
Download Instructions |
|
Icelandic |
is-is |
íslenska |
Partial |
The pack includes your selected display language for some applications and includes proofing tools. |
Lestu þér til um hvernig á að grunnstilla pakkann eftir að hann er settur upp. |
|
Language |
Culture (ll-cc) |
Native name |
Extent of localization |
Description |
Links |
Download Instructions |
|
Igbo |
ig-ng |
Igbo |
Proofing Tools only |
The pack includes a spell checker. |
|
Language |
Culture (ll-cc) |
Native name |
Extent of localization |
Description |
Links |
Download Instructions |
|
Indonesian |
id-id |
Bahasa Indonesia |
Full |
The pack includes:
|
|
Language |
Culture (ll-cc) |
Native name |
Extent of localization |
Description |
Links |
Download Instructions |
|
Irish |
ga-ie |
Gaeilge |
Partial |
The pack includes your selected display language for some applications and includes proofing tools. |
|
Language |
Culture (ll-cc) |
Native name |
Extent of localization |
Description |
Links |
Download Instructions |
|
isiXhosa |
xh-za |
isiXhosa |
Proofing Tools only |
The pack includes a spell checker. |
Funda malunga nendlela yokulungiselela iphekhi emva kokufakela. |
|
Language |
Culture (ll-cc) |
Native name |
Extent of localization |
Description |
Links |
Download Instructions |
|
isiZulu |
zu-za |
isiZulu |
Proofing Tools only |
The pack includes a spell checker. |
|
Language |
Culture (ll-cc) |
Native name |
Extent of localization |
Description |
Links |
Download Instructions |
|
Italian |
it-it |
Italiano |
Full |
The pack includes:
|
|
Language |
Culture (ll-cc) |
Native name |
Extent of localization |
Description |
Links |
Download Instructions |
|
Japanese |
ja-jp |
日本語 |
Full |
The pack includes:
|
|
Language |
Culture (ll-cc) |
Native name |
Extent of localization |
Description |
Links |
Download Instructions |
|
Kannada |
kn-in |
ಕನ್ನಡ |
Partial |
The pack includes your selected display language for some applications and includes proofing tools. |
ಸ್ಥಾಪನೆಗೊಳಿಸಿದ ನಂತರ ಪ್ಯಾಕ್ ಅನ್ನು ಹೇಗೆ ಕಾನ್ಫಿಗರ್ ಮಾಡಬೇಕೆಂಬ ಕುರಿತು ಓದಿ. |
|
Language |
Culture (ll-cc) |
Native name |
Extent of localization |
Description |
Links |
Download Instructions |
|
Kazakh |
kk-kz |
қазақ тілі |
Full |
The pack includes:
|
|
Language |
Culture (ll-cc) |
Native name |
Extent of localization |
Description |
Links |
Download Instructions |
|
Khmer |
km-kh |
ភាសាខ្មែរ |
Partial |
The pack includes your selected display language for some applications but does not include proofing tools. |
|
Language |
Culture (ll-cc) |
Native name |
Extent of localization |
Description |
Links |
Download Instructions |
|
Kinyarwanda |
rw-rw |
Kinyarwanda |
Proofing Tools only |
The pack includes a spell checker. |
Soma uko utunganya imikoreshereze y'ipaki nyuma yo kuyinjiza |
|
Language |
Culture (ll-cc) |
Native name |
Extent of localization |
Description |
Links |
Download Instructions |
|
KiSwahili |
sw-ke |
Kiswahili |
Partial |
The pack includes your selected display language for some applications and includes proofing tools. |
Soma kuhusu jinsi ya kusanidi kifurushi baada ya kusakinisha. |
|
Language |
Culture (ll-cc) |
Native name |
Extent of localization |
Description |
Links |
Download Instructions |
|
Konkani |
kok-in |
कोंकणी |
Partial |
The pack includes your selected display language for some applications and includes proofing tools. |
|
Language |
Culture (ll-cc) |
Native name |
Extent of localization |
Description |
Links |
Download Instructions |
|
Korean |
ko-kr |
한국어 |
Full |
The pack includes:
|
|
Language |
Culture (ll-cc) |
Native name |
Extent of localization |
Description |
Links |
Download Instructions |
|
Kyrgyz |
ky-kg |
Кыргыз |
Partial |
The pack includes your selected display language for some applications and includes proofing tools. |
|
Language |
Culture (ll-cc) |
Native name |
Extent of localization |
Description |
Links |
Download Instructions |
|
Latvian |
lv-lv |
latviešu |
Full |
The pack includes:
|
|
Language |
Culture (ll-cc) |
Native name |
Extent of localization |
Description |
Links |
Download Instructions |
|
Lithuanian |
lt-lt |
lietuvių |
Full |
The pack includes:
|
|
Language |
Culture (ll-cc) |
Native name |
Extent of localization |
Description |
Links |
Download Instructions |
|
Luxembourgish |
lb-lu |
Lëtzebuergesch |
Partial |
The pack includes your selected display language for some applications and includes proofing tools. |
|
Language |
Culture (ll-cc) |
Native name |
Extent of localization |
Description |
Links |
Download Instructions |
|
Macedonian (North Macedonia) |
mk-mk |
Македонски |
Partial |
The pack includes your selected display language for some applications and includes proofing tools. |
Прочитајте како да го конфигурирате пакетот по инсталирањето. |
|
Language |
Culture (ll-cc) |
Native name |
Extent of localization |
Description |
Links |
Download Instructions |
|
Malay (Latin) |
ms-my |
Bahasa Melayu |
Full |
The pack includes:
|
|
Language |
Culture (ll-cc) |
Native name |
Extent of localization |
Description |
Links |
Download Instructions |
|
Malayalam |
ml-in |
മലയാളം |
Partial |
The pack includes your selected display language for some applications and includes proofing tools. |
പായ്ക്ക് ഇൻസ്റ്റാൾ ചെയ്തതിന് ശേഷം അത് കോൺഫിഗർ ചെയ്യുന്ന വിധത്തെക്കുറിച്ച് വായിക്കുക. |
|
Language |
Culture (ll-cc) |
Native name |
Extent of localization |
Description |
Links |
Download Instructions |
|
Maltese |
mt-mt |
Malti |
Partial |
The pack includes your selected display language for some applications and includes proofing tools. |
|
Language |
Culture (ll-cc) |
Native name |
Extent of localization |
Description |
Links |
Download Instructions |
|
Maori |
mi-nz |
Reo Māori |
Partial |
The pack includes your selected display language for some applications and includes proofing tools. |
Pānuitia me pēhea e whirihoratia ngā mōkī i muri i te tāutanga. |
|
Language |
Culture (ll-cc) |
Native name |
Extent of localization |
Description |
Links |
Download Instructions |
|
Marathi |
mr-in |
[मराठी] |
Partial |
The pack includes your selected display language for some applications and includes proofing tools. |
स्थापित केल्यानंतर पॅक कॉनिफगर कसा करायचा याबद्दल अधिक वाचा. |
|
Language |
Culture (ll-cc) |
Native name |
Extent of localization |
Description |
Links |
Download Instructions |
|
Mongolian (Cyrillic) |
mn-mn |
Монгол хэл |
Partial |
The pack includes your selected display language for some applications but does not include proofing tools. |
|
Language |
Culture (ll-cc) |
Native name |
Extent of localization |
Description |
Links |
Download Instructions |
|
Nepali |
ne-np |
नेपाली |
Partial |
The pack includes your selected display language for some applications and includes proofing tools. |
|
Language |
Culture (ll-cc) |
Native name |
Extent of localization |
Description |
Links |
Download Instructions |
|
Norwegian Bokmål |
nb-no |
norsk bokmål |
Full |
The pack includes:
|
|
Language |
Culture (ll-cc) |
Native name |
Extent of localization |
Description |
Links |
Download Instructions |
|
Norwegian Nynorsk |
nn-no |
nynorsk |
Partial |
The pack includes your selected display language for some applications and includes proofing tools. |
Les om korleis du kan konfigurere pakken etter installering. |
|
Language |
Culture (ll-cc) |
Native name |
Extent of localization |
Description |
Links |
Download Instructions |
|
Odia |
or-in |
ଓଡିଆ |
Partial |
The pack includes your selected display language for some applications and includes proofing tools. |
ସଂସ୍ଥାପନ କରିବା ପରେ ପ୍ୟାକ୍କୁ କିପରି ବିନ୍ୟାସ କରିବେ ସେ ସମ୍ପର୍କରେ ପଢନ୍ତୁ. |
|
Language |
Culture (ll-cc) |
Native name |
Extent of localization |
Description |
Links |
Download Instructions |
|
Pashto |
ps-af |
پښتو |
Proofing Tools only |
The pack includes a spell checker. |
له نصب څخه وروسته د بنډل د سازونې څرنګوالي په اړه معلومات ترلاسه کړئ |
|
Language |
Culture (ll-cc) |
Native name |
Extent of localization |
Description |
Links |
Download Instructions |
|
Persian (Farsi) |
fa-ir |
فارسی |
Partial |
The pack includes your selected display language for some applications and includes proofing tools. |
|
Language |
Culture (ll-cc) |
Native name |
Extent of localization |
Description |
Links |
Download Instructions |
|
Polish |
pl-pl |
polski |
Full |
The pack includes:
|
|
Language |
Culture (ll-cc) |
Native name |
Extent of localization |
Description |
Links |
Download Instructions |
|
Portuguese (Portugal) |
pt-pt |
Português (Portugal) |
Full |
The pack includes:
|
|
Language |
Culture (ll-cc) |
Native name |
Extent of localization |
Description |
Links |
Download Instructions |
|
Portuguese (Brazil) |
pt-br |
Português (Brasil) |
Full |
The pack includes:
|
|
Language |
Culture (ll-cc) |
Native name |
Extent of localization |
Description |
Links |
Download Instructions |
|
Punjabi (Gurmukhi) |
pa-in |
ਪੰਜਾਬੀ |
Partial |
The pack includes your selected display language for some applications and includes proofing tools. |
ਇੰਸਟਾਲ ਕਰਨ ਤੋਂ ਬਾਅਦ ਪੈਕ ਨੂੰ ਸੰਰਚਿਤ ਕਿਵੇਂ ਕਰੀਏ, ਇਸ ਬਾਰੇ ਪੜ੍ਹੋ। |
|
Language |
Culture (ll-cc) |
Native name |
Extent of localization |
Description |
Links |
Download Instructions |
|
Quechua |
quz-pe |
Runasimi |
Partial |
The pack includes your selected display language for some applications but does not include proofing tools. |
|
Language |
Culture (ll-cc) |
Native name |
Extent of localization |
Description |
Links |
Download Instructions |
|
Romanian |
ro-ro |
Română |
Full |
The pack includes:
|
|
Language |
Culture (ll-cc) |
Native name |
Extent of localization |
Description |
Links |
Download Instructions |
|
Romansh |
rm-ch |
Rumantsch |
Proofing Tools only |
The pack includes a spell checker. |
|
Language |
Culture (ll-cc) |
Native name |
Extent of localization |
Description |
Links |
Download Instructions |
|
Russian |
ru-ru |
русский |
Full |
The pack includes:
|
|
Language |
Culture (ll-cc) |
Native name |
Extent of localization |
Description |
Links |
Download Instructions |
|
Scottish Gaelic |
gd-gb |
Gàidhlig |
Partial |
The pack includes your selected display language for some applications and includes proofing tools. |
Faic an stiùireadh mu rèiteachadh na pacaide an dèidh an stàlaidh. |
|
Language |
Culture (ll-cc) |
Native name |
Extent of localization |
Description |
Links |
Download Instructions |
|
Serbian (Cyrillic, Serbia) |
sr-cyrl-rs |
српски |
Partial |
The pack includes your selected display language for some applications and includes proofing tools. |
|
Language |
Culture (ll-cc) |
Native name |
Extent of localization |
Description |
Links |
Download Instructions |
|
Serbian (Latin, Serbia) |
sr-latn-rs |
srpski (latinica, Srbija) |
Full |
The pack includes:
|
|
Language |
Culture (ll-cc) |
Native name |
Extent of localization |
Description |
Links |
Download Instructions |
|
Serbian (Cyrillic, Bosnia & Herzegovina) |
sr-cyrl-ba |
српски |
Partial |
The pack includes your selected display language for some applications and includes proofing tools. |
|
Language |
Culture (ll-cc) |
Native name |
Extent of localization |
Description |
Links |
Download Instructions |
|
Sesotho sa Leboa |
nso-za |
Sesotho sa Leboa |
Proofing Tools only |
The pack includes a spell checker. |
|
Language |
Culture (ll-cc) |
Native name |
Extent of localization |
Description |
Links |
Download Instructions |
|
Setswana |
tn-za |
Setswana |
Proofing Tools only |
The pack includes a spell checker. |
Bala gore o ka rulaganya jang sephuthelo seno fa se sena go tsenngwa. |
|
Language |
Culture (ll-cc) |
Native name |
Extent of localization |
Description |
Links |
Download Instructions |
|
Sindhi (Arabic) |
sd-Arab-pk |
سنڌي |
Partial |
The pack includes your selected display language for some applications but does not include proofing tools. |
|
Language |
Culture (ll-cc) |
Native name |
Extent of localization |
Description |
Links |
Download Instructions |
|
Sinhala |
si-lk |
සිංහල |
Partial |
The pack includes your selected display language for some applications and includes proofing tools. |
ස්ථාපනය කිරීමෙන් පසුව ඇසුරුම වින්යාස කරන ආකාරය ගැන කියවන්න. |
|
Language |
Culture (ll-cc) |
Native name |
Extent of localization |
Description |
Links |
Download Instructions |
|
Slovak |
sk-sk |
slovenčina |
Full |
The pack includes:
|
|
Language |
Culture (ll-cc) |
Native name |
Extent of localization |
Description |
Links |
Download Instructions |
|
Slovenian |
sl-si |
slovenščina |
Full |
The pack includes:
|
|
Language |
Culture (ll-cc) |
Native name |
Extent of localization |
Description |
Links |
Download Instructions |
|
Spanish |
es-es |
español |
Full |
The pack includes:
|
|
Language |
Culture (ll-cc) |
Native name |
Extent of localization |
Description |
Links |
Download Instructions |
|
Spanish (Mexico) |
es-mx |
español |
Full |
The pack includes your selected display language for some Microsoft 365 applications and includes proofing tools. |
|
Language |
Culture (ll-cc) |
Native name |
Extent of localization |
Description |
Links |
Download Instructions |
|
Swedish |
sv-se |
Svenska |
Full |
The pack includes:
|
|
Language |
Culture (ll-cc) |
Native name |
Extent of localization |
Description |
Links |
Download Instructions |
|
Tamil |
ta-in |
தமிழ் |
Partial |
The pack includes your selected display language for some applications and includes proofing tools. |
நிறுவுதலுக்கு பிறகு தொகுப்பை எப்படி கட்டமைப்பது என்பதைப் பற்றி படிக்கவும். |
|
Language |
Culture (ll-cc) |
Native name |
Extent of localization |
Description |
Links |
Download Instructions |
|
Tatar (Cyrillic) |
tt-ru |
Татар |
Partial |
The pack includes your selected display language for some applications and includes proofing tools. |
|
Language |
Culture (ll-cc) |
Native name |
Extent of localization |
Description |
Links |
Download Instructions |
|
Telugu |
te-in |
తెలుగు |
Partial |
The pack includes your selected display language for some applications and includes proofing tools. |
వ్యవస్థాపించిన తర్వాత ప్యాక్ని ఎలా కాన్ఫిగర్ చేయాలో తెలుసుకోండి. |
|
Language |
Culture (ll-cc) |
Native name |
Extent of localization |
Description |
Links |
Download Instructions |
|
Thai |
th-th |
ไทย |
Full |
The pack includes:
|
|
Language |
Culture (ll-cc) |
Native name |
Extent of localization |
Description |
Links |
Download Instructions |
|
Turkish |
tr-tr |
Türkçe |
Full |
The pack includes:
|
|
Language |
Culture (ll-cc) |
Native name |
Extent of localization |
Description |
Links |
Download Instructions |
|
Turkmen (Latin) |
tk-tm |
türkmen dili |
Partial |
The pack includes your selected display language for some applications but does not include proofing tools. |
|
Language |
Culture (ll-cc) |
Native name |
Extent of localization |
Description |
Links |
Download Instructions |
|
Ukrainian |
uk-ua |
українська |
Full |
The pack includes:
|
|
Language |
Culture (ll-cc) |
Native name |
Extent of localization |
Description |
Links |
Download Instructions |
|
Urdu |
ur-pk |
اردو |
Partial |
The pack includes your selected display language for some applications and includes proofing tools. |
|
Language |
Culture (ll-cc) |
Native name |
Extent of localization |
Description |
Links |
Download Instructions |
|
Uyghur |
ug-cn |
ئۇيغۇرچە |
Partial |
The pack includes your selected display language for some applications but does not include proofing tools. |
قاچىلىغاندىن كېيىن ئەپنى قانداق تەڭشەش كېرەكلىكىنى بىلىۋېلىڭ |
|
Language |
Culture (ll-cc) |
Native name |
Extent of localization |
Description |
Links |
Download Instructions |
|
Uzbek (Latin) |
uz-Latn-uz |
o'zbekcha |
Partial |
The pack includes your selected display language for some applications and includes proofing tools. |
Paketni o'rnatgandan so'ng uni qanday sozlash haqida o'qing. |
|
Language |
Culture (ll-cc) |
Native name |
Extent of localization |
Description |
Links |
Download Instructions |
|
Valencian |
ca-es-valencia |
Valencià |
Partial |
The pack includes your selected display language for some applications and includes proofing tools. |
Obteniu informació sobre com configurar el paquet després d'instal·lar-lo. |
|
Language |
Culture (ll-cc) |
Native name |
Extent of localization |
Description |
Links |
Download Instructions |
|
Vietnamese |
vi-vn |
Tiếng Việt |
Full |
The pack includes:
|
|
Language |
Culture (ll-cc) |
Native name |
Extent of localization |
Description |
Links |
Download Instructions |
|
Welsh |
cy-gb |
Cymraeg |
Partial |
The pack includes your selected display language for some applications and includes proofing tools. |
|
Language |
Culture (ll-cc) |
Native name |
Extent of localization |
Description |
Links |
Download Instructions |
|
Wolof |
wo-sn |
Wolof |
Proofing Tools only |
The pack includes a spell checker. |
|
Language |
Culture (ll-cc) |
Native name |
Extent of localization |
Description |
Links |
Download Instructions |
|
Yoruba |
yo-ng |
Ede Yorùbá |
Proofing Tools only |
The pack includes a spell checker. |
Step 2: Configure Microsoft 365 language
After you install the language accessory pack, you must configure Microsoft 365 for your new language preferences. This configuration affects all your Microsoft 365 applications.
-
In any Microsoft 365 application, go to File > Options > Language.
-
Under Choose Editing Languages, make sure the language you want to use is added to this list.
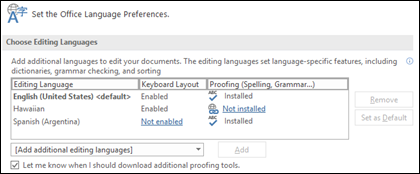
If the language accessory pack includes proofing tools for that language, the Proofing column shows Installed. If the status is Not installed, select the link to install the proofing tools. -
Under Choose Display Language, you can change the default Display and Help languages for all your applications.
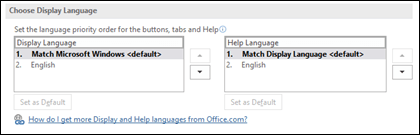
If the language accessory pack contained Display and Help for the language, you should see it listed here.
-
Restart all programs for your changes to take effect.
You can change the default language for all your Microsoft 365 applications in the Set the Office Language Preferences dialog. For more information, see Add a language or set language preferences in Office.
See Also


Need more help?
Want more options?
Explore subscription benefits, browse training courses, learn how to secure your device, and more.


Communities help you ask and answer questions, give feedback, and hear from experts with rich knowledge.


Find solutions to common problems or get help from a support agent.
