Note: The new Microsoft Planner is currently rolling out to customers. If your experience looks different than the steps listed in this article, or you're working from a Government Cloud Communities (GCC), GCC High, or Department of Defense (DoD) environment, refer to the instructions toward the bottom of this page. Learn more about the new Planner in Frequently asked questions about Planner.
Track your tasks in My Tasks
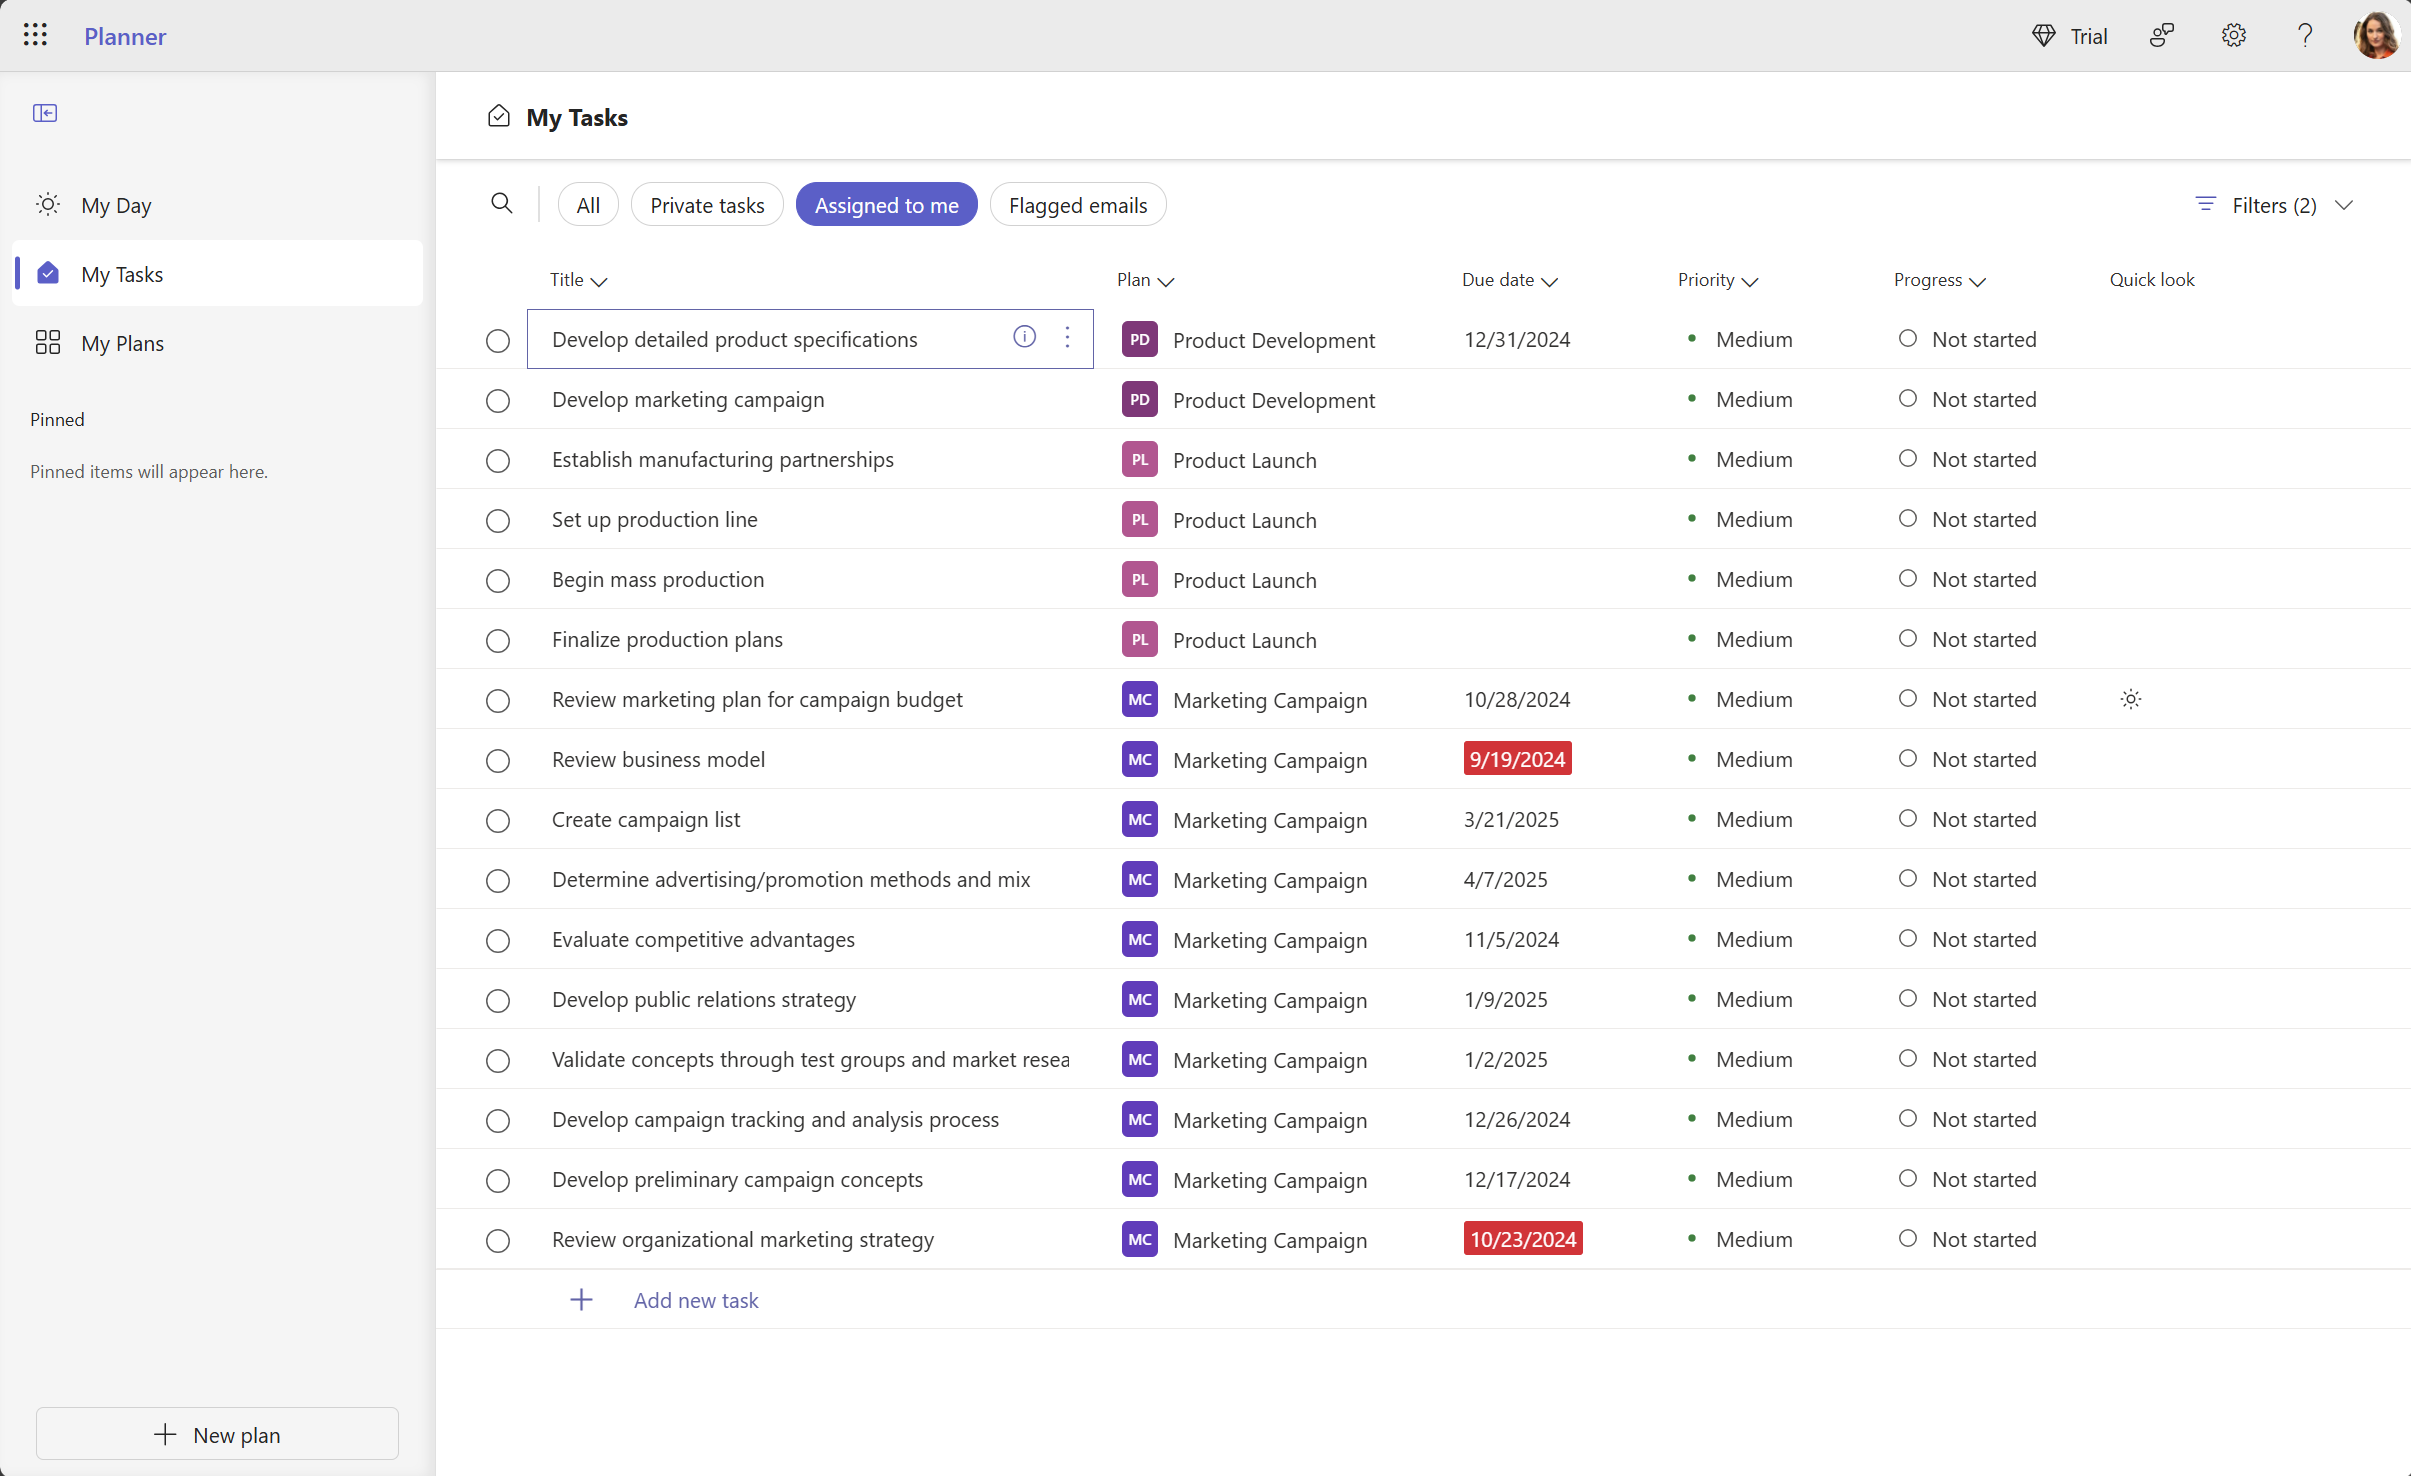
My Tasks is designed to centralize all the tasks relevant to you and organized into four distinct tabs:
-
All: The All view provides an aggregation of all your individual tasks from Private tasks, Assigned to me, and Flagged emails. You can then filter and sort these tasks by due date, priority, and progress.
-
Private tasks: This is a tab where you can create tasks that do not belong to a plan yet. You can then further organize these tasks inside plans by selecting the More options ... menu of any task.
-
Assigned to me: Includes all of the tasks that have been assigned to you across Teams meeting notes, basic plans, premium plans, task lists in Loop, and shared lists in To Do.
-
Flagged emails: All your flagged emails from Outlook appear in the Flagged emails section. You can also navigate to the emails directly from the task by selecting the attachment.
Plan your day with My Day
My Day is a clutter-free focus space that helps you stay on top of tasks that you want to focus on today. Tasks from My Tasks and personal plans that are due today will show up in My Day. You can also create tasks that you feel are important and may need your attention. Your daily dashboard includes:
-
Handpicked priorities: Determine and add your main tasks for the day.
-
Auto-population: Tasks from My Tasks and personal plans that are due today automatically appear on My Day, keeping you on top of important deadlines.
-
Prioritize and work on these tasks: Once the tasks are on My Day, you can sort them by attributes like title, plan, due date, priority, and progress to prioritize tasks in the order you want to accomplish them.
-
Start fresh in My Day each day: My Day clears itself every night, so you can start the next day with a blank slate. Any unfinished tasks in My Day that are left over before it clears will be available in the original plan that they came from.
Add tasks to a plan
-
Select + Add task below the heading of the bucket to which you want to add a task.
A new plan starts with a To do bucket heading, but established plans might have named buckets instead.
-
Select Enter a task name.
-
Type the task name.
-
Do either of the following:
-
Press Enter to create a task without a due date.
-
Select Set due date and select a date. Then select Add Task to create a task with a due date.
-
Create multiple tasks quickly
-
Select + Add task below the heading of the bucket to which you want to add a task.
-
Select Enter a task name.
-
Type each task name, pressing Enter after each to create the task.
After you add people and tasks to your plan, you can assign people to tasks.

Add task start and due dates
-
Select the task to open the task window.
-
Select Start anytime below Start date, and then select the start date you want.
-
Select Due anytime below Due date, and then select the due date you want.
-
Select dismiss

Comment on a task
-
Select the task to open the task window.
-
Select Type your message here in the Comments area of the task window.
-
Type the comment that you want to attach to the task.
-
Select Send.

Add an attachment to a task
-
Select the task to open the task window.
-
Select Add attachment.
-
Select File to attach a locally stored file, select Link to include a link, or select SharePoint to attach a file from a SharePoint site.
-
Navigate to and select the file you want to attach, or enter the link information.
When attaching a file, you can upload the file to OneDrive for the plan, or you can browse to find it if you've already uploaded it. If your file isn't located on OneDrive for the plan, you can add a link to it instead.
The first time you attach a file, photo, or link to a task, that attachment becomes the task's preview picture. It's shown on the Board, and offers a quick way to identify the task and get to work. Want to change the preview picture for a task?


