
As you type, PowerPoint for the web lets you know when it detects possible spelling, grammar, or style mistakes by underlining the words.
Type:
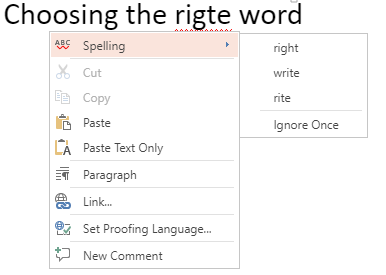
Spelling
Example:

Works for files stored in:
OneDrive,
OneDrive for work or school,
SharePoint in Microsoft 365
Type:
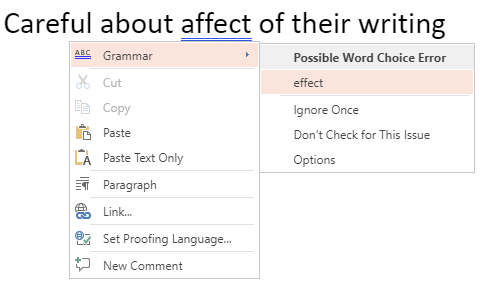
Grammar
Example:

Works for files stored in:
OneDrive for work or school,
SharePoint in Microsoft 365
Type:
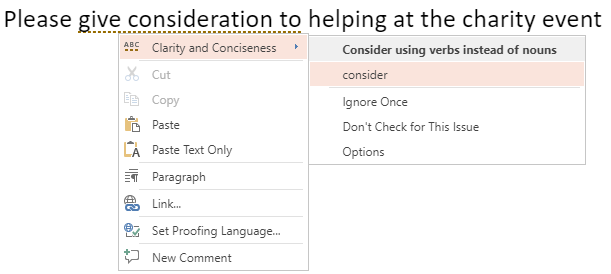
Suggested writing refinement
Example:

Works for files stored in:
OneDrive for work or school,
SharePoint in Microsoft 365
Correct an error
To correct an error (or to Ignore the suggestion), right-click an underlined term:
Tip
It's possible the word you've typed is spelled correctly but the PowerPoint for the web dictionary doesn't recognize it. It could be a brand name, acronym, or something similar.
Check a slide for correct spelling, grammar, and style
If your file is stored in OneDrive for work or school or SharePoint in Microsoft 365, you can tell PowerPoint for the web to proof a slide for spelling, grammar, and style.
- On the Review tab, select ABC Proofing, then select Editor Settings.
- Depending on your Microsoft 365 version and licensing, PowerPoint may display either:
- An Editor pane with spelling, grammar, and writing suggestions, or
- An Editor Settings dialog where you can configure spelling and grammar rules.
Turn off proofing markers throughout a file
If your file is stored in OneDrive for work or school or SharePoint in Microsoft 365, you can hide all markers that show proofing errors.
- On the Review tab, select the ABC Proofing dropdownn.
- Select Hide Proofing Errors.
This command toggles the markers off and on. Use it again later if you want to show proofing markers in this presentation.
Turn off the proofing tool for particular words or a box of text
If your file is stored in OneDrive for work or school or SharePoint in Microsoft 365, you can turn off proofing for a particular term or for an entire box containing text.
Skip to step 2 if you want to change the proofing language for an entire box of text; otherwise, select the word or words you don't want checked.
Right-click the selected words, or the text box itself, and choose Set Proofing Language.
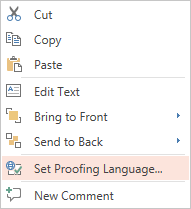
Select Don't check spelling or grammar.
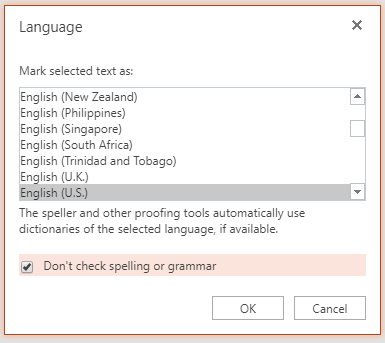
Select OK.
Change the proofing language
Changing the proofing language for the whole file isn't supported. You can only change the proofing language for selected words or for a box of text.
- Skip to step 2 if you want to change the proofing language for an entire box of text; otherwise, select a word or words for which you want to change the proofing language.
- Right-click the box or the selected words, and then select Set Proofing Language.
- In the Mark selected text as box, choose the language that you want to change to, and then select OK.
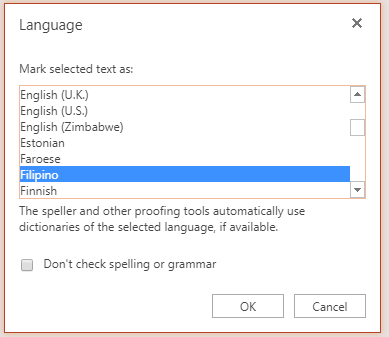
To change the language of the buttons and menus in the Office Online apps, see Change the language Office uses in its menus.