
Here's how to replace the rubber feet on Surface devices.
To keep your Surface looking and working great, follow these steps in the recommended order.
- Step 1: Prepare your Surface
- Step 2: Remove Surface feet
- Step 3: Adhesive removal and cleaning recommendations
- Step 4: Install Surface feet
Where to buy
Replacement feet are available at the Microsoft Store or iFixit.
Step 1: Prepare your Surface
- Turn off your Surface. Make sure to completely shut down your Surface and disconnect it from the power supply.
- Set up. To prevent damages such as scratches, place your device on a clean, debris-free surface with the bottom facing up.
Step 2: Remove Surface feet
Note
Only remove the feet you want to replace. Don't remove your current laptop's feet until you receive your replacement feet. You will need the following tools—plastic tweezers and a plastic tool called a spudger (tools not included with replacement feet).
To remove Surface feet, follow the steps below for your model. Find out which Surface model you have.
Feet removal instructions by Surface model
Remove feet on Surface Laptop 3, Surface Laptop 4, Surface Laptop 5, Surface Laptop 6 for Business, Surface Laptop (7th Edition), Surface Laptop 5G for Business
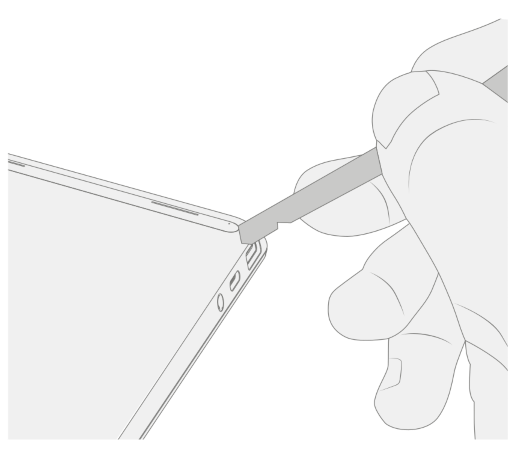
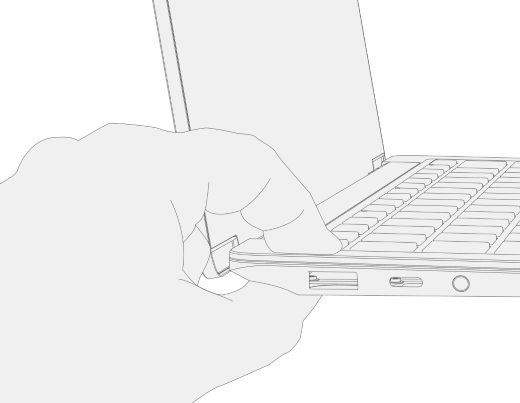
- Insert the pointed end of the spudger in the middle of the foot starting from the front edge and push it towards the middle of your laptop.
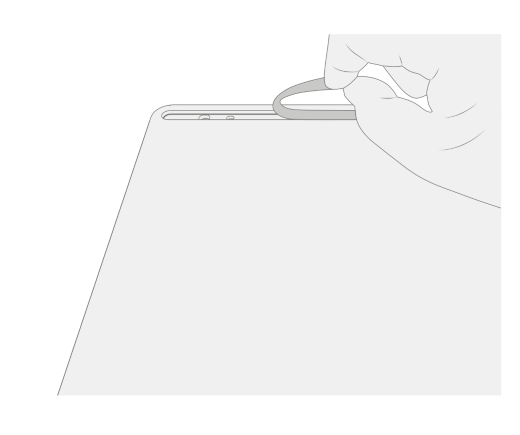
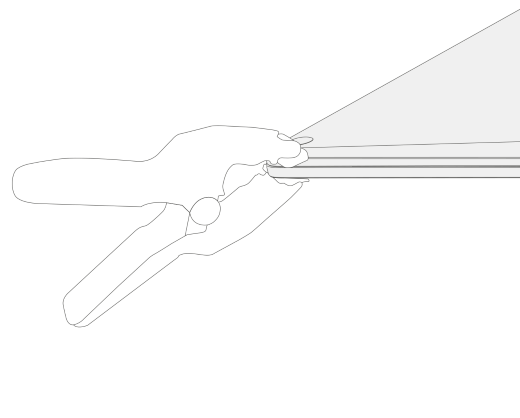
- Use the tweezers to grasp the loose end of the foot, then pull the foot to remove it from your laptop.
- Repeat steps 1-2 to remove the other feet.

Remove feet on Surface Laptop Studio, Surface Laptop Studio 2
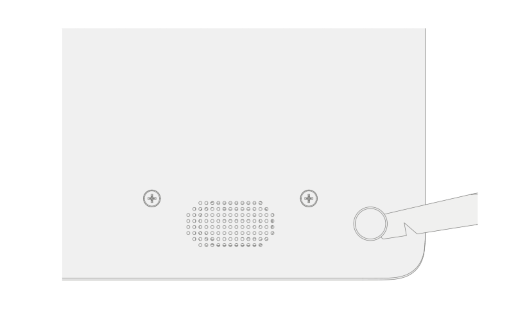
- Lift the edge of the foot with the spudger.
- Use the tweezers to grasp the loose end of the foot, then pull the foot to remove it from your laptop.
- Repeat steps 1-2 to remove the other foot.


Remove feet on Surface Laptop Go 2, Surface Laptop Go 3
- Lift the edge of the foot with the spudger.
- Use the tweezers to grasp the loose end of the foot, then pull the foot to remove it from your laptop.
- Repeat steps 1-2 to remove the other foot.
Remove feet on Surface Laptop SE
To remove the feet on Surface Laptop SE, lift the edge of each foot with the spudger and remove it.
Step 3: Adhesive removal and cleaning recommendations
To remove adhesive liners or adhesive tape remnants from the foot recesses of your Surface, use isopropyl alcohol (IPA) solution, 70% only. Lightly dampen a cleaning swab with the IPA solution before wiping the foot recesses. Make sure all the glue residue is removed, and the IPA solution is dried off before installing the replacement feet.
Step 4: Install Surface feet
To install replacement feet on Surface laptops, follow the steps for your model.
Surface Laptop 3, Surface Laptop 4, Surface Laptop 5, Surface Laptop 6 for Business, Surface Laptop (7th Edition), Surface Laptop 5G for Business
Install replacement feet on Surface Laptop 3, Surface Laptop 4, Surface Laptop 5, Surface Laptop 6 for Business, Surface Laptop (7th Edition), Surface Laptop 5G for Business
Note
Complete any repairs to your Surface before installing the new feet. Don't install previously removed or used feet on your Surface.
Note
Make sure to check the replacement feet before installing them. The front and back feet on Surface Laptop 3 and Surface Laptop 4 are different.
Once you determine which feet belong to the front and back of your Surface, follow the corresponding steps.
To install the front feet:
Place your laptop on a clean surface with the bottom facing up.
Remove the liner from one of the replacement feet. Make sure the adhesive side is facing toward the foot location. Align the three prongs on the foot with the pocket on the bottom of your laptop.
Press the foot in with your hand until it sits flat.
Repeat steps 2-3 to install the other front foot on the adjacent side.
Make sure the front feet are secure. Do one of the following:
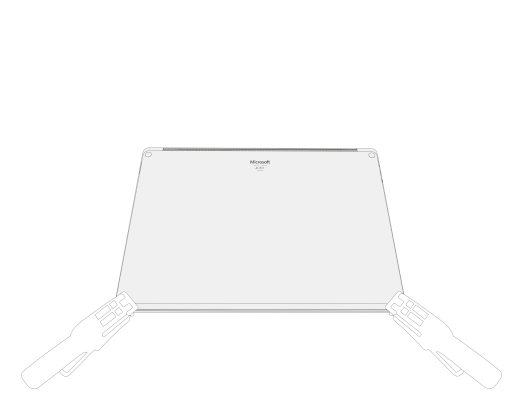
Use a clamp: Align and center the clamp on the front feet. Clamp both front feet for 4 minutes.
Use your hand: Place the keyboard and foot between your thumb and index finger, then pinch the foot tightly with your thumb and hold for 20 seconds.

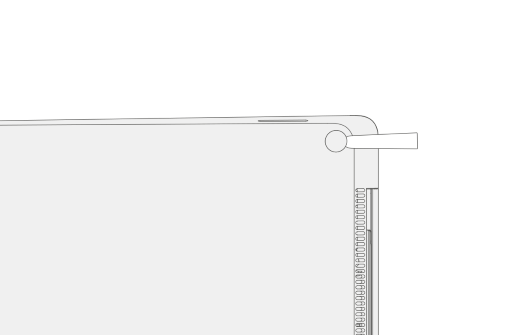
Look for any damage or gaps between the feet and bottom of your laptop. If there's a gap larger than .05 mm, replace the foot.
To insert the back feet:
Remove the liner from one of the replacement feet. Make sure the adhesive side is facing toward the foot location. Align the prong on the foot with the pocket on the bottom of your laptop.
Press the foot in with your hand until it sits flat.
Repeat steps 1-2 to install the other back foot on the adjacent side.
Make sure the back feet are secure. Do one of the following:
Use a clamp: Align and center the clamp on the front feet. Clamp both front feet for 4 minutes.
Use your hand: Place the keyboard and foot between your thumb and index finger, then pinch the foot tightly with your thumb and hold for 20 seconds.
Look for any damage or gaps between the feet and bottom of your laptop. If there's a gap larger than .05 mm, replace the foot.
Important
After installing the replacement feet, let your laptop sit feet-down on a tabletop for at least 12 hours. If this is not possible, avoid placing it in a backpack, purse, or other carrier for at least 12 hours.
Surface Laptop Studio, Surface Laptop Studio 2
Install replacement feet on Surface Laptop Studio and Surface Laptop Studio 2
Place your laptop on to a clean surface with the bottom facing up.
Remove the liner from one of the replacement feet. Make sure the adhesive side is facing toward the groove on bottom of your laptop.
Put the right side of the foot into the groove ensuring that the alignment post fits into the hole. Then loosely put the rest of the foot down making sure that the left alignment post fits in the corresponding hole.


Repeat steps 2-3 to install the other foot.
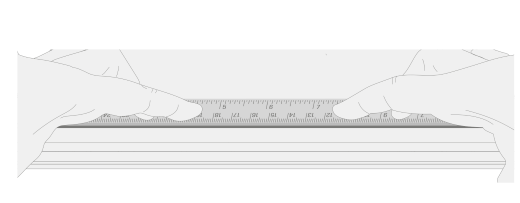
Make sure the feet are secure. Place a ruler over one of the feet and press down with several fingers spaced along the length of the ruler for 30 seconds. Repeat the process for the remaining foot.

Surface Laptop Go 2, Surface Laptop Go 3
Install replacement feet on Surface Laptop Go 2 and Surface Laptop Go 3
Note
Complete any repairs to your Surface before installing the new feet. Don't install previously removed or used feet on your Surface.
Note
Make sure to check the replacement feet before installing them. The front and back feet for Surface Laptop Go 2 and Surface Laptop Go 3 are different.
Once you determine which feet belong to the front and back of your Surface, follow the corresponding steps.
To insert the front foot:
Place your laptop on a clean surface with the bottom facing up.
Remove the liner from the replacement foot. Make sure the adhesive side is facing toward the foot location on the bottom of your laptop. Align the two locating posts on the front foot.
Press the foot in firmly.

Make sure the foot is secure. Slide your hand up and down the extent of the foot.
Look for any damage or gaps between the foot and bottom of your laptop.
To insert the back foot:
Remove the protective sheet off the replacement foot. Make sure the adhesive side is facing toward the foot location on the bottom of your laptop. Align the locating post from the back foot.
Press the foot in firmly.


Make sure the foot is secure. Slide your hand up and down the extent of the foot.
Look for any damage or gaps between the foot and bottom of your laptop.
Important
After installing the replacement feet, let your laptop sit feet-down on a tabletop for at least 12 hours. If this is not possible, avoid placing it in a backpack, purse, or other carrier for at least 12 hours.
Surface Laptop SE
Install replacement feet for Surface Laptop SE
Note
Make sure to check the replacement feet before installing them. The front and back feet for Surface Laptop SE are different sizes.
Once you determine which feet belong to the front and back of the device, continue to the steps.
Place your laptop on a clean surface with the bottom facing up.
Remove the liner from one of the replacement feet. Make sure the adhesive side is facing toward the pocket on the bottom of your laptop.
Press the foot into the cavity.
Repeat steps 2-3 to install the other replacement feet.

Look for any damage or gaps between the feet and bottom of your laptop.