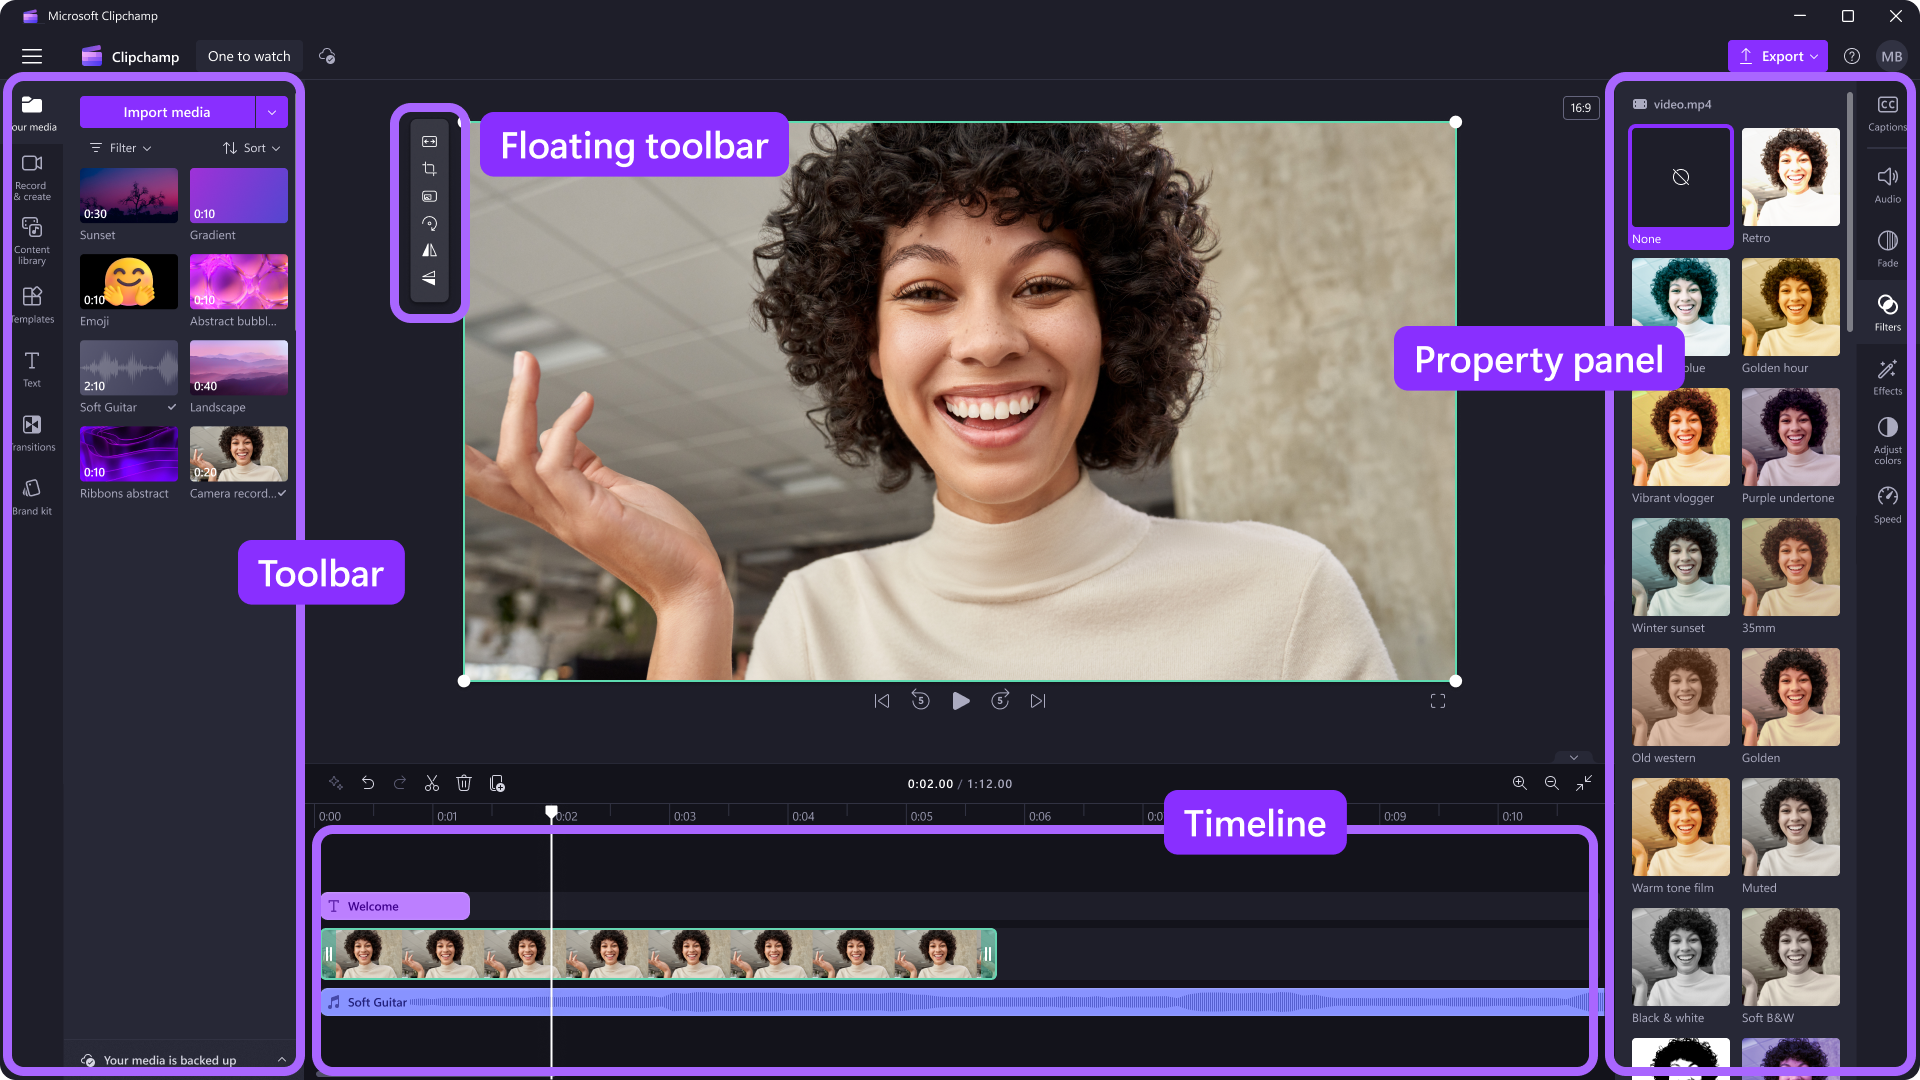
In the Clipchamp video editor, after you added files to the media library, you need to move them to the timeline to start editing your video.
-
This is the space where you edit together video, image, or audio assets to create your final video, and where you can add texts and transitions.
-
What you add to the timeline is what will export when you save your finished video.
How to add media to the timeline
The video timeline is located at the bottom of the editor. To add media to the editing timeline, go to the toolbar then drag and drop an asset from the media tab or content library tab onto the timeline.
How to zoom in and out on the timeline
If you add several clips to the timeline, they may disappear off the right edge of the screen. In this case, you can zoom out on the timeline to see all your assets at once. You can also zoom in on the timeline to make your assets appear bigger.
To do this, use the zoom buttons in the bottom right-hand corner of the timeline. Click on the plus button to zoom in or click on the minus button to zoom out. You can also click on the fit timeline button so your assets take up the entire timeline with no empty space to the right.
You can also use the drag the scroll bar at the bottom of the screen to the left or right to view different parts of the timeline.
How to preview your video on the timeline
Move the seeker on the timeline to exact timestamps to preview the specific video or asset on the stage. Click on any timestamp on the timeline and click on the play button. You can also then drag the seeker to a new timestamp and preview from there.
You can also click on the space bar on your keyboard to play your video.
How to work with multiple assets on the timeline
The timeline will most likely contain multiple different assets like videos, images, text, music, and more. You can layer assets on the timeline by placing them above one another.
If you have multiple video assets stacked on the timeline, the video that is on the top of the stack will play on the video preview. All sound will play from each video asset, but only the top asset will be seen on the video. You can mute videos using the audio tab on the property panel.
How to use AI suggestions on the timeline
At any time while editing, you can prompt the in-built AI editing tool to offer suggestions of how to enhance and improve your video. Just click on the AI suggestions button at the top left of the timeline. You will then see one or multiple editing suggestions. To implement these changes, just click on an individual suggestion button.
How to edit a video on the timeline
If you would like to know how to trim, split, and add effects to your clips once they're in the timeline, see: How to edit your video.
How to fix assets that aren't loading on the timeline
If you have problems adding media assets to your project or your timeline or playing back your video in the preview, see: What to do if your assets aren't loading.
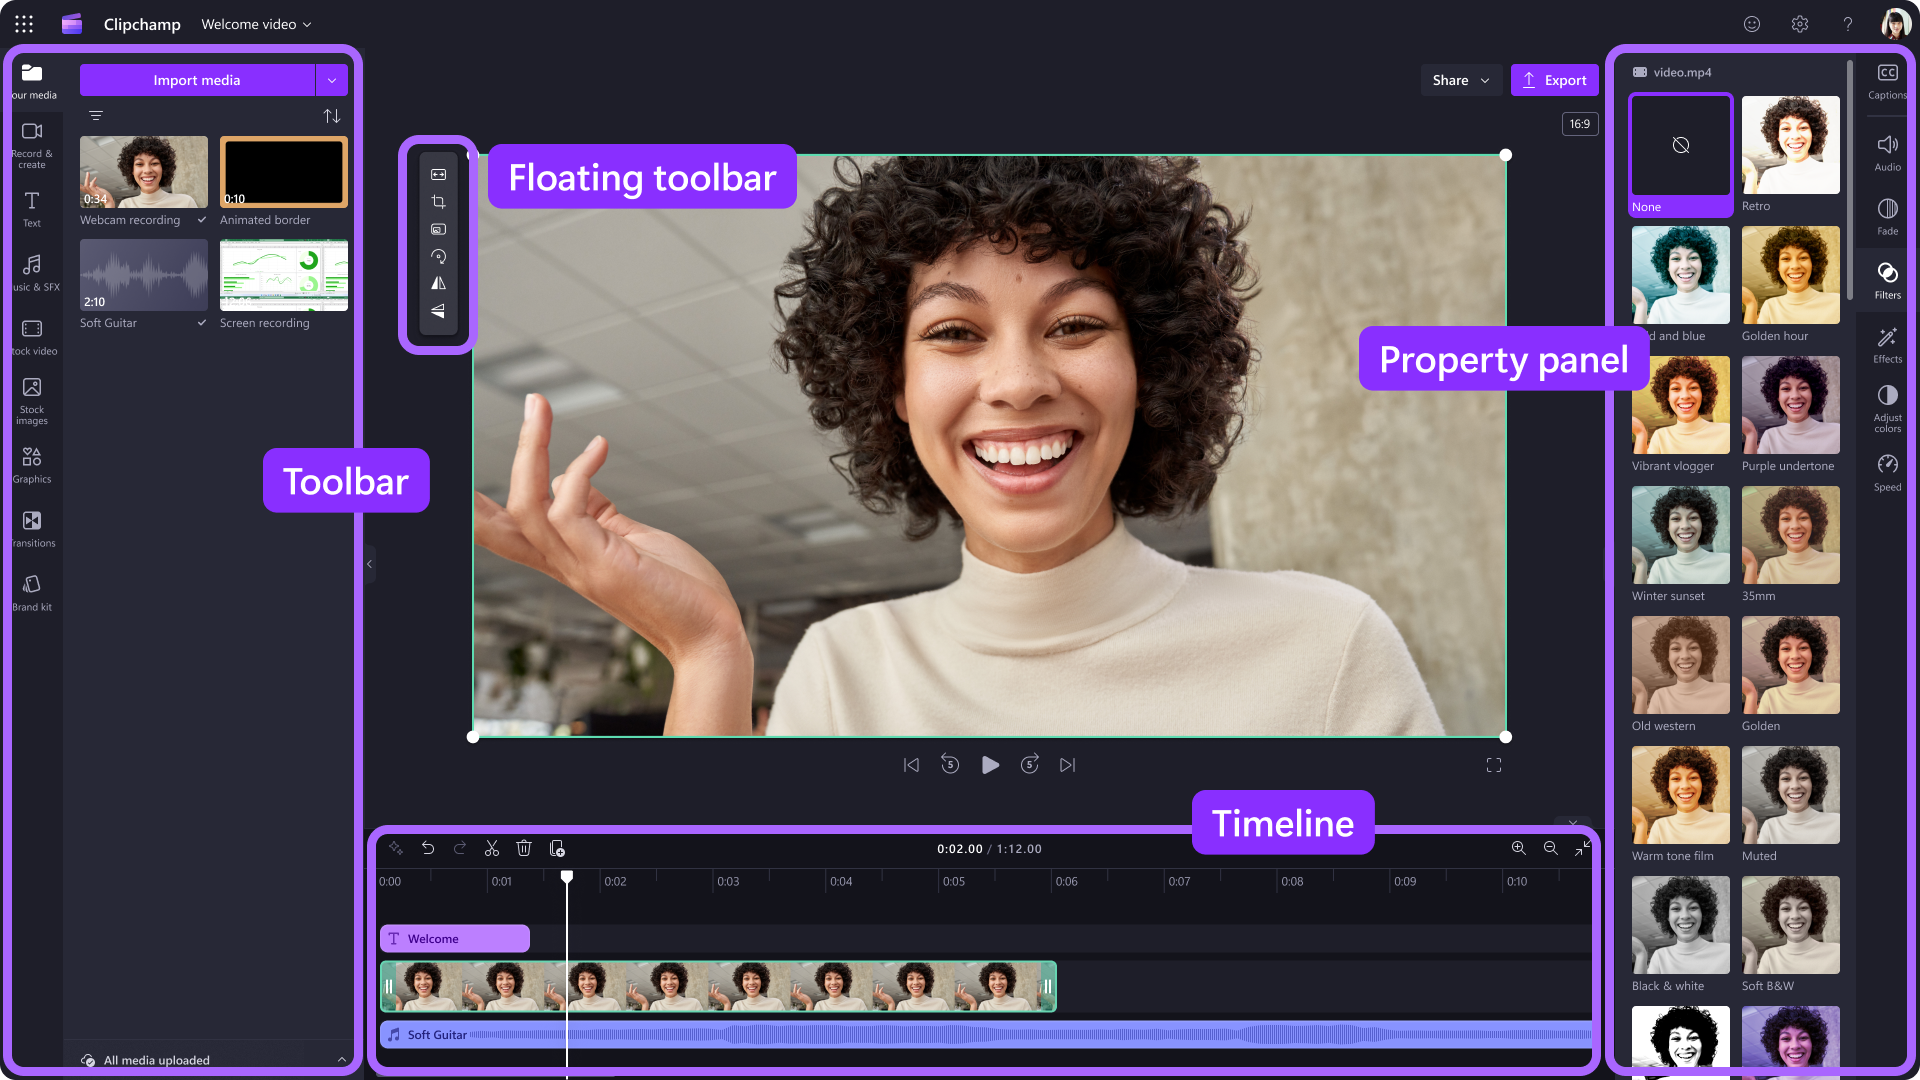
In the Clipchamp video editor, after you added files to the media library, you need to move them to the timeline to start editing your video.
-
This is the space where you edit video, image, or audio clips to create your final video, and where you can add texts and effects.
-
What you add to the timeline is what will be exported when you select Export and save your finished video.
How to add media to the timeline
The video timeline is located at the bottom of the editor. To add media to your timeline, go to the toolbar and drag and drop an asset onto the timeline from the media tab, stock video tab, or stock image tab.
How to zoom in and out on the timeline
If you add several clips to the timeline, they may disappear off the right edge of the screen. In this case, you can zoom out on the timeline to see all your assets at once. You can also zoom in on the timeline to make your assets appear bigger.
To do this, use the zoom buttons on the bottom right-hand corner of the timeline. Click on the plus button to zoom in, or click on the minus button to zoom out on the timeline. You can also click on the fit timeline button so your assets take up the entire timeline with no empty space to the right.
Use the timeline scroll bar at the bottom of the video editor to move left and right on the timeline.
How to preview your video on the timeline
Move the seeker on the timeline to exact timestamps to preview the specific video or asset on the stage. Click on any timestamp on the timeline and click on the play button. You can also then drag the seeker to a new timestamp and preview from there. Alternatively, click on the space bar on your keyboard to play your video.
How to work with multiple assets on the timeline
The timeline will most likely contain multiple different assets like videos, images, text, music, and more. You can layer assets on the timeline by placing them above one another.
If you have multiple video assets stacked on the timeline, the video that is on the top of the stack will play on the video preview. All sound will play from each video asset, but only the top asset will be seen on the video. You can mute videos using the audio tab on the property panel.
How to use AI suggestions on the timeline
At any time while editing, you can prompt the in-built AI editing tool to offer suggestions of how to enhance and improve your video. Just click on the AI suggestions button at the top left of the timeline. You will then see one or multiple editing suggestions. To implement these changes, just click on an individual suggestion button.
How to edit a video on the timeline
If you would like to know how to trim, split, and add effects to your clips after they're on the timeline, see: How to edit your video.
How to fix assets that aren't loading on the timeline
If you have problems adding media assets to your project or your timeline or playing back your video in the preview, see: What to do if your assets aren't loading.


