If File Explorer won’t open or start in Windows, it makes everyday tasks like finding files, opening folders, or managing storage difficult. This article walks through simple troubleshooting steps—such as checking for updates, restarting your device, and resetting Windows—to help restore File Explorer and get it working again.
To open File Explorer in Windows, select File Explorer
 on the taskbar or press the Windows logo key
 + E on your keyboard.
Here are some things to try if File Explorer won't open.
Check for updates
Select Start
> Settings
 > Windows Update
 . Then select Check for updates. Install any available updates and restart your device if required.
Restart your device
Even if you don’t see updates that require restarting, doing so ensures that any pending updates are installed.
Reset your PC
If you've tried the previous steps and File Explorer still isn't starting or opening, resetting your PC might help. For more info, see Recovery options in Windows.
To open File Explorer in Windows 10, select its icon
on the taskbar, press the Windows logo key
+ E on your keyboard, or select Start
> Documents (directly beneath your user icon).
Here are some things to try if File Explorer won't open.
Check for updates
Select Start
> Settings
> Update & Security
 > Windows Update
. Then select Check for updates. Install any available updates and restart your device if required.
> Windows Update
. Then select Check for updates. Install any available updates and restart your device if required.
Restart your device
Even if you don’t see updates that require restarting, doing so ensures that any pending updates are installed.
Optimize Advanced system settings, including virtual memory settings.
- On the taskbar, type control panel in the search box. Select Control Panel from the results.
- Select System and Security > System > Advanced system settings.
- On the Advanced tab, under Performance, select Settings > Advanced.
- Ensure that Adjust for best performance of is set to Programs.
- Under Virtual memory, select Change and make sure that Automatically manage paging file sizes for all drives is selected.
- Select OK, then select Apply.
- Restart your PC.
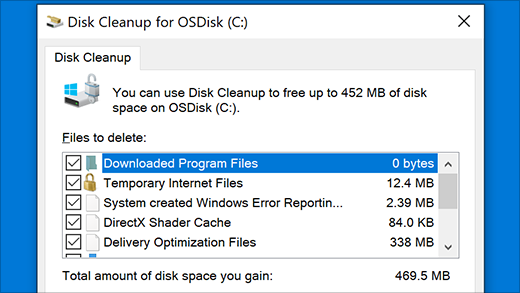
Run Disk Cleanup to free up resources on your device.
On the taskbar, type disk cleanup in the search box. Select Disk Cleanup from the results.
Select a drive and select OK.
Select the check box by each type of file. (Make sure there’s nothing important in your Recycle Bin before emptying it.)
Select OK.
Run the system maintenance troubleshooter
- On the taskbar, type control panel in the search box. Select Control Panel from the results.
- For View by, choose Large icons or Small icons.
- Select Troubleshooting > View all > System Maintenance.
- On the System Maintenance troubleshooter, select Next > Try troubleshooting as an administrator and review the results.
Check if system files are missing or corrupted
See Using System File Checker in Windows for more info.
Run Automatic Repair
Automatic Repair is a tool that attempts to fix registry corruption. To run it:
- Select Start
> Settings
> Update & Security
.
- Select Recovery
 and under Advanced startup, select Restart now. You may need to select Windows 10 Advanced Startup. or that may happen automatically.
- On the Choose an option screen, select Troubleshoot > Advanced options > Startup Repair.
- Choose an account and enter your password.
Automatic Repair now begins. Your computer may restart during this process.
If File Explorer doesn’t work more reliably after trying these steps, please send feedback through Feedback Hub so Microsoft can investigate potential issues.
