
Before you customize page numbers, insert them in the footer:
On the Insert tab, in the Header & Footer group, select Page Number.
Select Bottom of Page, and then choose a page number style.
Double-click outside the footer to return to the document.
Align the page number to the left or center
- Double-click the page number to edit the footer.
- Press Ctrl+L to put the page number on the left, or press Ctrl+E to center the page number.
Include the total number of pages, like "2 of 10"
- On the Insert tab, in the Header & Footer group, go to Page Number > Bottom of Page.
- Scroll down until you come to the Page X of Y page numbers, and then select Bold Numbers 3.
Add text, like "p." or "Page" to the page number
- Double-click the page number to edit the footer.
- Enter the text you want, such as p. or Page.
Add content, like the author name or current date, to the footer
On the Insert tab, in the Header & Footer group, go to Footer > Blank (Three Columns).
Replace the placeholders with your content. To insert content that comes from the document (like author and file name), use Document Info on the Header & Footer Tools > Design tab.
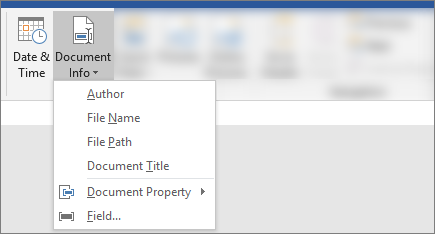
To add the current date, pick Date & Time on that same tab.
Tip
If you want the printed document to always show the date it's printed, select Update Automatically.
Use one of the placeholders for the page number. On the Header & Footer Tools > Design tab, go to Page Number > Current Position, and choose Plain Number.

If you don't use all the placeholders, delete the ones you don't use.
Before you customize page numbers, insert them in the footer:
On the Insert menu, select Page Number.
Choose a page number style and location at the bottom of the page.
Select OK.
Align the page number to the left or center
- Double-click the page number to edit the footer.
- Go to Page Number on the Header & Footer tab, and in the Page Numbers dialog box, choose Left or Center as the alignment.
Include the total number of pages, like "Page 2 of 10"
- On the Insert tab, go to Footer.
- Scroll down and pick Semaphore.
Tip
By default the page number is centered, but you can select it and use buttons on the Home tab to align it to the right or left.
Add text, like "p." or "Page" to the page number
- Double-click the page number to edit the footer.
- Enter the text you want, such as p. or Page.
Add content, like the author name or current date, to the footer
On the Insert tab, go to Footer > Blank (Three Columns).
Replace the placeholders with your content. To insert content that comes from the document (like author and file name), go to Field on the Header & Footer Tools tab.
In the Field dialog box, filter the list of fields to choose from by choosing Document Information in the list of categories; then double-click the field you want.
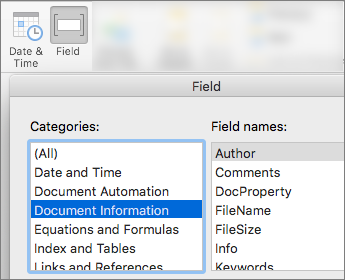
To add the current date, pick Date & Time on that same tab.
Tip
If you want the printed document to always show the date it's printed, select Update Automatically.
Position the page number by deleting one of placeholders and then going to Page Number on the Header & Footer tab. In the Page Numbers dialog box, choose the alignment that corresponds to the position of the placeholder you deleted (Right, Left, or Center).
If you don't use all the placeholders, delete the ones you don't use.