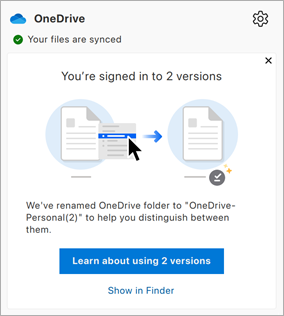
There are two versions of OneDrive available for macOS. If you have installed both the standalone version and the Mac App Store version of OneDrive on your Mac, you might encounter issues with syncing and receive messages about having two versions of OneDrive.
Important:
-
Only one version of OneDrive should be installed and configured on your Mac at a time as the different versions cannot sync the same content.
-
This is not the same as having two or more accounts configured (e.g. personal and work or school), which is supported.
This guide will help you understand the differences between these versions and provide steps to manage and use only one version of the OneDrive sync app.
-
Store version: Available from the Mac App Store.
-
Standalone version: Available from OneDrive.com, Office, and other sources.
Resolving the message “You’re signed in to 2 versions”
If you have set up the same account using both versions, you may see a message in the OneDrive sync window indicating you are syncing the same account on another version of OneDrive. This message will always appear when the app starts up and cannot be disabled.
To resolve this issue, follow these steps:
-
Click the OneDrive cloud icon on the menu bar to show the sync activity window.
-
Click on the Show in Finder link in the message.
-
A Finder window will appear, showing the contents of /Library/CloudStorage.
-
Double-click on each OneDrive folders that appear.
-
Inspect the top of the Finder windows.
-
If you see a message banner on one of the windows with a Delete button, click Delete to remove this folder. The folder corresponds with the previous version of OneDrive that is no longer installed.
-
If you don't see a message banner or delete option on any of the folders that are set up:
-
Open OneDrive preferences.
-
Click on the Account tab.
-
Click Unlink this Mac and follow the instructions.
Note: No data will be lost, we simply disconnect your Mac from OneDrive for a short time.
-
When the process is complete, exit OneDrive.
-
Drag the OneDrive app from the Applications folder to the Trash.
-
Re-install OneDrive from either:
-
Store version: Available from the Mac App Store.
-
Standalone version: Available from OneDrive.com, Office, and other sources.
-
-
-
-
Run OneDrive to complete set-up.
Learn more
-
Open Finder and navigate to Applications.
-
Open the Utilities folder.
-
Double-click on Terminal.
-
Copy and paste the following command and press Return:/usr/libexec/PlistBuddy -c 'Print CFBundleIdentifier' /Applications/OneDrive.app/Contents/Info.plist
Tip: Replace Applications/OneDrive.app with the path to your installed copy of OneDrive as needed. See below for how to identify the installation path.
The output determines which version you have installed:
-
com.microsoft.OneDrive = Standalone version
-
com.microsoft.OneDrive-mac = Store version
-
Open Finder and navigate to Applications.
-
Open the Utilities folder.
-
Double-click on Terminal.
-
Copy and paste the following command and press Return:xattr -l ~/OneDrive
Note: Replace ~/OneDrive with the path to your installed copy of OneDrive as needed. See below for how to identify the installation path.
The output determines which version you have set up to sync:
-
com.apple.file-provider-domain-id: com.microsoft.OneDrive.FileProvider/OneDrive= Standalone version
-
com.apple.file-provider-domain-id: com.microsoft.OneDrive-mac.FileProvider/OneDrive = Store version
-
Open Finder and navigate to Applications.
-
Open the Utilities folder.
-
Double-click on Terminal.
-
For the Standalone path, copy and paste the following command and press Return:mdfind kMDItemCFBundleIdentifier = "com.microsoft.OneDrive"
-
For the Store path, copy and paste the following command and press Return: mdfind kMDItemCFBundleIdentifier = "com.microsoft.OneDrive-mac"
-
-
The path to the application will be shown.


