
Passkey management is handled within your passkey provider.
- You can manage passkeys saved to Windows in Windows Settings.
- Passkeys created for your Microsoft accounts can also be managed through your personal or work/school security dashboard.
- For other synced credential managers, such as Microsoft Password Manager, go to the provider or service to manage passkeys stored there.
Select an option below to learn more.
View and delete passkeys saved in Windows
You can use the Settings app in Windows to view and delete any passkeys saved locally on your device.
In the
 Settings app on your Windows device
select Accounts > Passkeys or use the following shortcut:

To delete a device-bound passkey (a passkey stored to your Windows device), select
 > Delete passkey next to the passkey name.
Manage where your Windows passkeys are saved
Use the Settings app to manage advanced options for your passkeys. In the advanced passkeys options, you can configure passkey services.
In the Settings app
on your Windows device, select Accounts > Passkeys > Advanced options.
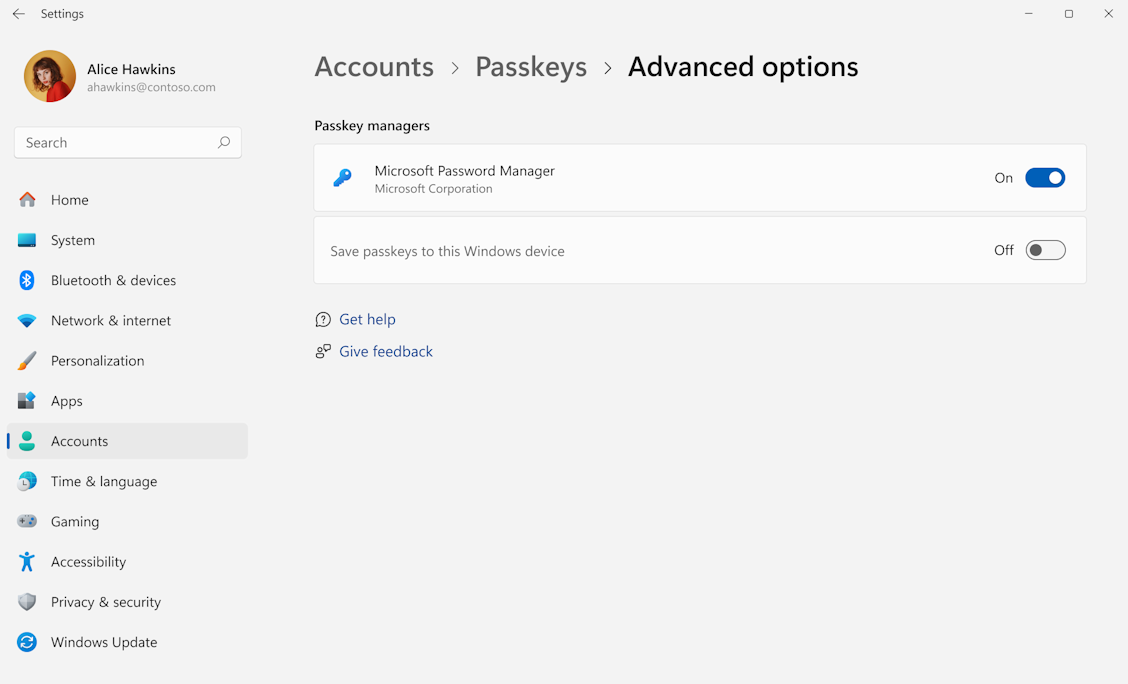
You can enable or disable the passkey services available on your Windows device by toggling them on or off. For example, if you want to have the option to save or use the passkeys stored locally on your device, turn on the option Save passkeys to this Windows device.
You can also use this section to configure integration with third-party passkey managers.
Note
This feature may be disabled by your organization IT Admin.
Manage passkeys created for your Microsoft accounts
Select your account type:
Sign in to your Microsoft account Advanced Security Options at account.live.com/proofs/manage
The account dashboard will show all of your sign-in verification methods, including your passkeys.
Passkeys are shown with this passkey icon
 .
.
Select
![]() to expand the passkey section and show:
to expand the passkey section and show:
Information on where the passkey is saved, such as device or Microsoft Password Manager or similar.
When it was last used.
Rename option. You can give the passkey a name to easily manage it later.
Remove option.
Caution
- If you remove the passkey, you will no longer be able to use it to sign in to your Microsoft account.
- If you do need to remove a passkey, make sure you add new information first.
- If you remove of all security information in your account, the account is put into a restricted state for 30-days and your account doesn't change during this time. During the 30-day restriction period, we cannot accept further changes or additions to security settings or billing information. Your account is still open and active, and you can still use your email, OneDrive and devices as usual. While we understand this 30-day period might be frustrating, this is done to protect and alert you in case the security info was removed by someone who had unauthorized access to your account. Learn more.
Back up passkeys with a synced password manager
Passwords and passkeys can be backed up with a synced credential manager (such as Microsoft Password Manager, Google Password Manager, Apple iCloud Keychain or others).
Learn how to find the Microsoft Password Manager.
Note
This feature may be disabled by your organization IT Admin.
Update your passkeys if you get a new device
If you had any passkeys stored on an old device, and the device was replaced, you will need to add new passkeys. Once completed, you can safely remove any old passkeys from your account.
Note
If the passkeys were stored in a synced credential manager (such as Microsoft Password Manager, Google Password Manager, Apple iCloud Keychain or others), then you don't need to add a passkey for the new device. Just sign in with your credential manager account.
- Set up a new passkey first. Learn how to Create and save a passkey.
- Check your account for any passkeys that no longer apply and delete them.
Personal Microsoft account | Work or school Entra ID