
Secure Boot is a security feature that helps prevent unauthorized software from loading when your PC starts. If Secure Boot is turned off, follow the guidance for your PC or motherboard manufacturer to turn it on.
Warning
Changing firmware settings incorrectly can affect your PC's security or prevent it from starting properly. Change only the Secure Boot settings described by your device manufacturer.
Find guidance for your PC manufacturer
Choose the manufacturer of your PC from the list below. If you built your PC, choose the manufacturer of your motherboard.
- Microsoft Surface
- Acer
- ASRock
- ASUS
- BIOSTAR
- Colorful
- Dell or Alienware
- GIGABYTE or AORUS
- HP or OMEN
- Lenovo
- MSI
Firmware menus and Secure Boot settings vary by manufacturer and device model. Follow the guidance provided by your manufacturer for your specific device.
Microsoft Surface
These steps start after Windows has restarted your device directly into Surface UEFI.
Turn on Secure Boot
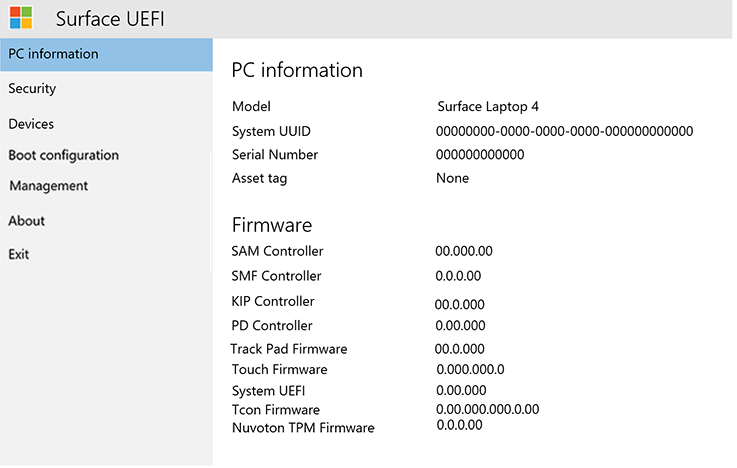
- In Surface UEFI, select Security from the menu on the left.
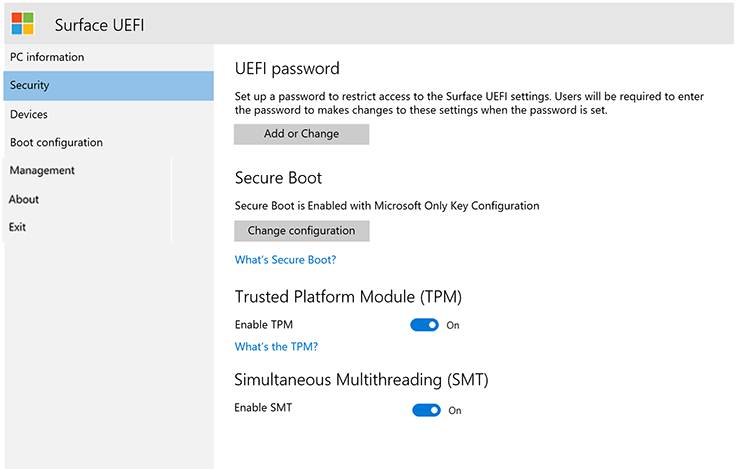
- Under Secure Boot, select Change configuration.
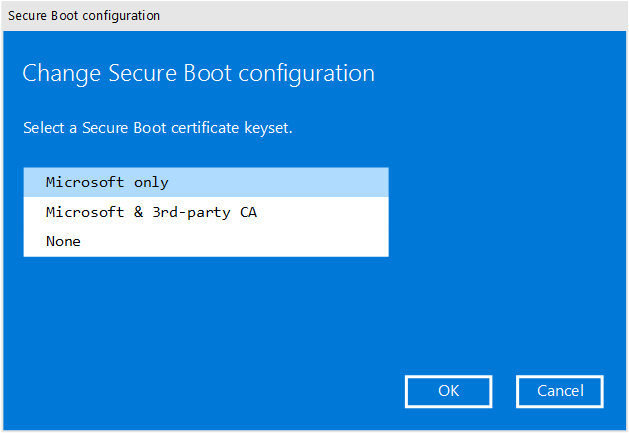
- In the certificate keyset list, select Microsoft only, and then select OK.
Warning
Change only this setting. Changing other startup settings can affect your Surface's security and how it works.
Save and restart
- Select Exit from the menu on the left.
- Select Restart now.
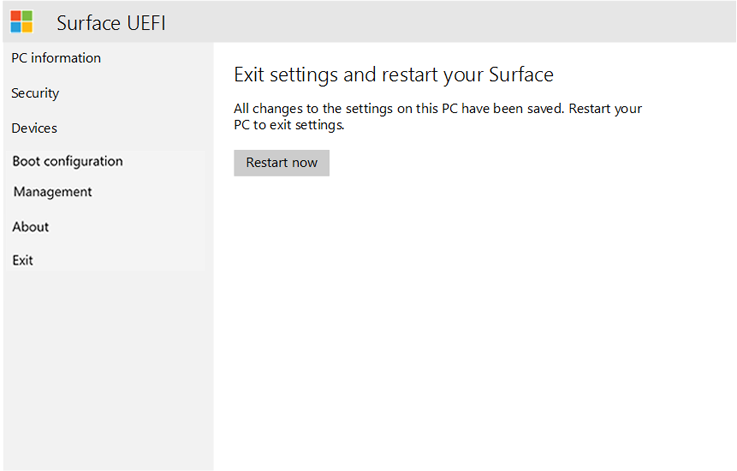
Your Surface saves the Secure Boot change and starts Windows.
Check that it worked
After Windows starts:
- Open Settings.
- Select Security.
- Select Integrity protection.
- Confirm that Secure Boot shows On.
- Confirm that the page shows All protected.
You're done when Secure Boot is on and the Integrity protection page shows All protected.
Acer
For instructions to turn on Secure Boot on an Acer device, see:
ASRock
For instructions to turn on Secure Boot on an ASRock motherboard, see:
ASUS
For instructions to turn on Secure Boot on an ASUS device or motherboard, see:
BIOSTAR
For instructions to turn on Secure Boot on a BIOSTAR motherboard, see:
Colorful
For instructions to turn on Secure Boot on a Colorful motherboard, see:
Dell or Alienware
For instructions to turn on Secure Boot on a Dell or Alienware device, see:
GIGABYTE or AORUS
For instructions to turn on Secure Boot on a GIGABYTE or AORUS device or motherboard, see:
HP or OMEN
For instructions to turn on Secure Boot on an HP or OMEN device, see:
Lenovo
For instructions to turn on Secure Boot on a Lenovo device, see:
MSI
For instructions to turn on Secure Boot on an MSI device or motherboard, see:
If you can't find the Secure Boot setting
The name and location of the Secure Boot setting can vary depending on your device.
If you can't find it:
- Confirm that you're using the instructions for the correct PC or motherboard manufacturer.
- Search your manufacturer's support site for your device model and Secure Boot.
- Contact the manufacturer's support team if Secure Boot isn't shown in the firmware menu.
Don't change other firmware settings unless the device manufacturer's instructions require you to do so.
Restart your device into UEFI
If Integrity protection provides an option to restart your device directly into UEFI, use that option and then follow the instructions for your manufacturer.
Otherwise:
- Open Settings.
- Select System > Recovery.
- Next to Advanced startup, select Restart now.
- On the Choose an option screen, select Troubleshoot.
- Select Advanced options.
- Select UEFI Firmware Settings, and then select Restart.
After your device restarts, follow the guidance for your manufacturer to find and turn on Secure Boot.