
Create a document library in SharePoint to securely store files where you and your co-workers can find them easily, work on them together, and access them from any device at any time. SharePoint team sites include a document library by default; however, you can add additional document and other libraries to a site as needed. For more info about document libraries, see What is a document library?
Note
Site owners can create or manage lists. Other team members might not be able to.
Create a library in SharePoint in Microsoft 365 or SharePoint Server 2019
Go to the team site where you want to create a new document library.
On the menu bar, select New, and then select Document library.
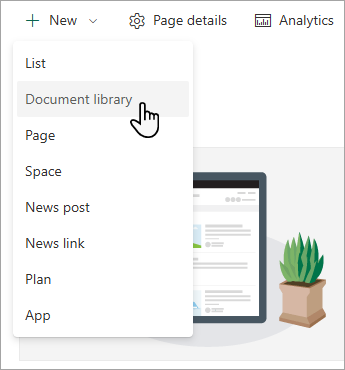
In the Create new document library dialog box, you can start with a blank library, start from an existing library, or use a template.

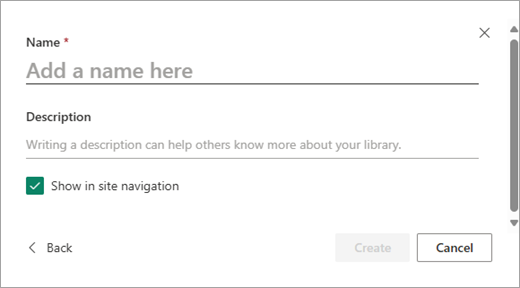
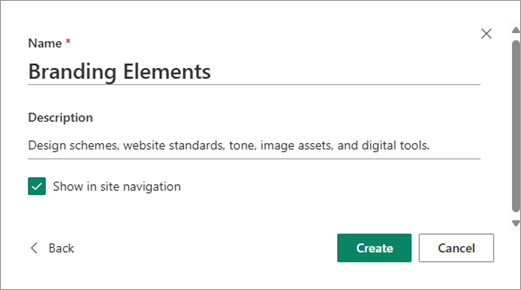
In the Name dialog box, you can give your new library a name and Description that will help others find and use your library.
Once you've entered the name and description for your new document library, select Create.
For info about adding versioning, uploading files, and enabling other library features, see How versioning works in lists and libraries.
Note
2,000 lists and libraries combined per site collection is the limit (including main site and any subsites) after which you will an receive error: Sorry, something went wrong. The attempted operation is prohibited because it exceeds the list view threshold. For more info, see SharePoint Limits.

Next steps with your document library
After creating a library, you can discover more info about SharePoint libraries:
- Upload files and folders to a library
- Move or copy files in SharePoint
- Enable and configure versioning for a list or library
- Manage large lists and libraries
- Set up a library to require check out of files
- Customize permissions for a SharePoint list or library
- Create, change, or delete a view of a list or library
- Create a column in a list or library
- Introduction to managed metadata