
Categories let you easily tag, label and group messages in Outlook on the web and new Outlook. Choose from default categories or create your own, and assign one or more categories to your messages.
Other people won't see the categories you assign.
Note
If the instructions don't match what you see, you might be using Outlook.com or an older version of Outlook on the web. Try Categories in Outlook.com or Instructions for classic Outlook on the web.
Add a category tag or label to an email message
Method 1:
In new Outlook, select the email message or messages you want to categorize.
Select Categorize from the top toolbar, and then do the following:
- To apply a category: Search for or select the category you want to use.
- To remove a category: Clear the check mark next to the category.
Note
If you've assigned a lot of categories and can't see the category you're looking for, click All categories at the bottom of the list.
Method 2:
Right-click the email message or selected messages, and then select Categorize from the list. Then, do the following:
- To apply a category: Select the category you want to use.
- To remove a category: Clear the check mark next to the category.
Note
If you select multiple messages with categories already applied, the categories selected in the drop-down will only show those applied to all those messages you've selected.
Add a category tag or label to a calendar event
Note
You can't apply a category to an instance of an appointment or meeting series. You can only apply categories to the entire series.
- Right-click the calendar event.
- Select Categorize, and then select a category to apply it, or clear the check mark next to a category to remove it.
If you don't see the category you're looking for, select All categories at the bottom of the list.
Show your category emails and calendar events
To see all the messages you have tagged with a category:
- Open your Category list.
- Select Add to Favorites.
- Return to your Inbox where you will see the category in the Favorites folder list.
Rename a category
You cannot rename categories, but you can create a new one with a new name.
Tip
If you want to replace the category on a message, apply the new category before removing the old.
Create a category tag or label
Method 1:
- In new Outlook, select an email message or calendar event and right-click.
- From the Categorize menu, select New category.
- Type a name for your category, and then, if you want, choose a color by clicking the category icon.
- Press Enter. The category is created and applied to the items you've selected.
Method 2:
- Open your Category list.
- Select Create category.
- Type a name for your category, and then, if you want, choose a color by selecting the category icon.
- Press Enter.
Change a category color
Open your Category list.
Select the icon of the category you want to change.
Select a color from the picker.
Note
Colors shown reflect the color of the category text, not the background color of the label when applied to an item.
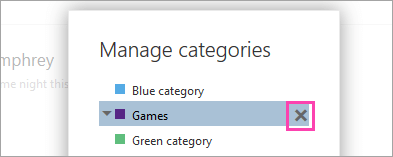
Delete a category
- Open your Category list.
- Select Delete
 to delete a category.


See Also
Organize your Inbox with Archive, Sweep, and other tools in Outlook on the web