
To join your work-owned Windows device to your organization's network so you can access work resources, select an option below and follow the steps. If you want to add or register your personal device, such as your phone, see Register your personal device on your organization's network.
Note
- If you want to add or register your personal device, such as your phone, see Register your personal device on your organization's network.
- While you're joining your Windows device to your work or school network, the following actions will happen:
- Windows registers your device to your work or school network, letting you access your resources using your personal account. After your device is registered, Windows then joins your device to the network, so you can use your work or school username and password to sign in and access restricted resources.
- Optionally, based on your organization's choices, you might be asked to set up two-step verification through either two-step verification or security info.
- Optionally, based on your organization's choices, you might be automatically enrolled in mobile device management, such as Microsoft Intune. For more info about enrolling in Microsoft Intune, see Enroll your device in Intune.
Add a brand-new Windows device to a work or school network
If your device is brand-new and hasn't been set up yet, you can go through the Windows Out of Box Experience process to join your device to the network.
Start up your new device and begin the Windows Out of Box Experience.
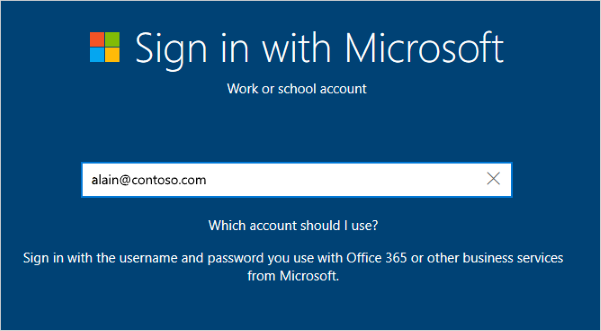
On the Sign in with Microsoft screen, type your work or school email address.
On the Enter your password screen, type your password.

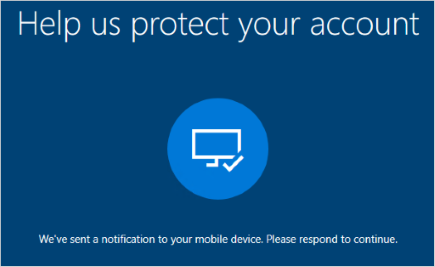
On your mobile device, approve your device so it can access your account.
Complete the Out of Box Experience, including setting your privacy settings and setting up Windows Hello (if necessary).
Your device is now joined to your organization's network.
Add your existing Windows device to a work or school network
If you've had your device for a while and it's already been set up, you can follow these steps to join your device to the network.
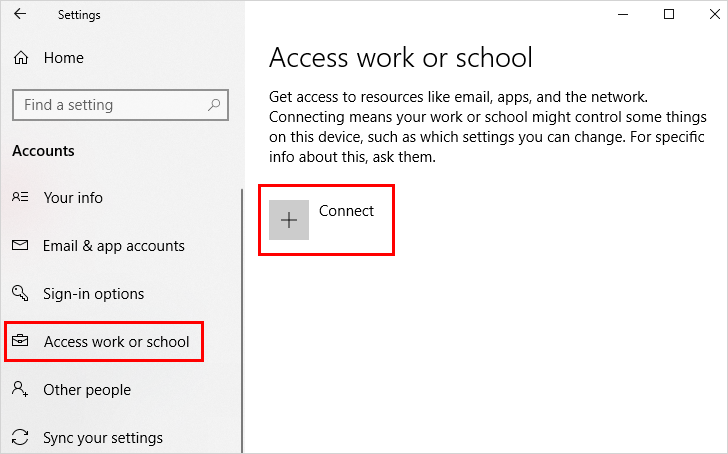
Open Settings, and then select Accounts.
Select Access work or school, and then select Connect.
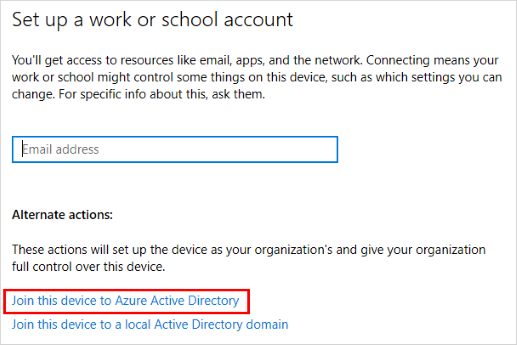
On the Set up a work or school account screen, select Join this device to Azure Active Directory.
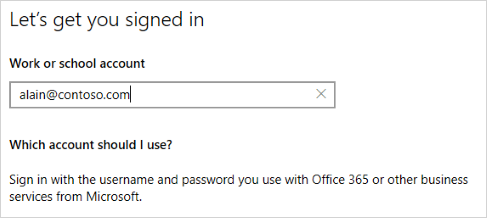
On the Let's get you signed in screen, type your email address (for example, alain@contoso.com), and then select Next.
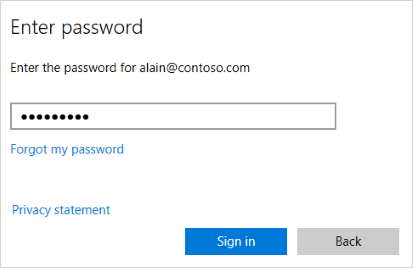
On the Enter password screen, type your password, and then select Sign in.
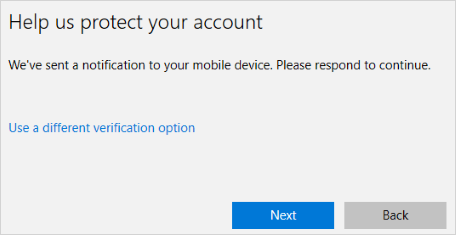
On your mobile device, approve your device so it can access your account.
On the Make sure this is your organization screen, review the information to make sure it's right, and then select Join.

On the You're all set screen, click Done.

To make sure your device is registered to your work or school
You can make sure that you're joined by looking at your settings.
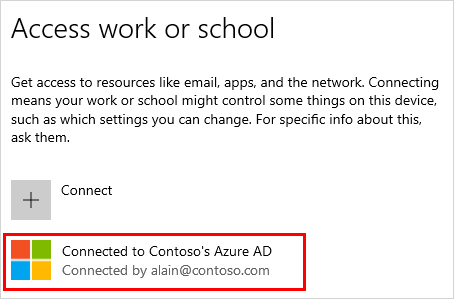
Open Settings, and then select Accounts.

Select Access work or school, and make sure you see text that says something like Connected to <your_organization> Entra ID.
Next steps
After you join your device to your organization's network, you should be able to access all of your resources using your work or school account information.
- If your organization is managed using Microsoft Intune and you have questions about enrollment, sign-in, or any other Intune-related issue, see the Intune user help content.