Führen Sie eine der folgenden Aktionen aus:
- Wählen SieBilder>auf diesem Geräteinfügen> für ein Bild auf Ihrem PC aus.
- Wählen Sie Insert>Bilder>Generieren Sie ein Bild , um den Copilot-Chatbereich zu öffnen, und beschreiben Sie das Bild, das Sie erstellen möchten.
- Wählen Sie "Bilder einfügen>">aus , um Bilder oder Hintergründe mit hoher Qualität zu erhalten.
- Wählen Sie Bilder online einfügen>>Bilder für ein Bild im Web aus.
Wählen Sie das gewünschte Bild und dann Einfügen aus.
Ändern der Größe oder Verschieben von Bildern
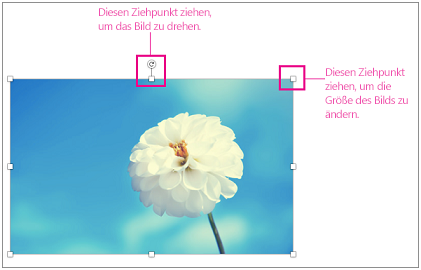
Wenn Sie die Größe eines Bilds ändern möchten, wählen Sie es aus, und ziehen Sie einen seiner Eckziehpunkte.
Wenn Sie Text um ein Bild herum umbrechen möchten, wählen Sie das Bild und dann eine der Umbruchoptionen aus.
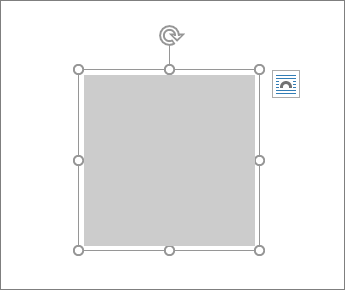
Tipp
Wenn Sie eine andere Option als Mit Text in Zeile auswählen, können Sie das Bild auf der Seite verschieben, indem Sie es einfach auswählen und dann ziehen.
Was ist mit EPS?
EPS-Dateien können nicht mehr in Office-Dokumente eingefügt werden. Weitere Details finden Sie unter Unterstützung für EPS-Bilder wurde in Microsoft 365 deaktiviert.
Wichtig
- Wir haben das Feature "Foto von einem mobilen Gerät einfügen" in Microsoft Office-Apps für Windows und das Web eingestellt. Das Feature wurde aufgrund anhaltender Sicherheitsrisiken und geringer Nutzung eingestellt.
-
Das Feature wurde mit Wirkung vom 22. August 2025 in allen Office-Apps deaktiviert.
Einfügen eines Bilds in Word, PowerPoint oder Excel
Klicken Sie in Ihrem Dokument auf die Stelle, an der ein Bild eingefügt werden soll.
Klicken Sie auf der Registerkarte Einfügen auf Bilder.
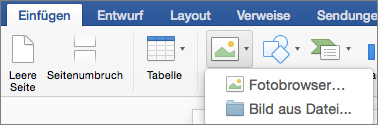
Wählen Sie die Option aus, die Sie zum Einfügen von Bildern verwenden möchten.
Mithilfe der Option Fotobrowser können Sie vorhandene Fotosätze auf Ihrem Computer durchsuchen, z. B. Fotos in iPhoto oder Photo Booth. Mit Bild aus Datei können Sie die Dateistruktur auf Ihrem Computer nach Fotos durchsuchen.
Wenn Sie das gewünschte Bild gefunden haben, ziehen Sie es aus dem Fotobrowser in Ihr Dokument, oder klicken Sie im Dateibrowser auf Einfügen.
Tipp
Das Bild wird in Ihr Dokument eingebettet. Wenn die Bilddatei sehr groß ist und Ihr Dokument dadurch zu groß wird, können Sie die Dokumentgröße reduzieren, indem Sie das Bild mit dem Dokument verknüpfen, anstatt es einzufügen. Wählen Sie im Dialogfeld Bild auswählen das Kontrollkästchen Mit Datei verknüpfen aus.
Einfügen eines Bilds in Outlook
Sie können in den Nachrichtentext einer E-Mail ein Bild oder Foto einfügen, statt die Datei anzufügen. Um ein Bild einfügen zu können, muss die Nachricht HTML-Formatierung verwenden. Wählen Sie in Outlook Legacy Optionen aus, und wählen Sie unter "Text formatieren"die Option "HTML" aus.
- Klicken Sie im Nachrichtentext an die Stelle, an der Sie ein Bild hinzufügen möchten.
- Wählen Sie auf der Symbolleiste oberhalb der Nachricht oder auf der Menüleiste oben Format die Option Bild einfügen aus.
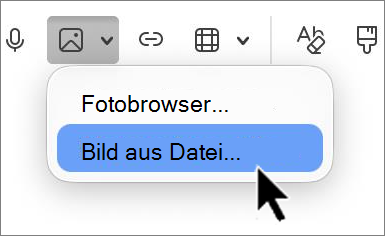
- Wählen Sie die Option aus, die Sie zum Einfügen von Bildern verwenden möchten.
Mithilfe der Option Fotobrowser können Sie vorhandene Fotosätze auf Ihrem Computer durchsuchen, z. B. Fotos in iPhoto oder Photo Booth.
Mit Bild aus Datei können Sie die Dateistruktur Ihres Computers durchsuchen, um nach Fotos zu suchen.
- Wenn Sie das gewünschte Bild gefunden haben, ziehen Sie es aus dem Fotobrowser in Ihr Dokument, oder klicken Sie im Dateibrowser auf Öffnen.
Ändern Sie bei Bedarf die Größe des Bilds, indem Sie auf einen der Ziehpunkte klicken, die das Bild umgeben, und es ziehen. Zum Rotieren des Bilds verwenden Sie den Ziehpunkt am oberen Rand des Bilds.
Ersetzen eines Bilds in Word, PowerPoint oder Excel
- Halten Sie die CTRL-Taste gedrückt, wählen Sie das Bild aus, und wählen Sie dann Bild ändern.
- Suchen Sie ein neues Bild auf Ihrem Computer, und klicken Sie dann auf Einfügen.
Siehe auch
Zuschneiden eines Bilds
Verschieben, Drehen oder Gruppieren eines Bilds, Textfelds oder anderen Objekts in Office für Mac
Wichtig
- Wir haben das Feature "Foto von einem mobilen Gerät einfügen" in Microsoft Office-Apps für Windows und das Web eingestellt. Das Feature wurde aufgrund anhaltender Sicherheitsrisiken und geringer Nutzung eingestellt.
-
Das Feature wurde mit Wirkung vom 22. August 2025 in allen Office-Apps deaktiviert.
Durch Bilder werden Dokumente ansprechender und leichter verständlich. Es gibt verschiedene Möglichkeiten zum Einfügen eines Bilds in Word für das Web. Hier finden Sie eine detaillierte Beschreibung der einzelnen Elemente.
Einfügen eines auf dem Computer gespeicherten Bilds
- Platzieren Sie den Cursor an der Stelle, an der ein Bild eingefügt werden soll.
- Wählen Sie auf der Registerkarte "Einfügen" die Option "Dieses Gerät abbilden>" aus.
- Navigieren Sie zum gewünschten Speicherort auf Ihrem Computer > , wählen Sie ein Bild> aus, klicken Sie auf Öffnen.
Einfügen eines Bilds von OneDrive
- Platzieren Sie den Cursor an der Stelle, an der ein Bild eingefügt werden soll.
- Wählen Sie auf der Registerkarte "Einfügen " die Option "Bild>OneDrive" aus.
- Wechseln Sie zum gewünschten Speicherort auf Ihrem OneDrive, > wählen Sie ein Bild> aus, klicken Sie auf "Einfügen".
Aus Archivbildern einfügen
Platzieren Sie den Cursor an der Stelle, an der ein Bild eingefügt werden soll.
Wählen Sie auf der Registerkarte "Einfügen" die Option"Bild-Stockbilder>" aus.
Wählen Sie ein Bild aus der Sammlung von Bildern aus, die im Dialogfeld angezeigt werden. Sie können auch im Suchfeld eingeben, wonach Sie suchen, um das gewünschte Bild zu finden.
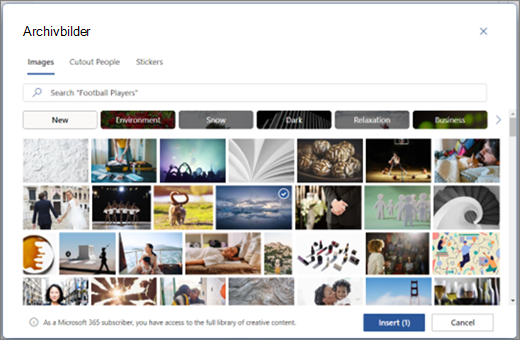
Nachdem Sie das gewünschte Bild ausgewählt haben, klicken Sie auf Einfügen. Einfügen eines Bilds aus dem Web
Platzieren Sie den Cursor an der Stelle, an der ein Bild eingefügt werden soll.
Wählen Sie auf der Registerkarte "Einfügen " die Option "Bildsuche>im Web" aus.
Wählen Sie eine Kategorie aus, oder suchen Sie nach einem Bild, indem Sie in das Suchfeld eingeben.
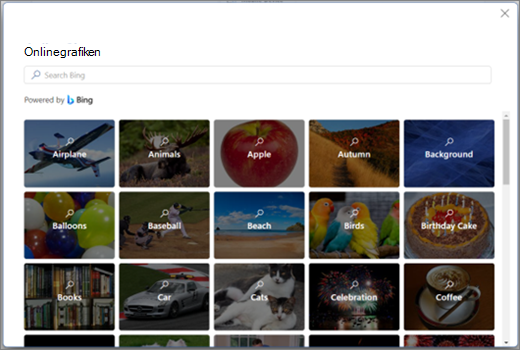
Nachdem die Suchergebnisse angezeigt wurden, können Sie optional die Schaltfläche Filter auswählen, um Ihre Suchergebnisse mit den Filtern Größe, Typ, Farbe, Layout und Lizenz einzugrenzen.
Nachdem Sie das gewünschte Bild ausgewählt haben, klicken Sie auf Einfügen.
Darüber hinaus können Sie ein Bild einfügen, indem Sie es aus der Quelle kopieren, oder Sie können das Bild per Drag & Drop in Word für das Web ziehen.
